How to Add a QR Code Border (and Keep It Scannable)
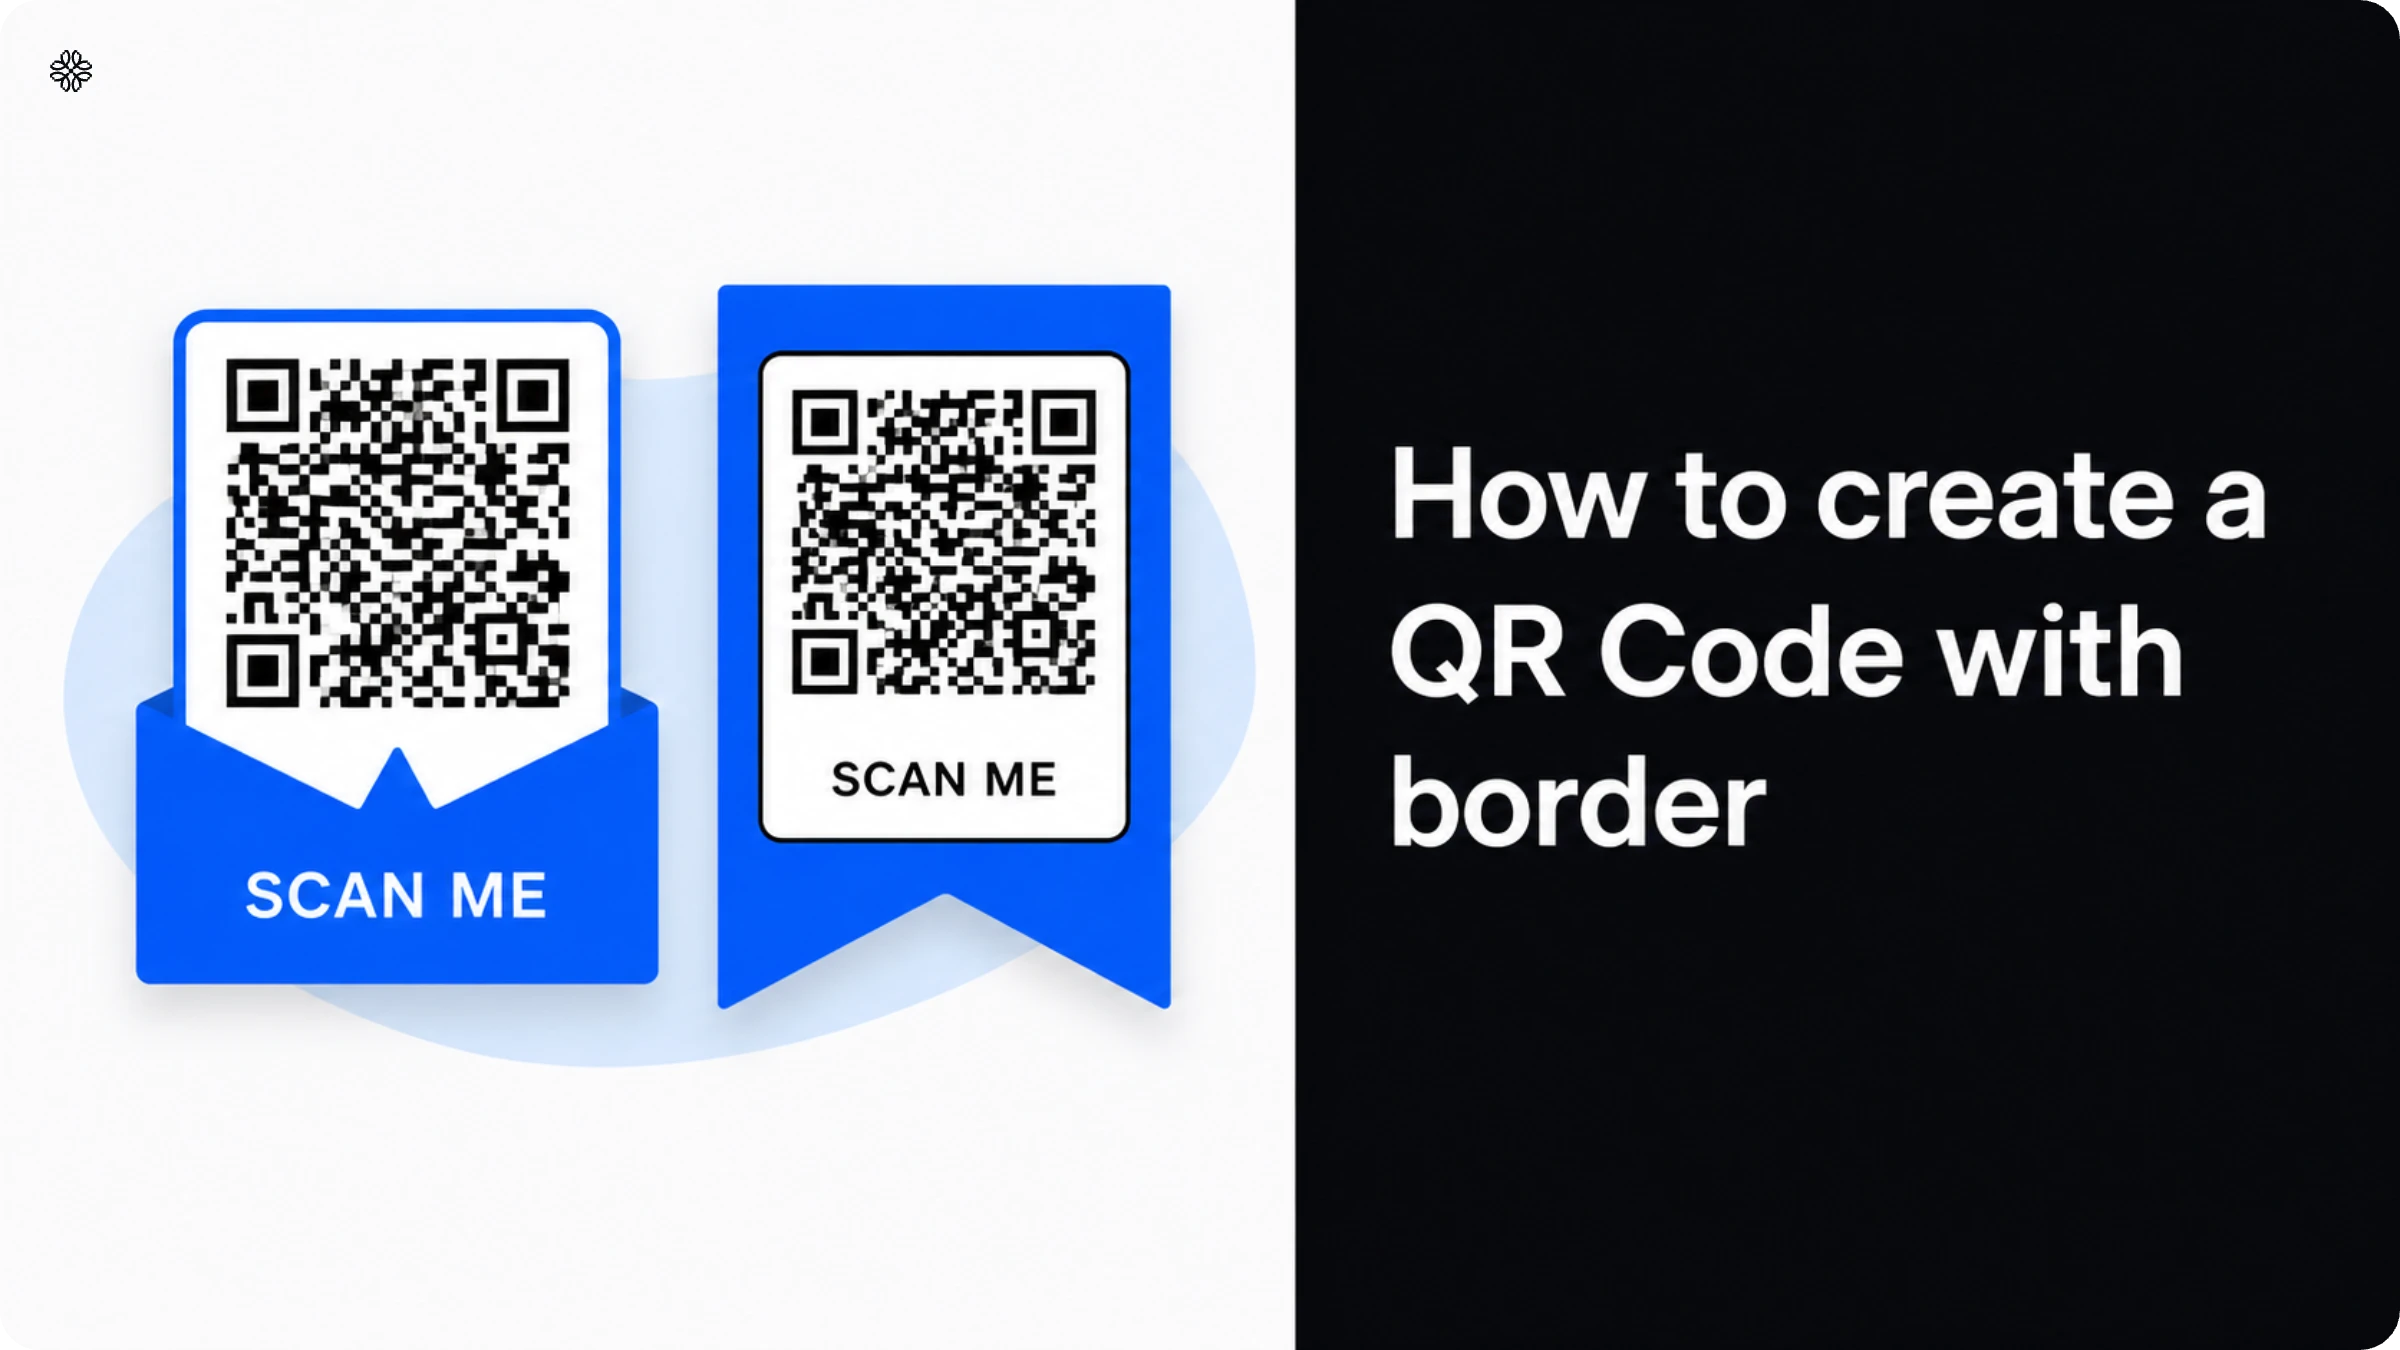
Level up your QR Code design with a border and a call-to-action. Learn how to do it easily in four steps and increase user engagement.
Brief overview
- QR Code borders only work if they respect the quiet zone, a mandatory empty margin, not a style choice.
- Quiet zone rule: ISO/IEC 18004 requires 4 modules of clear space per edge (≈8mm at a 2mm module size) so scanners can find the finder patterns.
- 4 steps to add a border: choose a campaign type → add the destination → set frame style/color/CTA/logo under "Frames" → download in the right format for the use case.
- Decorate only after the quiet zone is locked in: color, logo placement, pattern, and background are all fair game outside that margin.
- Why bother: differentiation (Burger King's red border + crown CTA), CTA engagement (A/B testable), and a cleaner visual boundary for scanning.
- Best practices: contrast is the biggest lever as low contrast between code and background is the top cause of failed scans, regardless of border style.
- 5 mistakes that pass on screen but fail in print: frame crowding the quiet zone, ink bleed on uncoated stock, over-trimming in die-cutting, low-contrast brand colors, and CTA text flush against the code. The first two are dangerous because they're invisible until the print run ships.
A QR Code border is a design frame that sits along the outer edge of your QR Code. But here’s the catch: it only works if you respect the quiet zone inside it. This quiet zone is a required empty margin. It may not affect how your border looks, but it is crucial for making sure your code actually scans.
In this guide, you’ll find everything you need: the 4-module quiet zone rule, four simple steps for adding a border, and tips for creating decorative designs that still follow the rules. I’ll also share five best practices and highlight common mistakes that can ruin scans, even if your design looks perfect on screen. And if you prefer ready-made solutions, don’t worry, the QR Code frame library has you covered with templates.
What is a QR Code border?
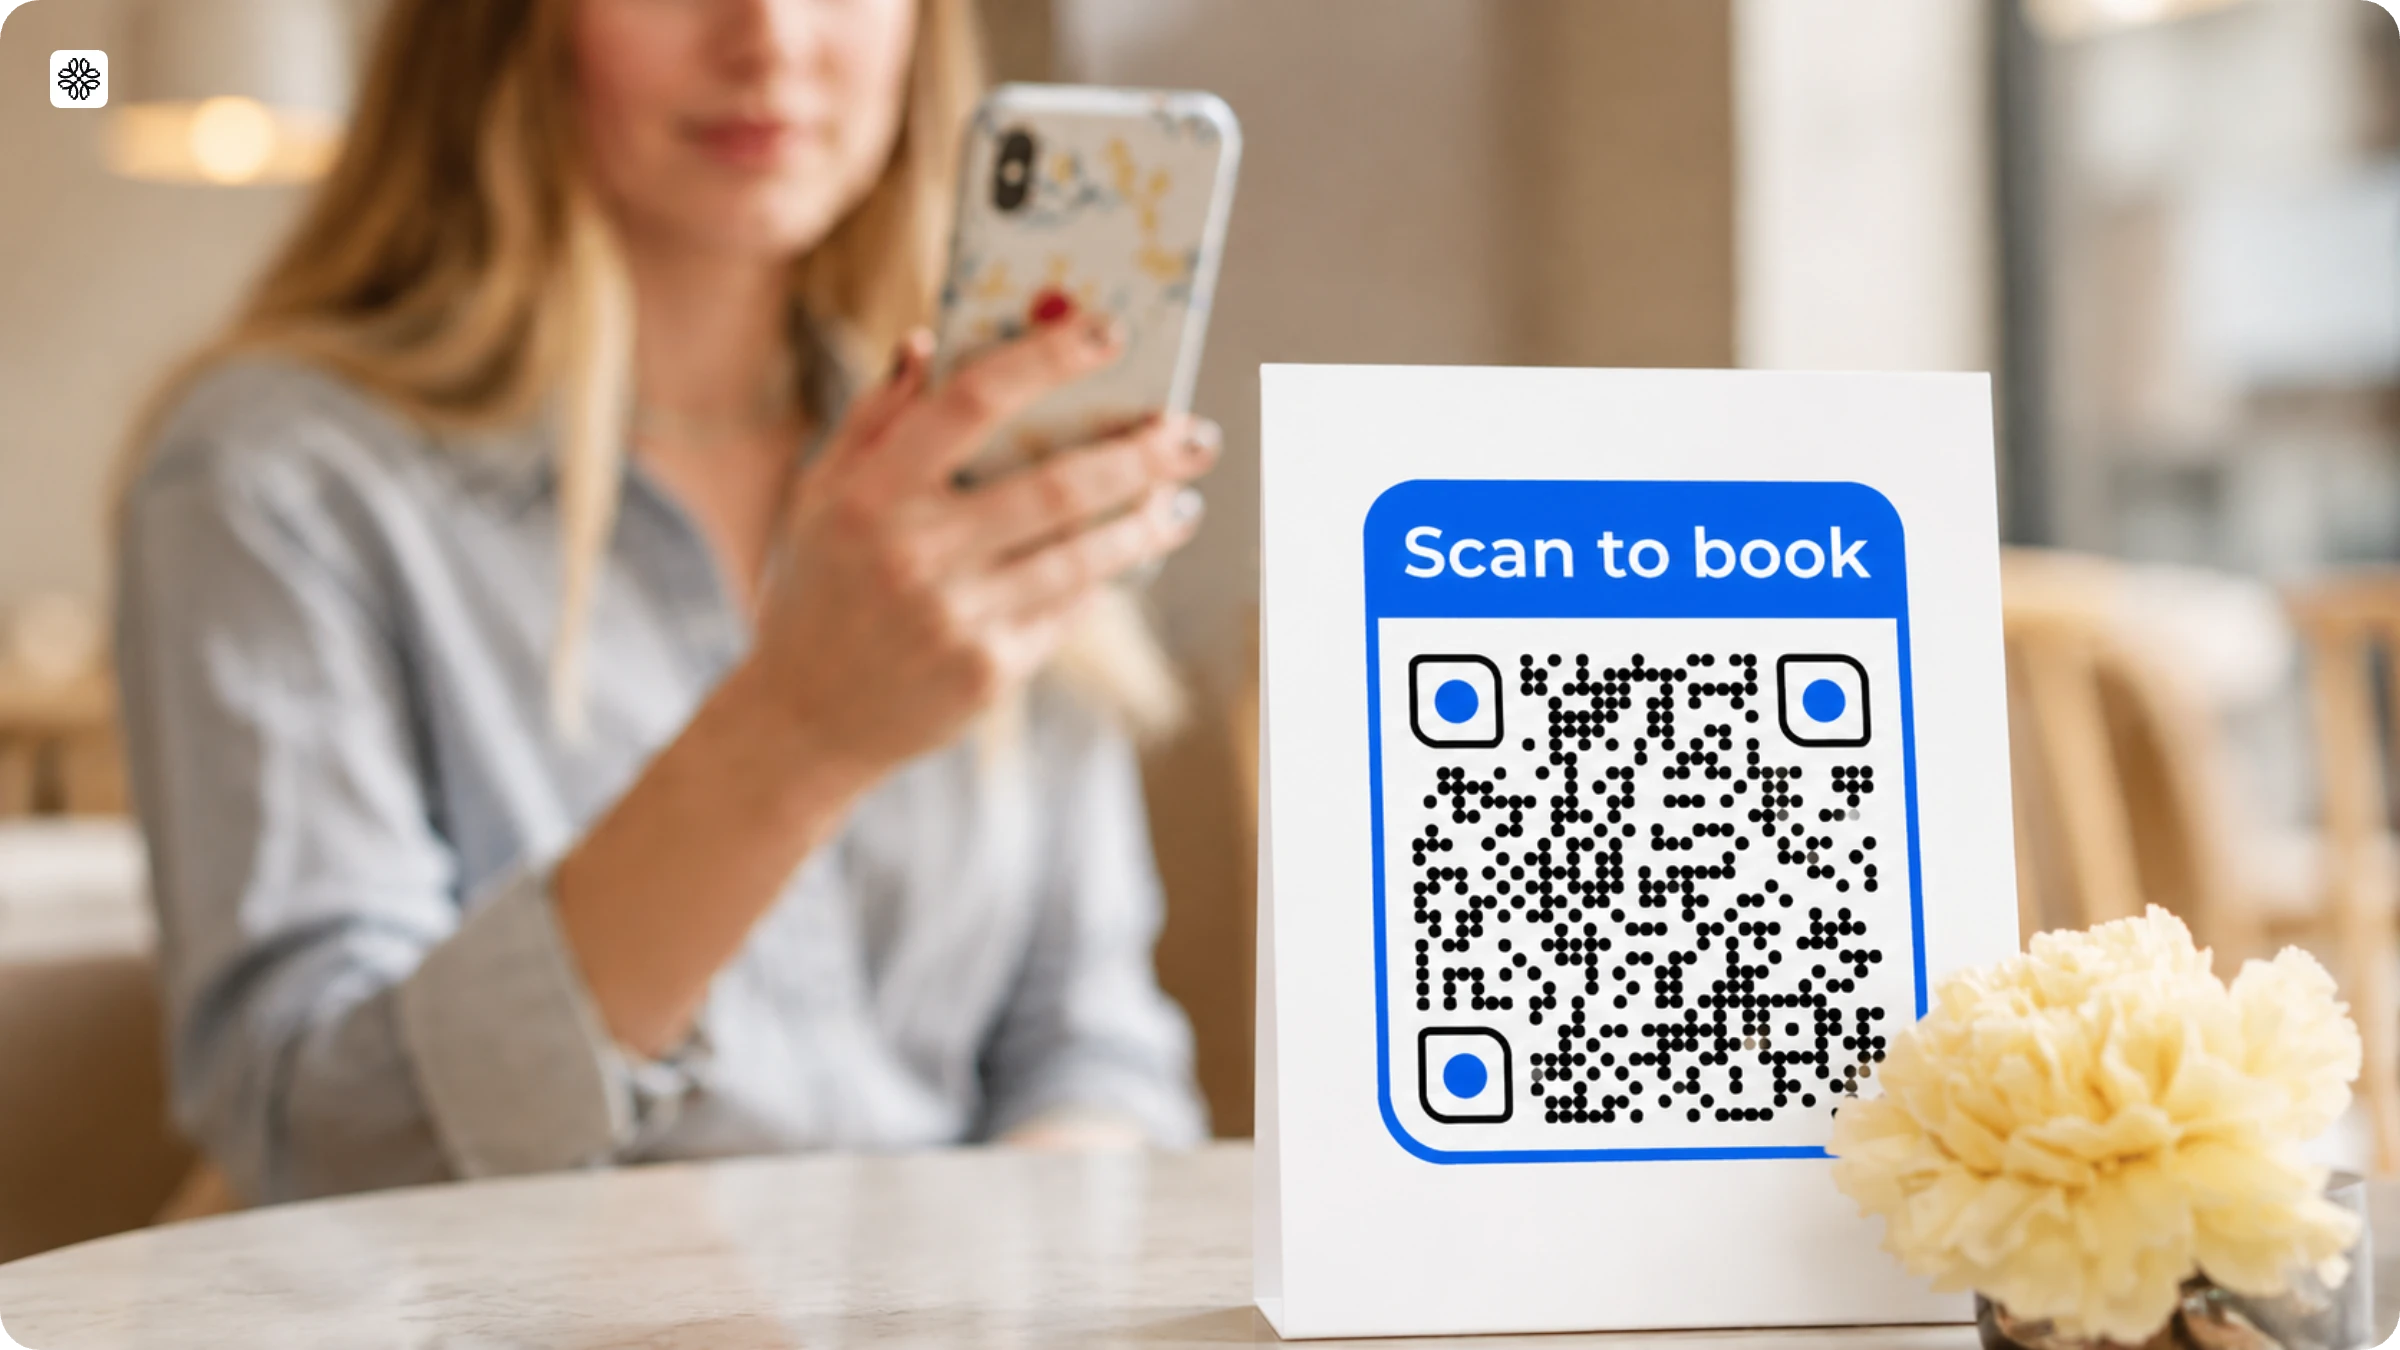
A QR Code border is a design element that frames the code, making it stand out from the rest of the page. You will often see a short instruction like "Scan me" on the border, guiding viewers on what to do next.
Adding a border does not affect whether the QR Code works. Even a plain black-and-white code will scan perfectly well without any border. However, a thoughtfully designed border does two important things: it shows users what to do, and it helps build trust in what they are about to scan. Uniqode’s State of QR Codes 2026 report found that 58% of consumers feel confident scanning QR Codes, and 26% trust them more than they did a year ago.
What is the quiet zone, and how is it different from a border?
Ever noticed the empty border around a QR Code? That blank margin is called the quiet zone, and it is absolutely essential for scanning. This is not just a design preference; it is a requirement set by the QR Code standard. According to ISO/IEC 18004, you need at least four modules of clear space on every edge. Think of a module as the tiniest square in the QR Code’s pattern. So, if each module is 2mm, you will need a minimum of 8mm of empty space on all sides for scanners to pick up the code without a hitch.
Why is this quiet zone so important? Scanners rely on it to spot the QR Code in the first place. The scanning software searches for the three large finder patterns in the corners, and the empty margin helps the code stand out from anything else printed nearby. Without this buffer, your QR Code could easily get lost in the clutter.
How to add a border to a QR Code
You can add a border to any QR Code if your QR Code generator supports it. Here are the four steps to follow:
Step 1: Log-in to Uniqode and choose the campaign type
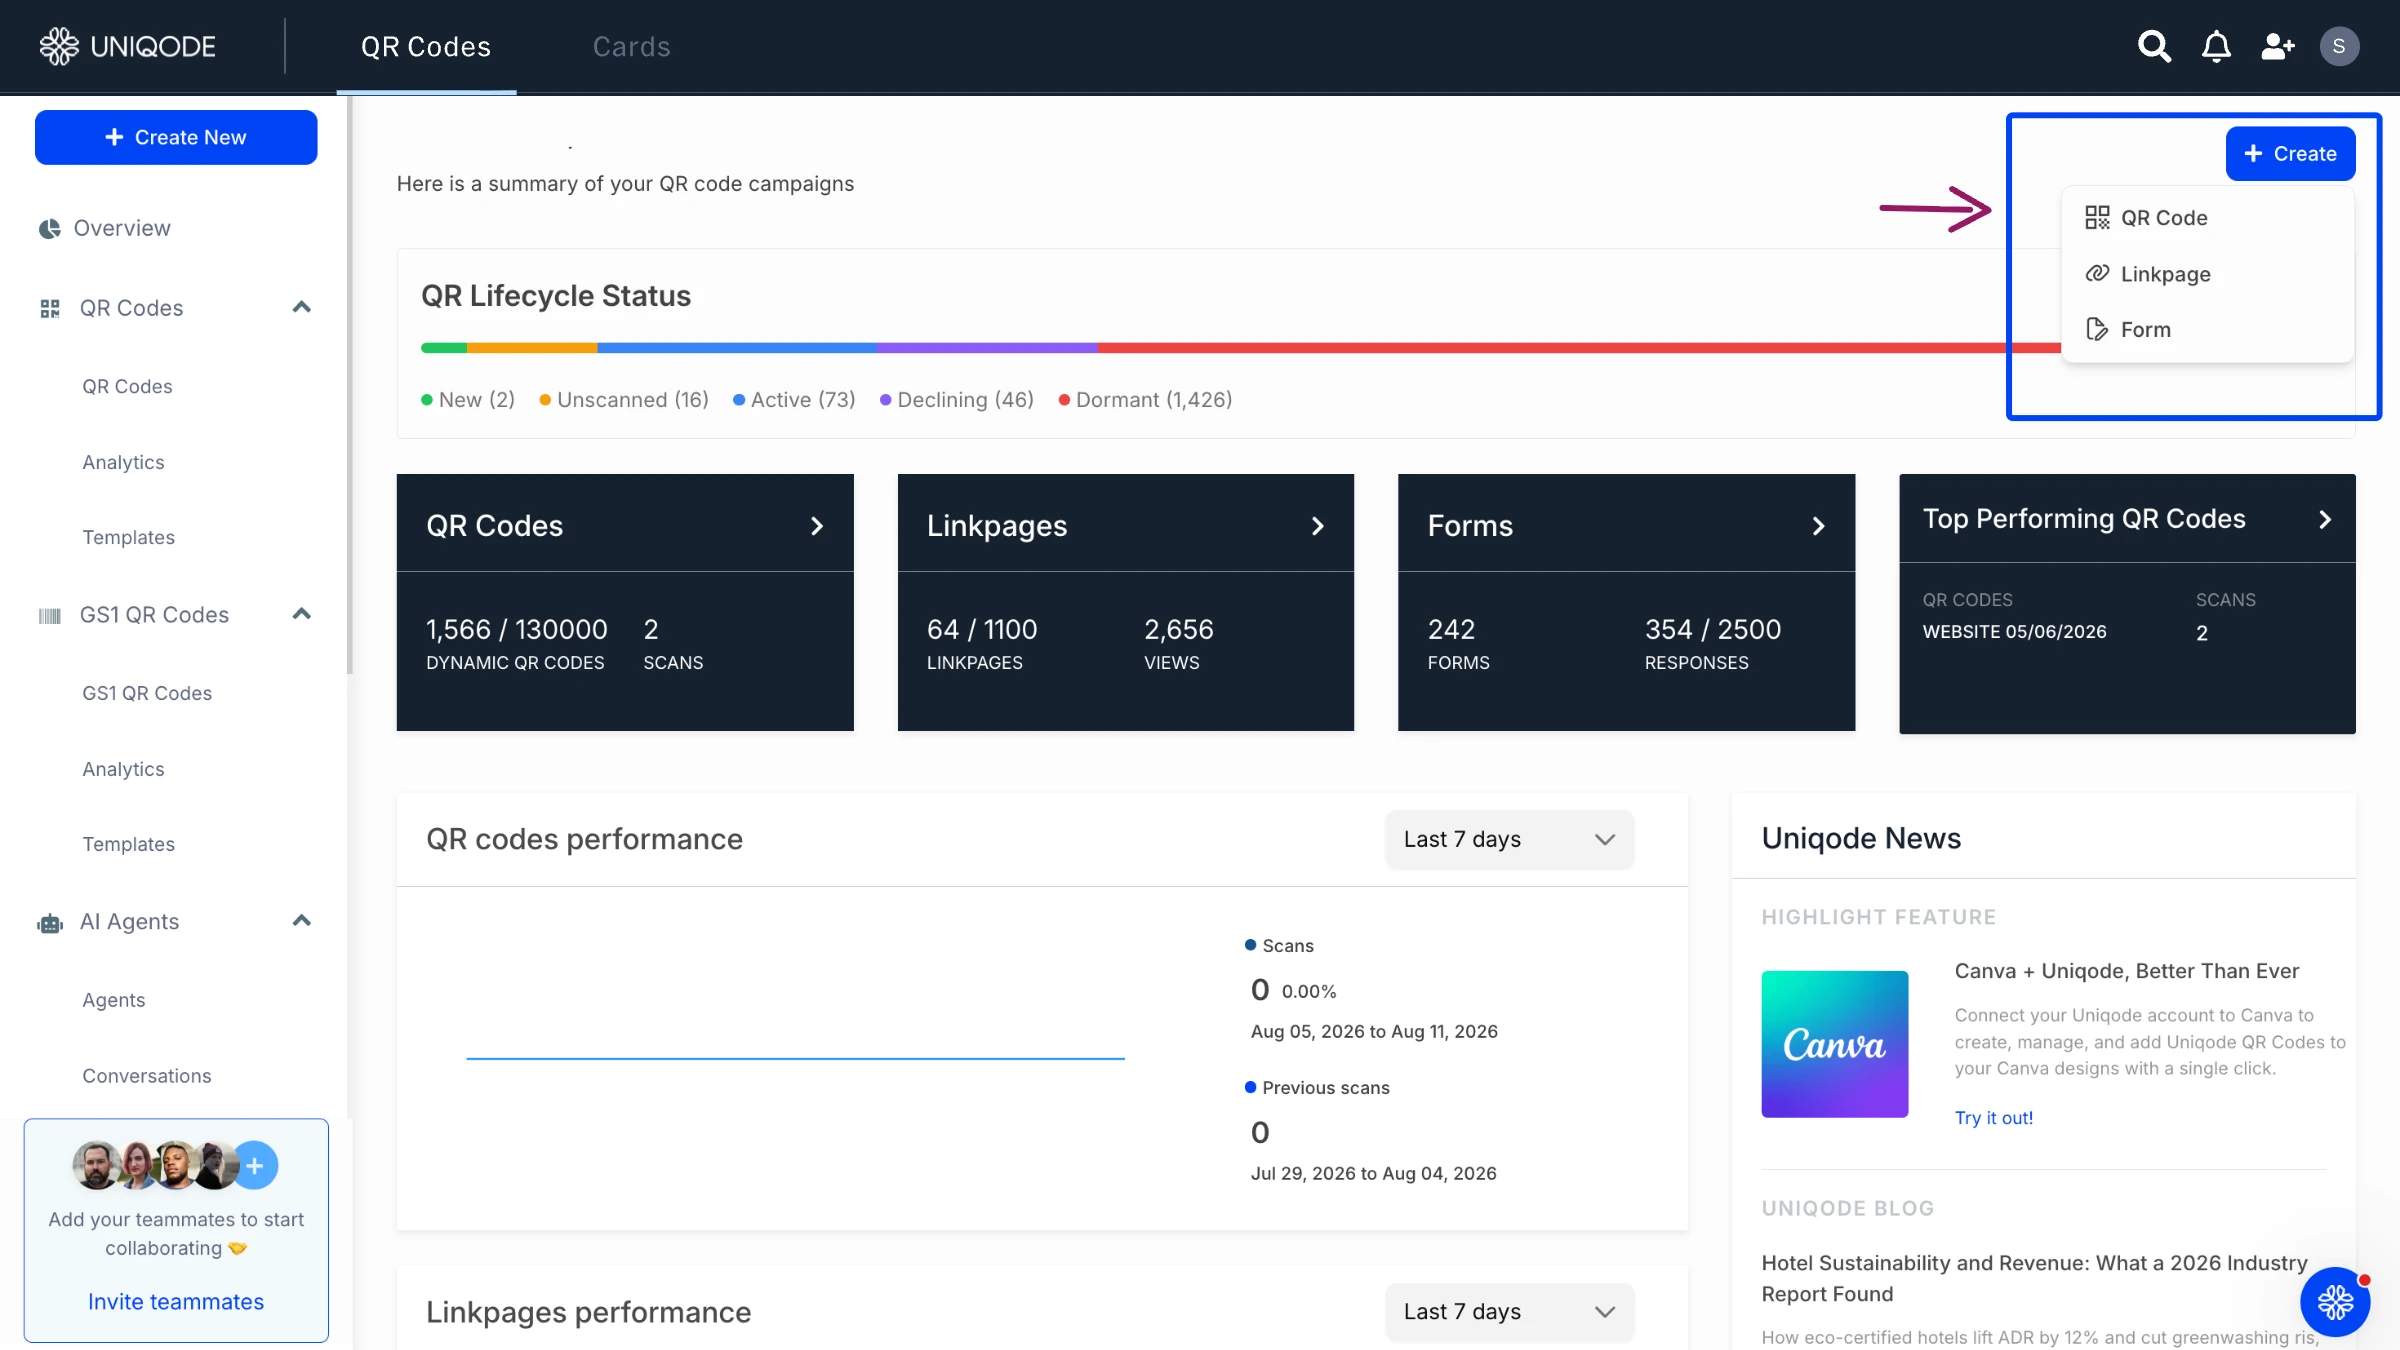
Sign up for a free trial to access the QR Code generator dashboard. With this, you get the option to add and edit the QR Code with border anytime. You can also add CTAs and make other customizations easily. No credit cards required.
After logging in, navigate to the +CREATE button on the dashboard and click it. From the dropdown, click QR Code. Choose a campaign type according to what you want to convert into a QR Code. For instance, choose PDF from the campaign list to convert a PDF into a QR Code.
Step 2: Add the destination file or URL
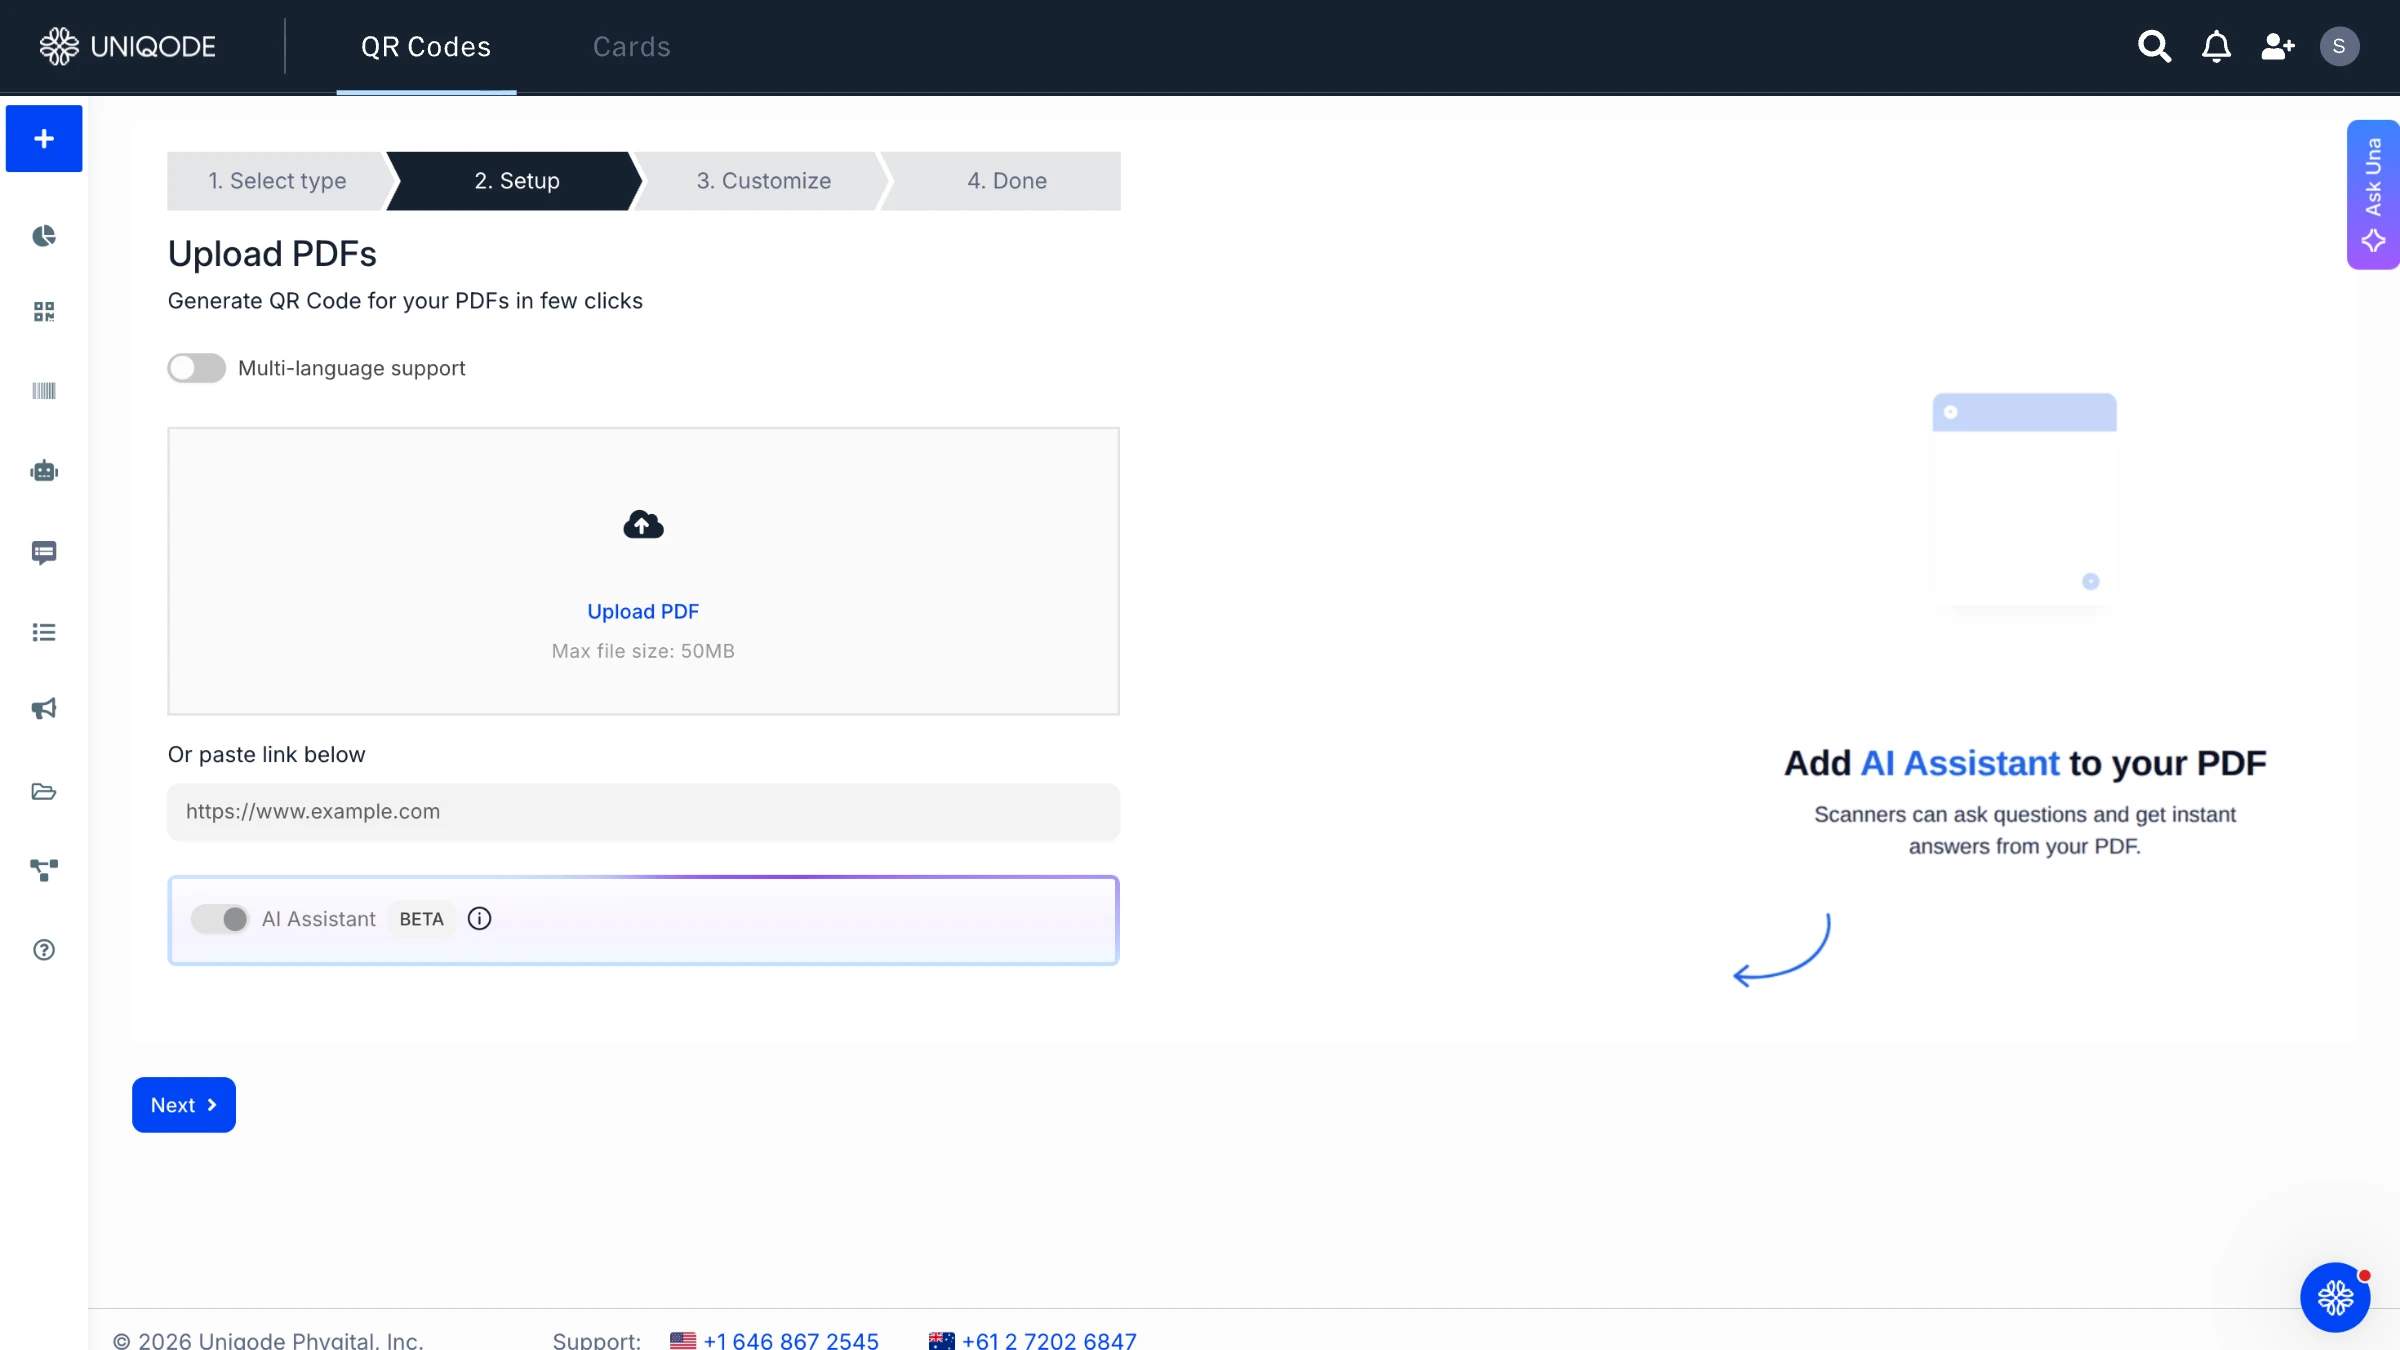
Choose a QR Code type according to what you want to convert into a QR Code. Click “Next.”
📝Note: Ensure the PDF or any URL you add has the required access for your audience to scan and view it.
Step 3: Add the QR Code border
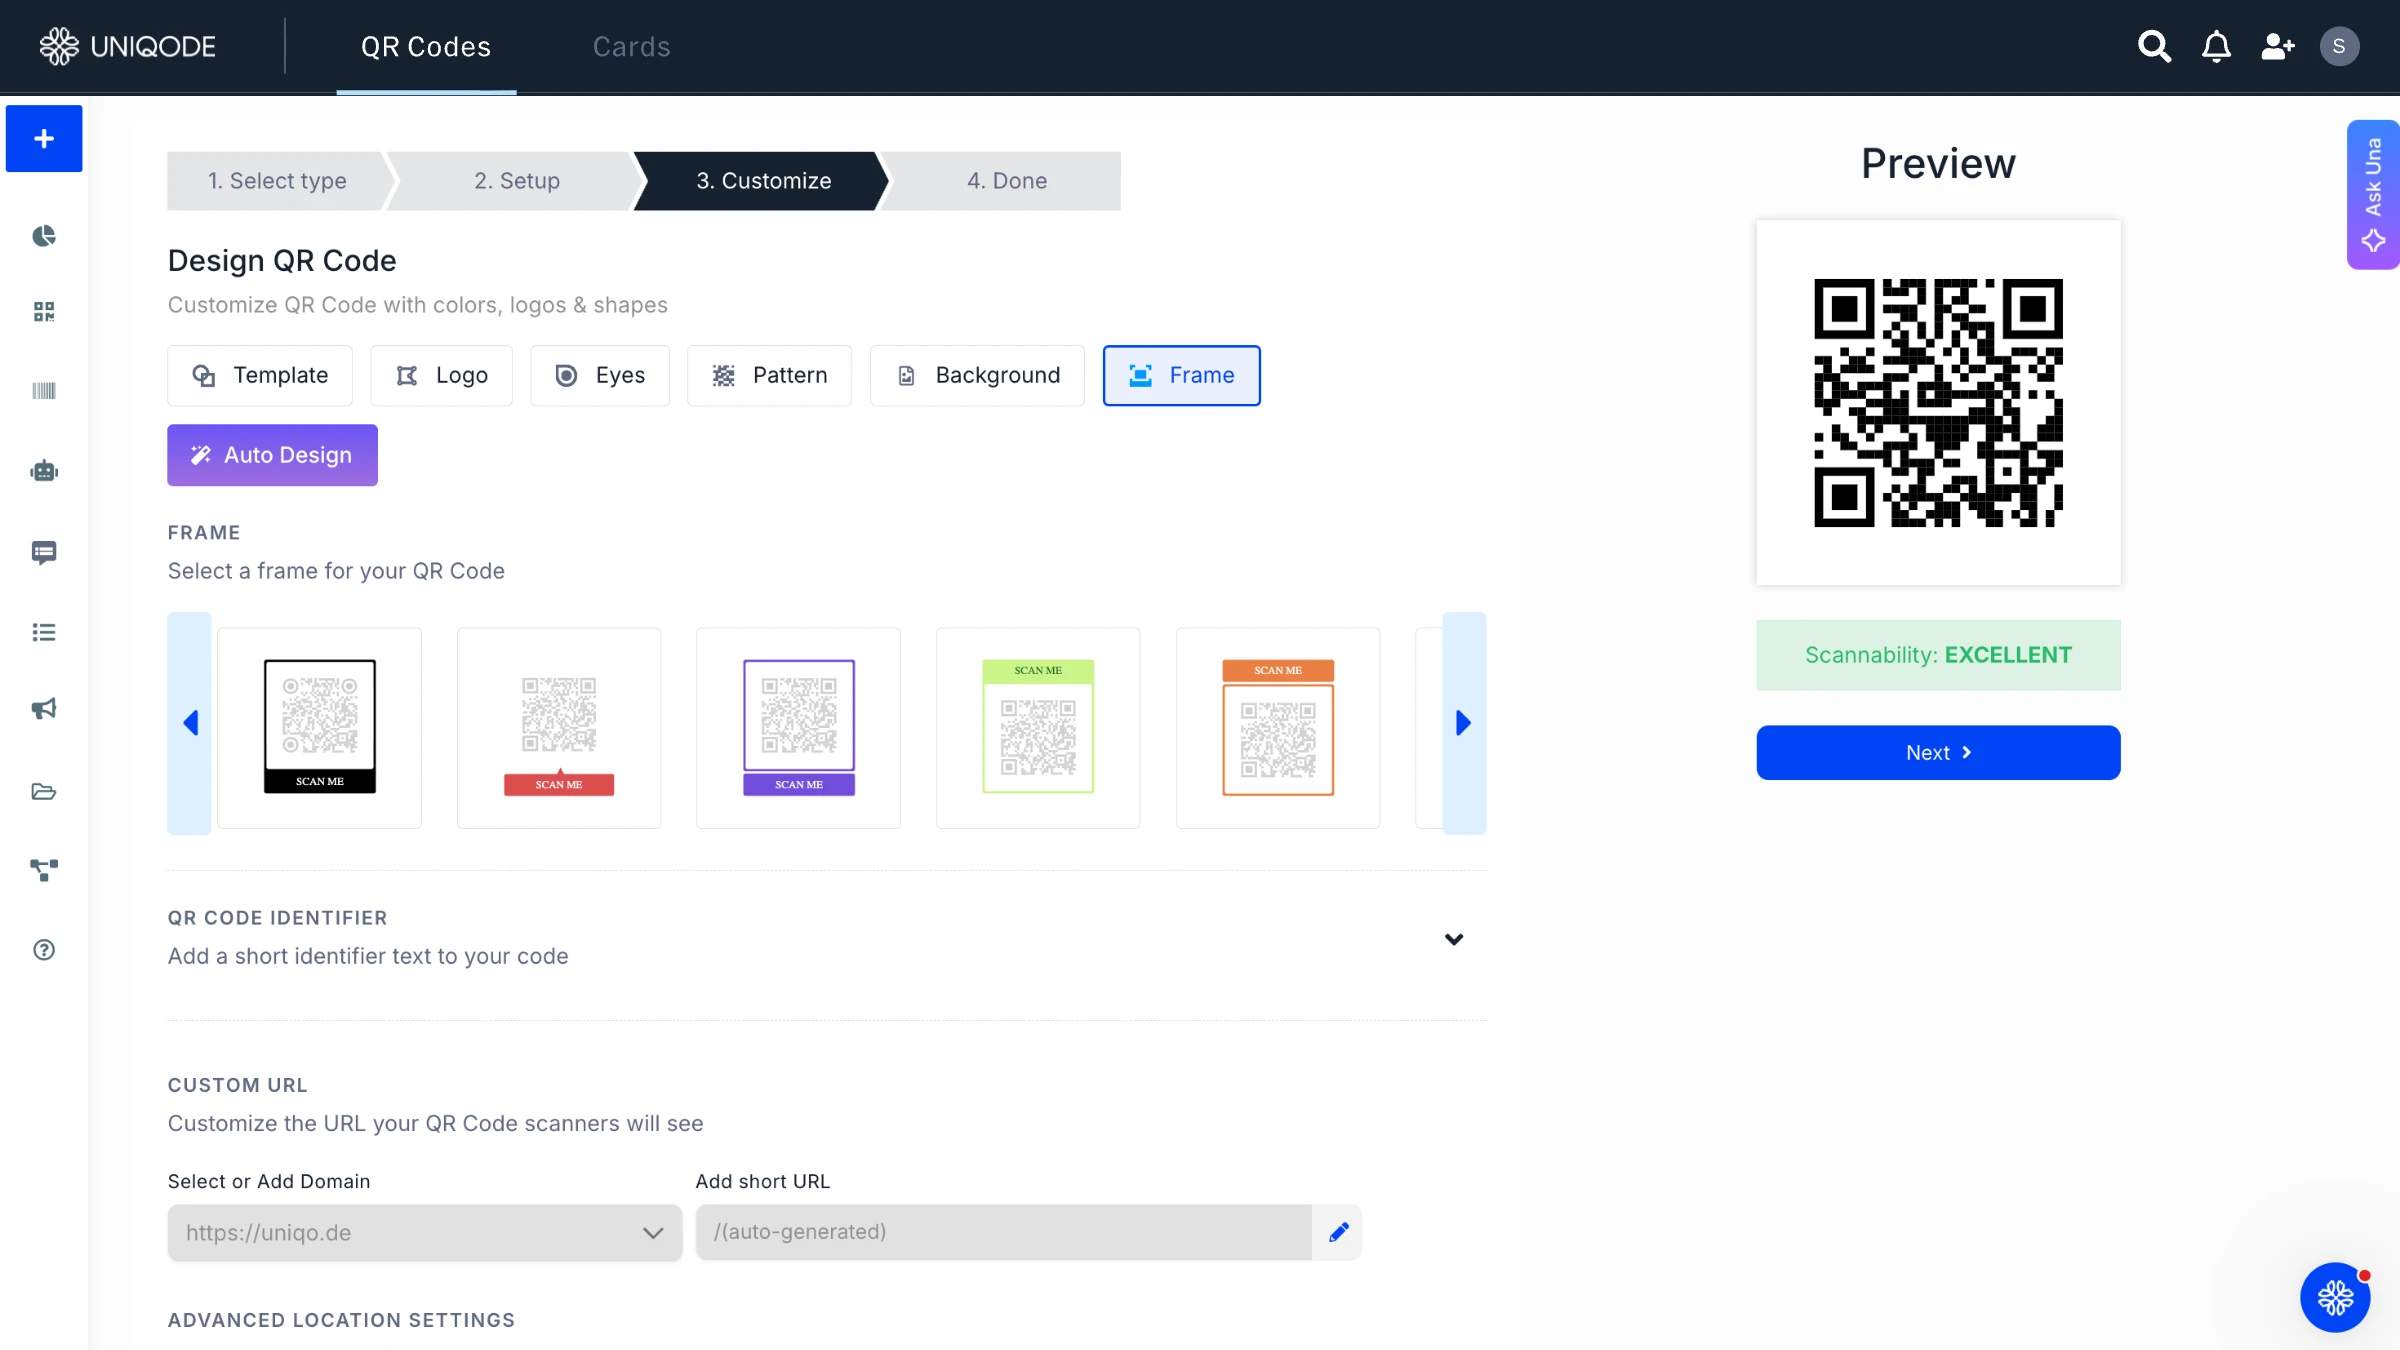
Select Frames to add the border. From there:
- Add the border or frame style of choice
- Change the frame color to match brand or campaign requirements
- Add the CTA text under frame text
- Choose a text color for the CTA
The same panel handles the rest of the code's design alongside the border: add a logo, change the eyes' shape (the three large corner squares) and color, switch the pattern shape between solid and gradient, and add a background. The Frames panel adds decoration around the code rather than into it, so the quiet zone underneath stays untouched. Customization happens on top of the compliant margin, not instead of it.
Step 4: Download the QR Code with border
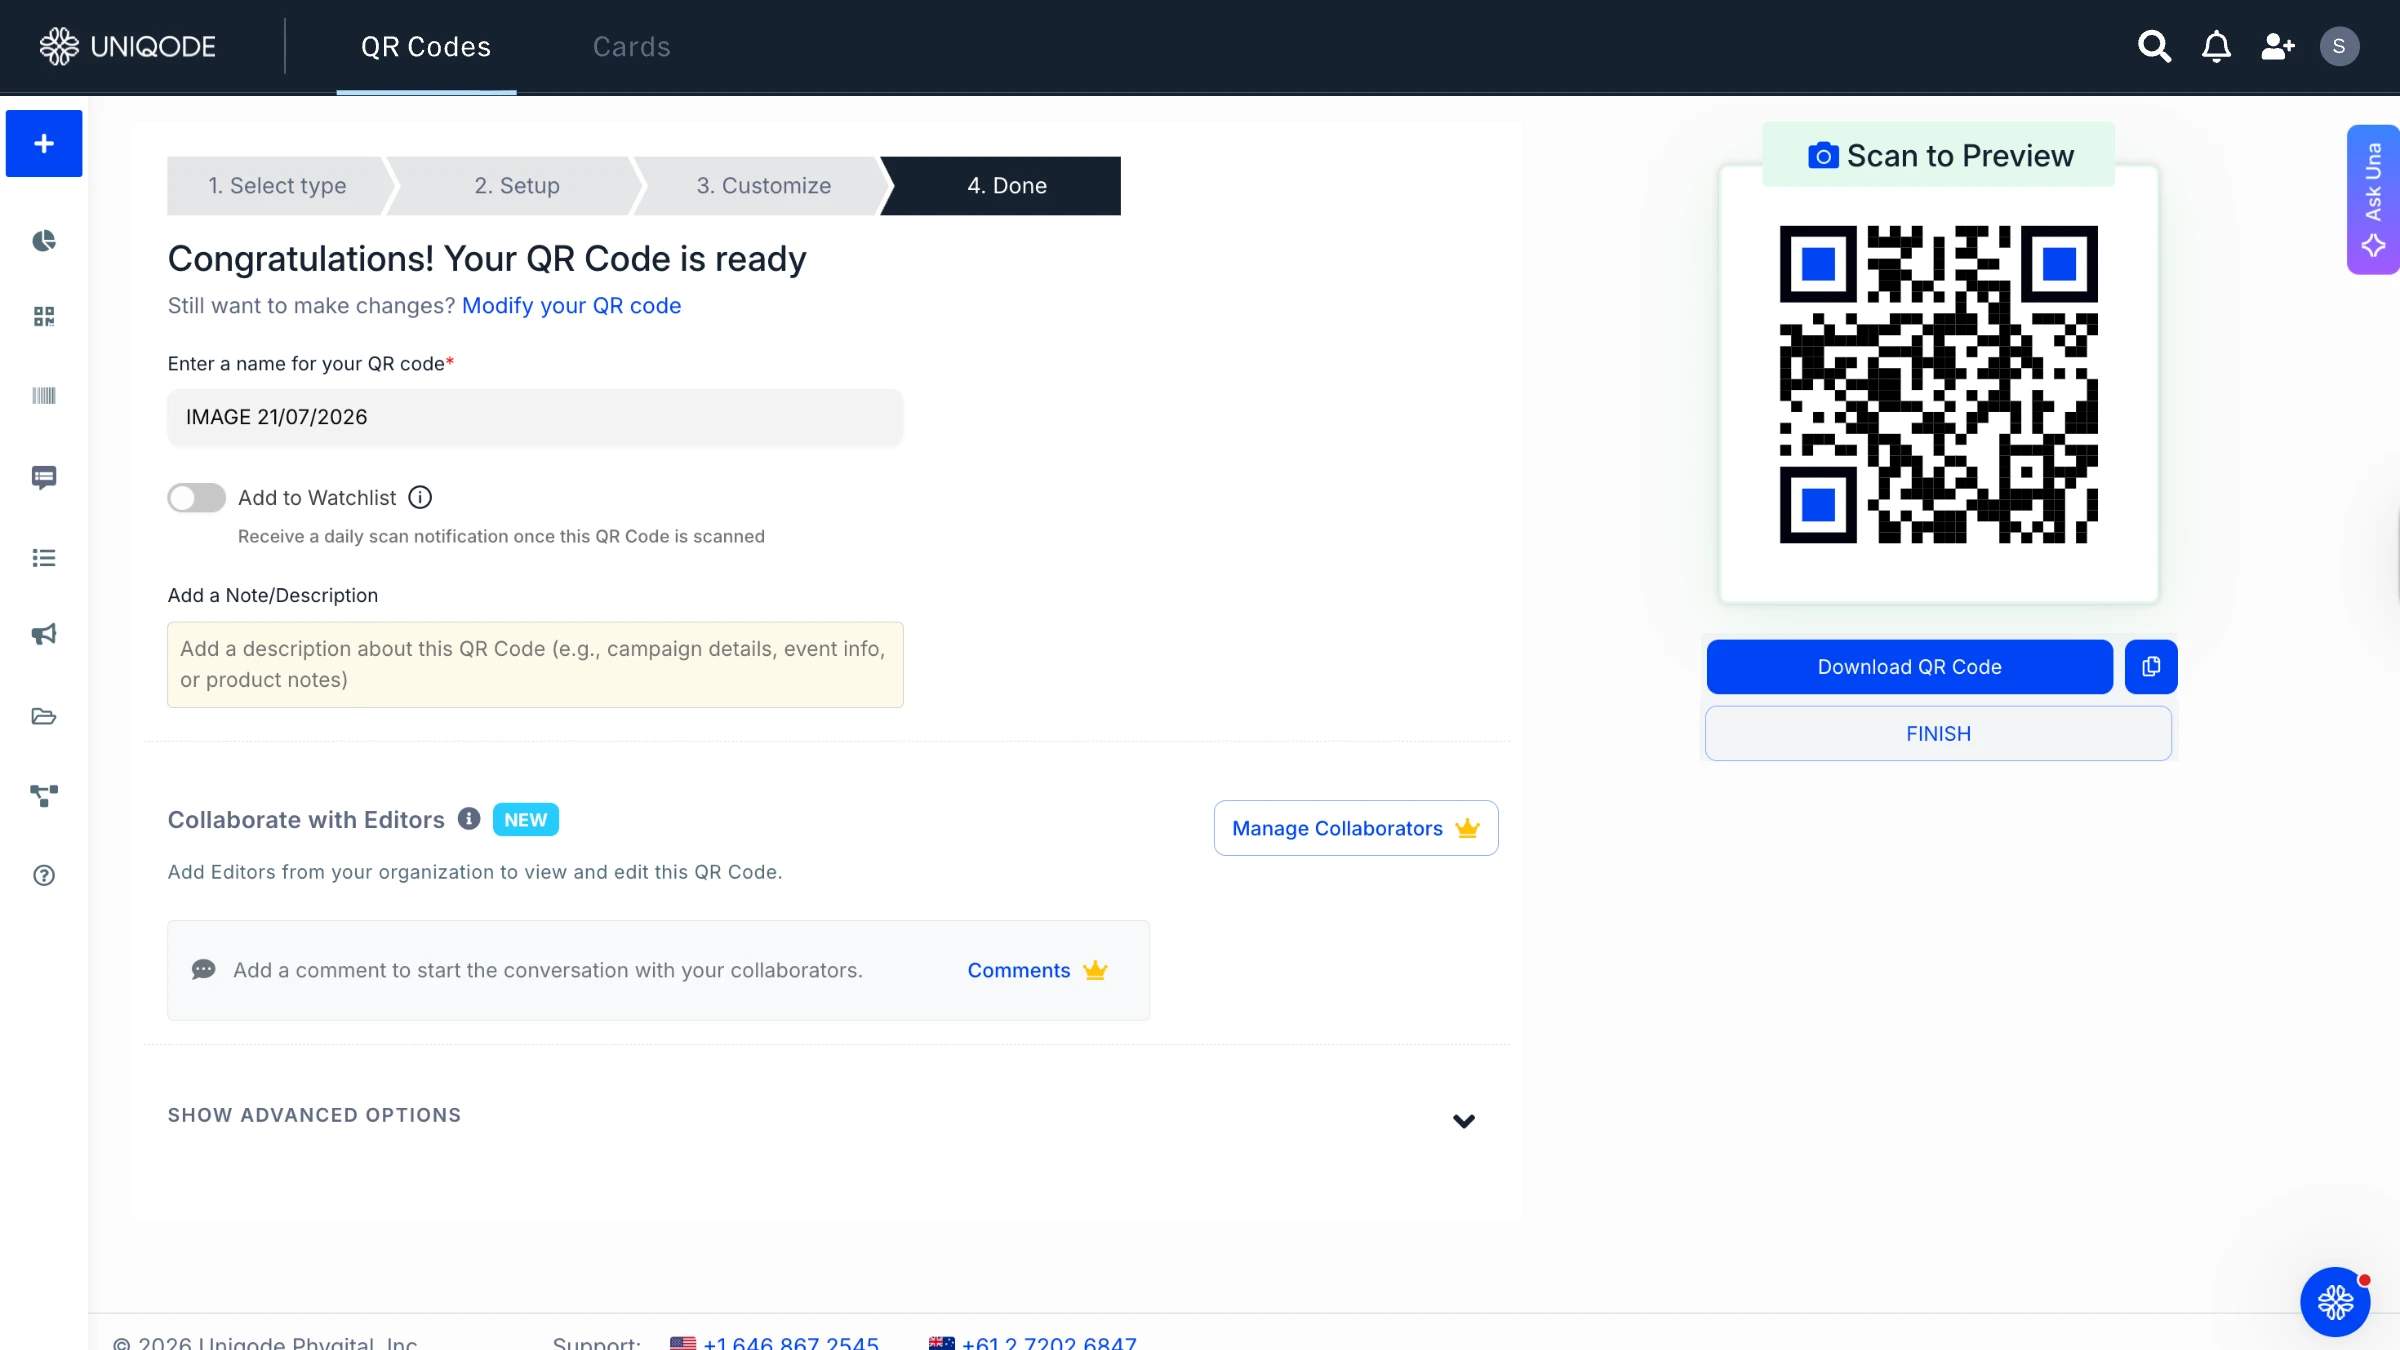
Use a mobile device to scan the preview and check if the QR Code redirects to the intended file or webpage. Download the QR Code in any format based on the use case. High-resolution formats such as SVG and EPS work alongside other formats such as PNG, JPEG, and PDF.
📝Note: For use cases such as billboards and large digital screens, use high quality QR Code formats such as SVG and EPS. Use PNG and JPEG if you don’t plan to resize the QR Code for use cases such as brochures and websites.
How to design a decorative or branded QR Code border
Before you start decorating the border of your QR Code, make sure the quiet zone is in place. Once that essential margin is set, you can focus on the fun part: choosing colors, deciding where to place your logo, and picking a pattern style. With the quiet zone secured, the area beyond it is yours to experiment with.
- Brand-color frames. Pull the frame color from an existing brand palette, and check it against the code's color for contrast before finalizing anything.
- Logo placement inside the code. Drop a logo into the code's pattern itself, not into the quiet zone around it, so the mark reinforces the border rather than competing with it.
- Pattern and eye-shape styling. Swap the default square finder patterns and pixel pattern for rounded or custom shapes when a design calls for it. The QR Code shapes guide covers the full range of options.
- Background treatments. Add an image or color background behind the code, provided it doesn't reduce contrast between the code and its surroundings.
Why should you use a QR Code with border
Here are three reasons why you should consider creating QR Codes with borders for your next use case:
1. To differentiate yourself among competitors
Burger King, a multinational fast food restaurant, used QR Codes with borders to share coupon codes with their customers.
Customers can scan the QR Code coupon and redeem it while ordering.
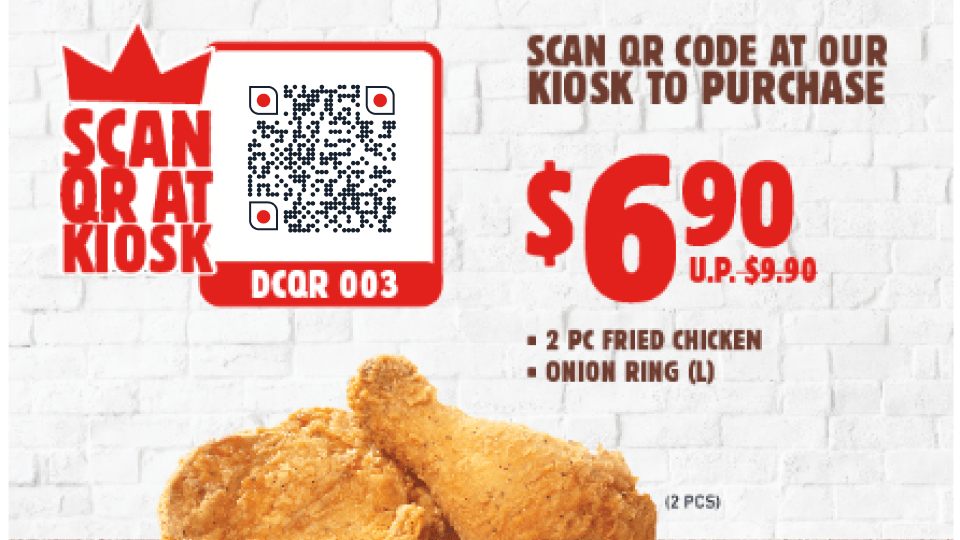
Instead of a plain QR Code, the fast food giant chose a red border. They also added a CTA on the left.
And instead of keeping the CTA plain text, they stylized it with Burger King’s iconic crown. The CTA conveys where customers should scan while adding a branded element to the QR Code.
While other competitors shared physical or online coupons, Burger King made it easy with a QR Code inside their stores.
⚡Pro tip: Design stunning posters, coupons, and promotional materials on Canva and seamlessly add Dynamic QR Codes to your designs—without juggling platforms. You can add QR Code with border to any design—like Burger King’s example—by integrating the Uniqode dashboard with Canva.
Learn more about Uniqode-Canva integration
2. To get more engagement with CTAs
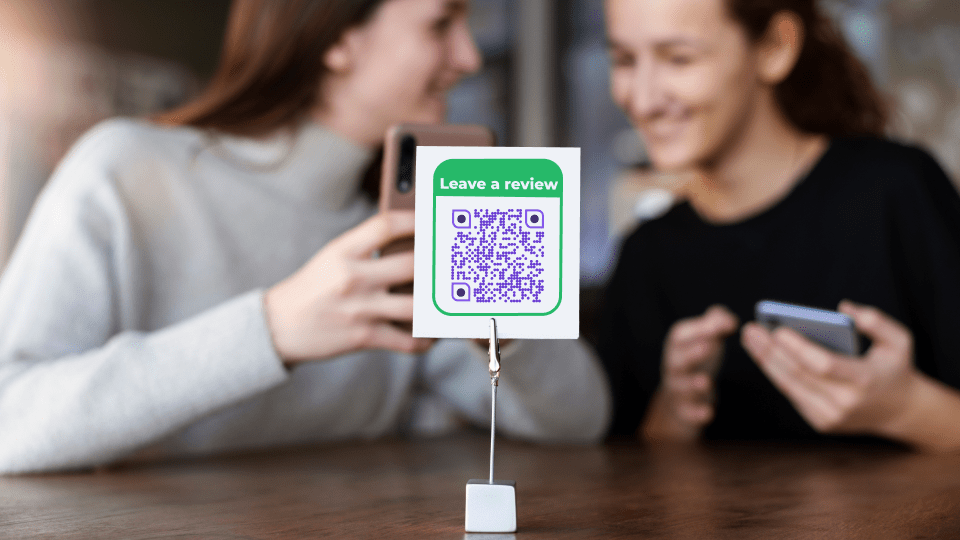
Adding borders or frames means you can also add CTAs to your QR Code.
Adding text below QR Codes (CTAs) guides people with “what to do” and “what to expect.” This helps generate more engagement with the QR Code.
You can also A/B testthe CTA and the frame. For instance, you can create two variations of frames and CTA for a QR Code and place them in different store areas.
After a while, you can check the number of scans of both on the QR Code generator’s dashboard to know which one performed better, which CTA helped it perform, and make changes accordingly.
3. For enhanced QR Code scanning experience
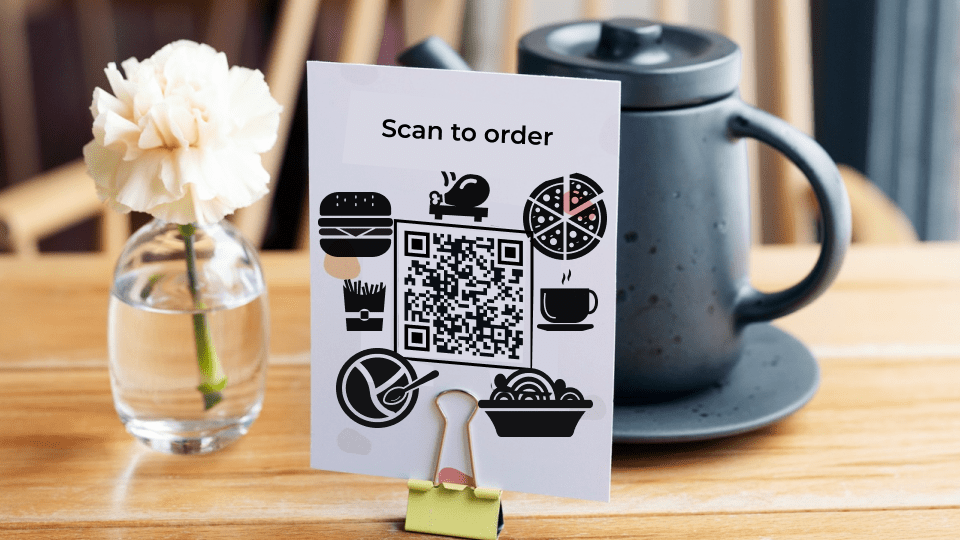
A border can provide a clear boundary between the QR Code and the surrounding content on your marketing material, reducing visual clutter for your audience.
Along with a CTA, a QR Code frame also act as a distinctive visual cue, making it easier for scanning.
For instance, in a standee or a poster with other design elements, you can add a border to the QR Code to give it more prominence.
⚡Pro tip: Ascertain how scannable your QR Code with border is before printing or deploying. Use Uniqode’s real-time scannability score for the QR Code you create.
Make the required changes to the QR Code until the scannability score is EXCELLENT for best scanning performance.
QR Code border best practices
There are six key practices that set apart a QR Code border that truly works from one that merely looks appealing in a mockup. Note down these best practices:
| What to do | How to do it |
|---|---|
| ✅ Fix the quiet zone before choosing colors | Confirm the 4-module margin is intact first. Decorate the space outside it second, never the reverse |
| ✅ Use a dynamic QR Code | Change the destination content anytime, and the update reflects immediately in the live border and code. Track scans, location, and device used from the same dashboard. |
| ✅ Choose contrasting colors | Select a code color and border color with clear contrast between them, and pick a CTA text color that stands out against the frame. |
| ✅ Keep the frame simple | Choose a frame and CTA that draw attention without competing with the code itself for visual space. |
| ✅ Write a short CTA | Fit the CTA text to the frame. Text that's too long shrinks down and becomes hard to read at a glance. |
| ✅ Scan-test before deploying | Scan the code with a phone's camera before deploying it anywhere. Checking on screen isn't the same as checking the file about to go to print. |
Contrast plays a crucial role here, serving both as a legibility essential and a key factor for successful scanning. If you have ever wondered why some QR Codes just refuse to scan, low contrast between the code and its background is often the culprit, no matter what border style you choose. For those considering colors beyond the classic black-on-white, the colored QR Codes guide is your go-to resource for understanding the right contrast thresholds.
Common QR Code border mistakes
Five common mistakes can make a border look fine on screen but cause it to fail when printed.
- Treating the frame as the quiet zone: A decorative frame graphic should sit neatly against the empty margin, never crossing into it, even if the overall design appears balanced. This simple rule keeps your layout looking crisp and intentional.
- Ignoring print bleed: If you have ever printed on uncoated or absorbent stock, you will know that ink tends to bleed, causing each printed module to expand just a bit. This means that a margin which looked perfect in your design file can end up noticeably narrower on the final printed piece, even though you have not changed a single pixel.
- Trimming too close during die-cutting: When you die-cut or laminate a printed piece, you can accidentally trim away some of the margin around a QR Code sticker or card. This can turn a properly sized quiet zone into one that no longer meets requirements, even after the design is finished.
- Using low-contrast brand colors: A muted or pastel brand color might look perfect on your screen at first glance, but the real test comes when it is printed under warehouse lighting or captured by an older phone camera. That is when the true challenge of color selection reveals itself.
- Placing CTA text flush against the code: When text is placed too close to the edge of your code, it competes for the same margin that helps your code stay readable. Even if the text is technically outside the border, the lack of space makes everything feel cramped.
The first two mistakes are especially important because they often go unnoticedx until your print run is already out the door. Even if your file looks perfect in every design tool, you might still lose precious margin between the printer and the final cut. If you ever find yourself facing a border-related scan failure after everything seemed fine on screen, your best starting point is to check the 13 reasons a QR Code might stop scanning.
Boost QR Code engagement with eye-catching borders
Start experimenting with different borders for your QR Code using Uniqode. With the real-time preview feature, you can view which frame is the best for your use case.
Moreover, you can play with the frame and CTA colors on the dashboard to suit your branding and design needs. This feature is especially useful for branding and design specialists looking to create visually appealing and impactful QR codes.
Uniqode holds SOC® 2 Type 2 certification and complies with GDPR. It means your and your prospects’ data privacy is always safe.
Wondering how to add a border to your QR Codes for your next campaign? Get started by creating one below 👇

Frequently Asked Questions
- Can a QR Code have a border?
Yes, a QR Code can have a border! To add a border/frame, follow these steps:
Log-in or sign-up to the Uniqode dashboard
Choose a campaign type and add the necessary details
Select “Frames” and add any frame as the border to your QR Code. Add a call to action.
Preview and download the QR Code with a border in any format you choose.
- Do you need a border around a QR Code?
No, a border is not required for a QR Code to function. However, adding a border can enhance QR Code visibility and scanning accuracy by clearly separating the surrounding elements.
- Does a QR Code need a white border?
You can add a white border if the background of the QR Code is dark in color to make it contrast. By default, a QR Code background is white with a black pattern. In this case, you don’t necessarily need a white border.
- What file formats should I use for QR codes with borders on billboards?
For large-scale applications like billboards and digital screens, you should use high-resolution formats such as SVG and EPS to ensure the QR code with border remains scannable and crisp at any size. PNG and JPEG formats are recommended only when you don't plan to resize the QR code, such as for brochures and websites where the dimensions remain fixed.
- Can you change a QR code border color after creating it?
Yes, you can change a QR code border color after creating it if you use a dynamic QR code generator with editing capabilities. Dynamic QR codes allow unlimited updates to design elements including frame colors, call-to-action text, and other customizations through the dashboard without needing to reprint or redistribute the code.
- How big should a QR Code border be?
A QR Code border needs at least 4 modules of clear space on every side before any decorative element gets added on top of that margin. That's the ISO/IEC 18004 quiet zone minimum, and it applies regardless of how elaborate the decorative border around it gets.
- What's the difference between a QR Code frame and a QR Code border?
A border is the general design element around a QR Code's edge, while a frame is a specific decorative border style that comes with a built-in CTA text option. The two terms describe overlapping ideas, with "frame" naming a particular implementation of a "border."
- Why does a QR Code border matter?
A QR Code border matters because it signals intent and legitimacy at a glance, on top of separating the code visually from its surroundings. Consumer trust data backs the legitimacy angle: 58% of consumers say they're confident QR Codes are safe to scan, and 26% trust them more than they did a year ago (State of QR Codes 2026).
- Can a decorative border make a QR Code stop scanning?
Yes, a decorative border can stop a QR Code from scanning if the decoration extends into the quiet zone. Keeping all four sides of that margin clear before adding color, text, or graphics prevents the failure.
- What's the minimum quiet zone size for a QR Code?
The minimum quiet zone is 4 modules on every side per ISO/IEC 18004, or 2 modules for Micro QR Codes. At a module size of 2mm, that translates to roughly 8mm of clear space required on each edge of a standard QR Code.
About the Author
Ektha is a QR code expert with years of research and analysis into the evolution of QR codes. Having written over 70 in-depth articles on QR technology, she has developed a comprehensive understanding of how QR codes are transforming industries. Her insights, including The State of QR Report, have been featured in leading publications. With a passion for simplifying complex topics and providing actionable strategies, Ektha helps businesses leverage QR codes to enhance their 'phygital' connections.
Related Posts
How to Design a QR Code: Best Practices, Mistakes to Avoid, and Real Examples
High Resolution QR Code : Ensure Clarity and Scannability
Vector QR Codes Explained: SVG vs EPS, DPI, and Print-Ready Setup
QR Code with a Background Image: How to Create One That Still Scans
QR Code Frames: How to Add One (Step-Wise Guide and Free Templates)