How to create a QR Code for Google Slides
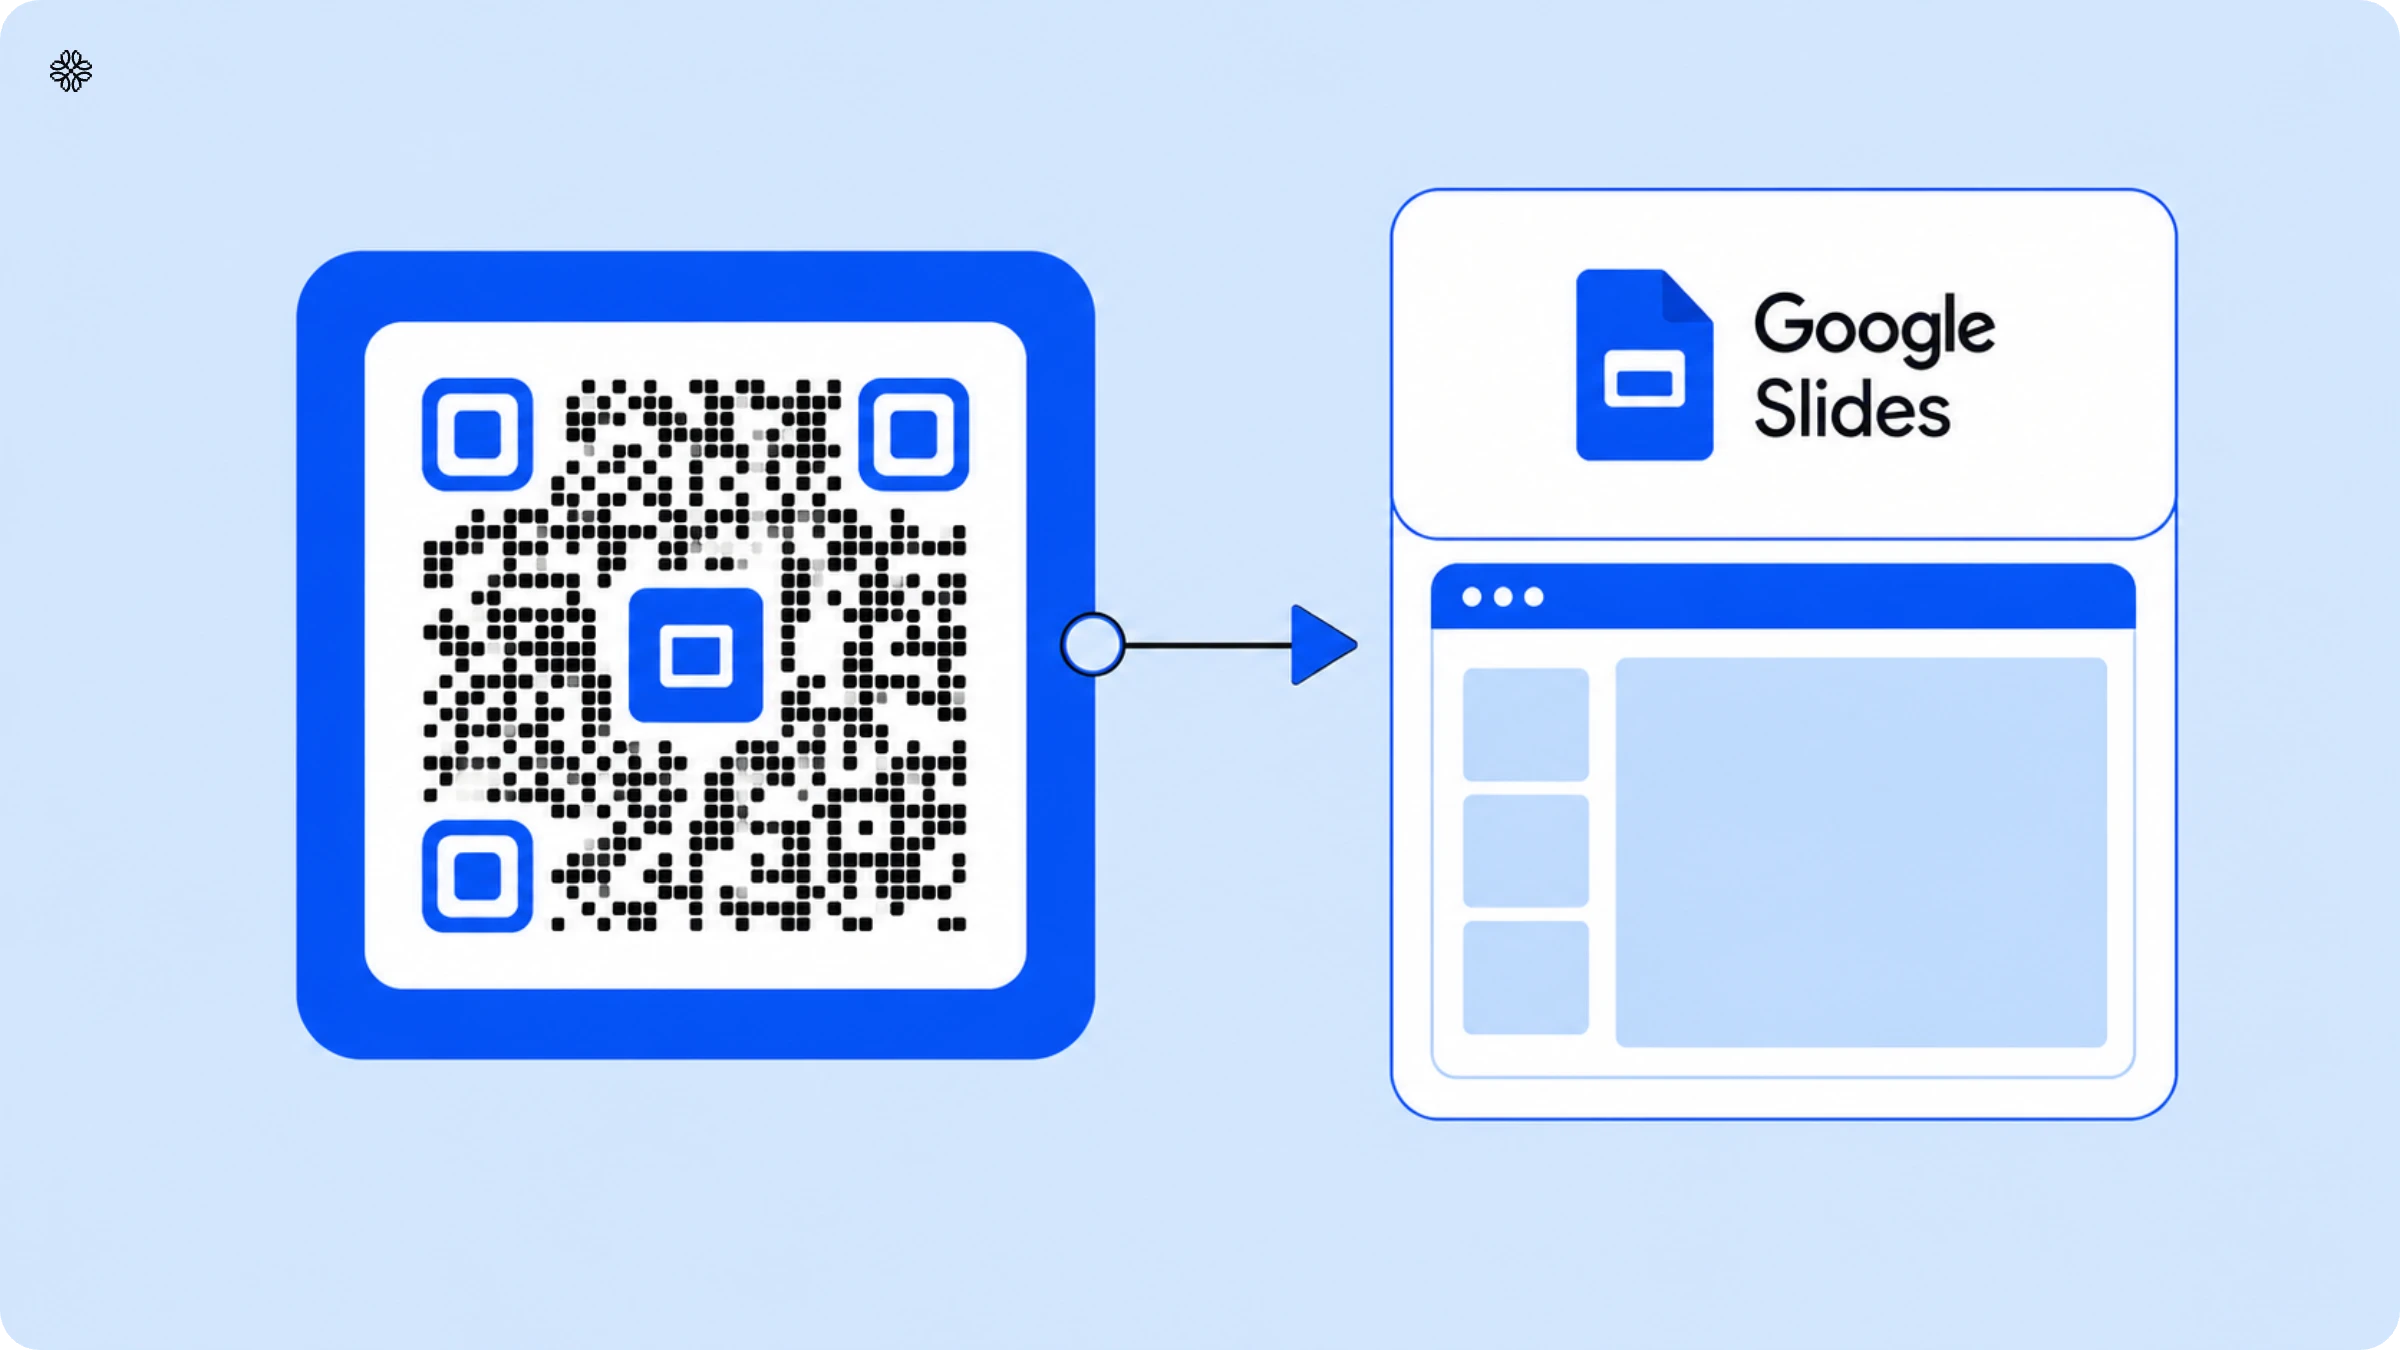
This guide shows you how to create a QR Code for Google Slides, walks through three methods to make one, Chrome's built-in generator, a Google Workspace add-on, or a dynamic QR Code generator like Uniqode, and covers the design details that decide whether that code actually gets scanned: size, contrast, and placement on the slide.
Brief overview:
- A QR Code for Google Slides is a scannable code that opens your presentation (or any linked resource) on a viewer's phone the moment they scan it.
- Three ways to create one: Chrome's built-in generator (free, static, best for one-time use), a Google Workspace add-on (static, no scan tracking), or a dynamic QR Code generator like Uniqode (editable after printing, trackable).
- The real decision isn't which tool is easiest, it's whether the slide deck gets reused. Static codes break silently when a destination changes; dynamic codes can be redirected in seconds.
- Design matters for scannability: at least 2 inches square, high contrast (black-on-white), one code per slide, placed in a corner with white space.
- Common failure points: dead links, low contrast, codes too small or pixelated, and codes nobody tested at presentation distance.
- Dynamic QR Codes add four practical wins: instant sharing, editable destinations, exportable scan data (time, device, location), and SOC 2 Type II-backed security.
- Common uses: networking (digital business cards), product promotion (landing pages), classroom resource sharing, and post-event feedback collection.
A QR Code for Google Slides is a scannable code you can add to your slide. When someone scans it, the presentation or a specific resource opens instantly on their phone. There are three easy ways to create one: use Chrome’s built-in generator, try a Google Workspace add-on, or opt for a dynamic QR Code generator such as Uniqode. What truly matters is whether you plan to reuse this particular slide, rather than which tool seems most convenient right now.
What is a QR Code for Google Slides?
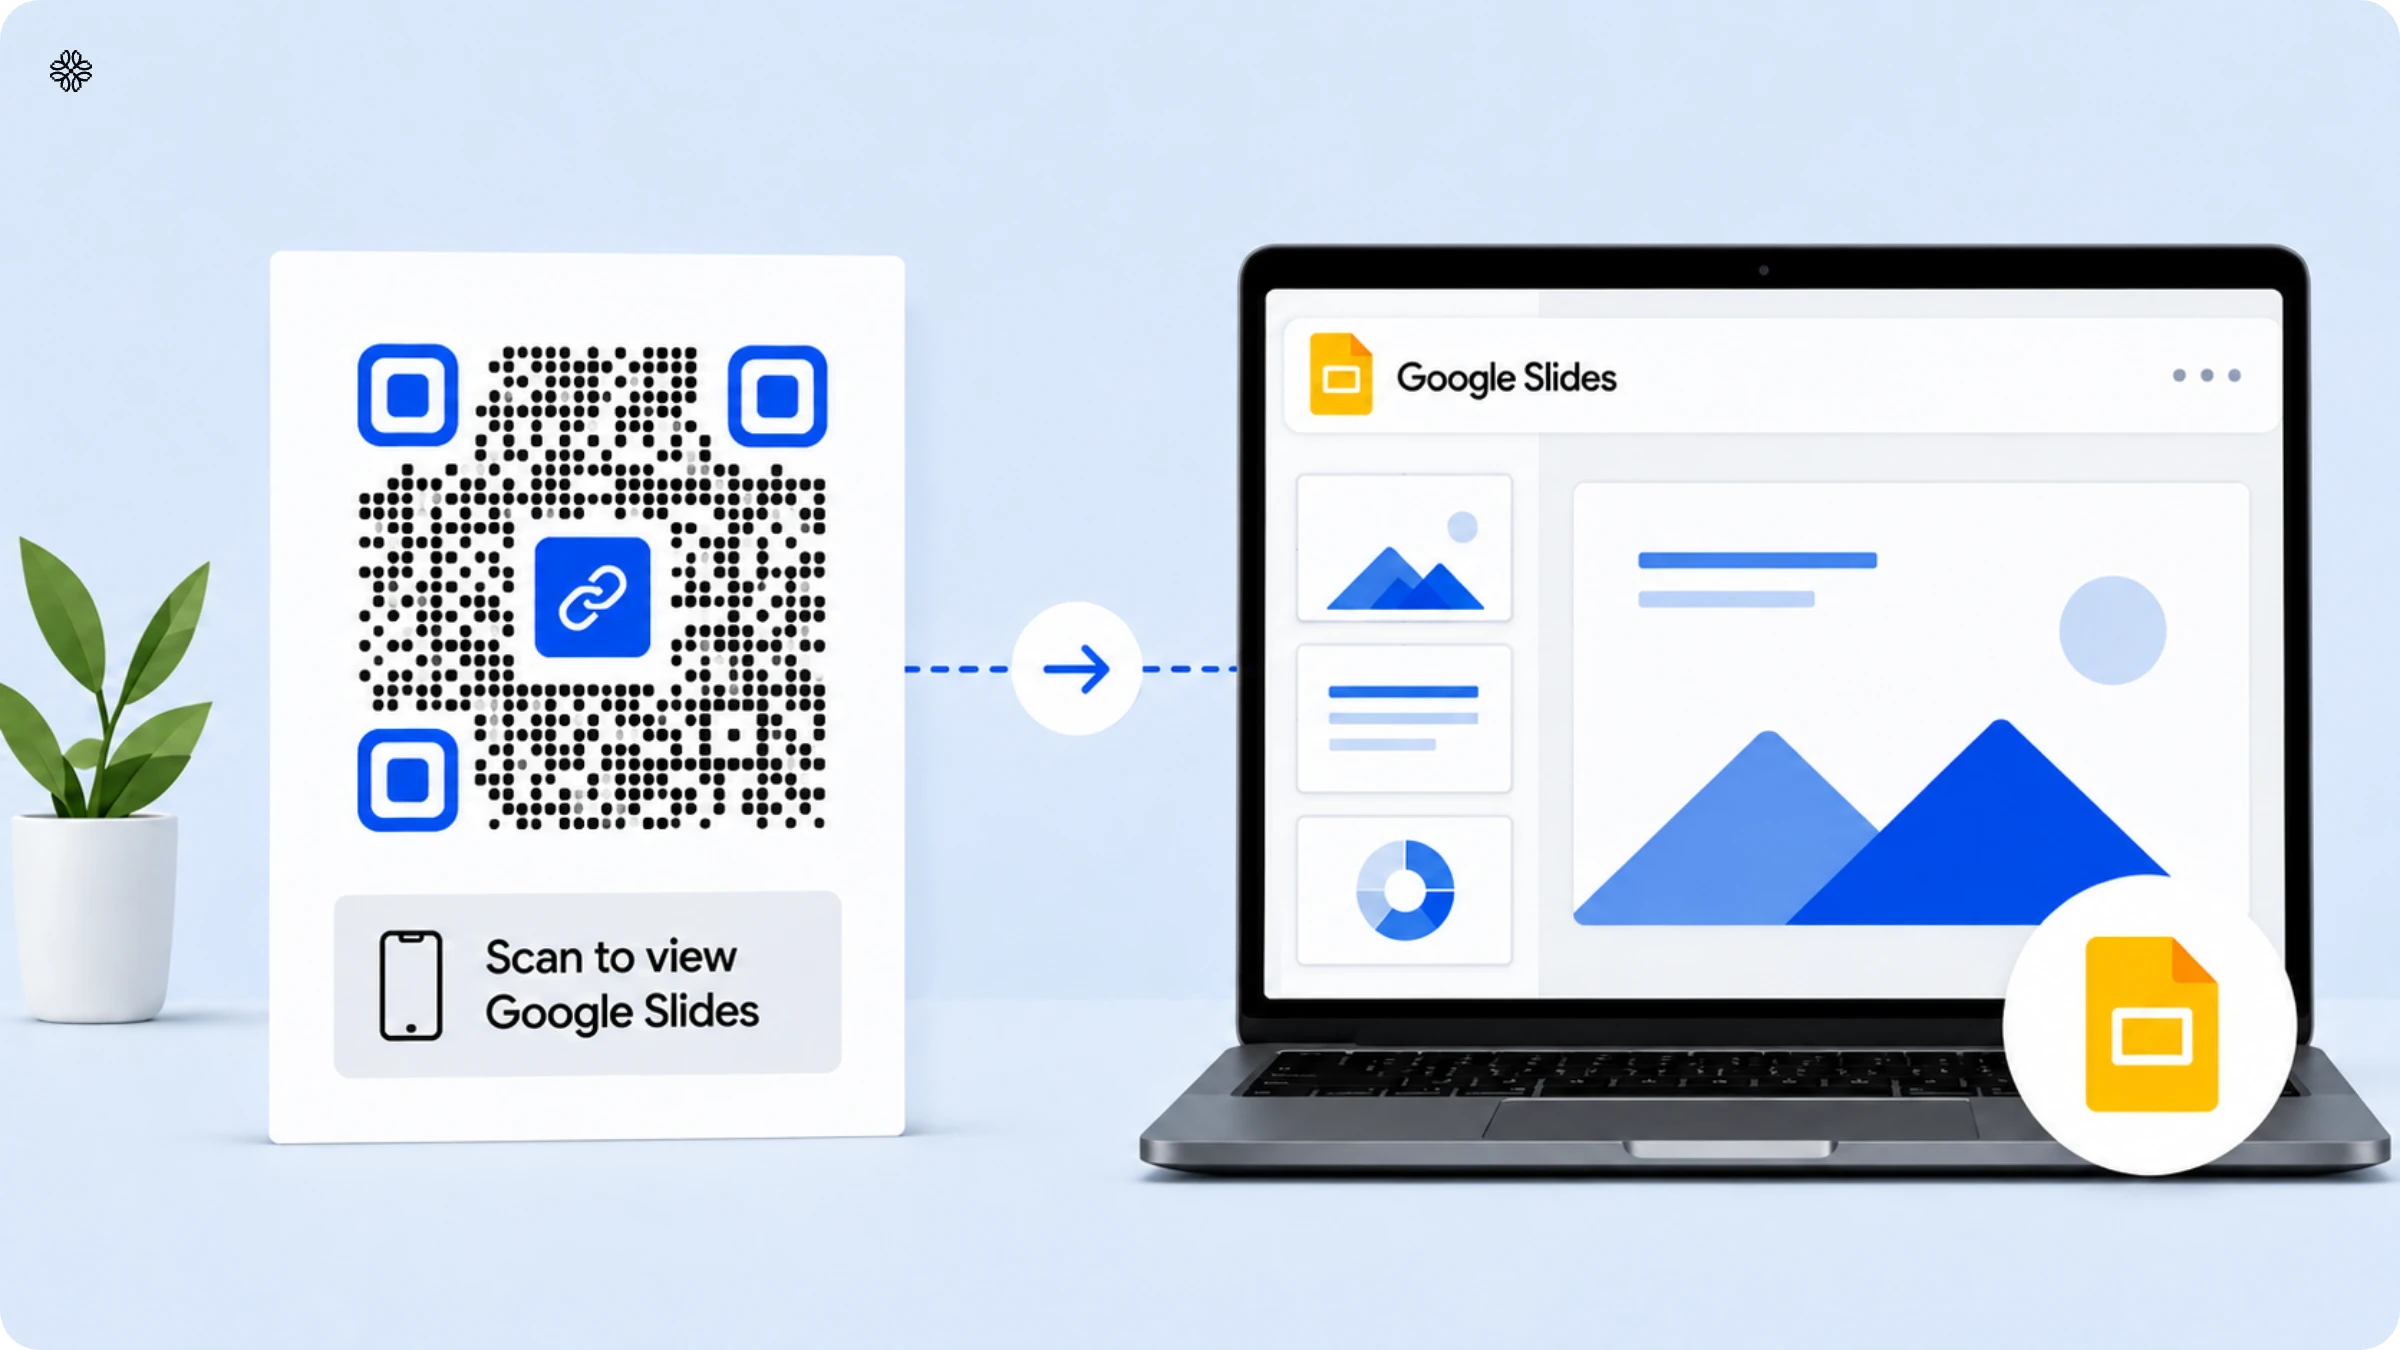
A QR Code for Google Slides is just like any other QR Code: a simple grid of black and white squares that your phone camera can read in a flash, no app required. Just point your phone at the code, and you are instantly taken to the destination, whether that is a shared presentation, a form, a contact card, or a landing page. No typing, no hassle.
Static QR Codes lock in their destination the moment you create them. In contrast, dynamic QR Codes give you the flexibility to change where the code points, even after it has been printed or embedded, all without altering the image itself. This difference may seem minor at first glance, but it becomes crucial when you think about how presentation decks are actually used. A sales deck created in March might be repurposed for a renewal pitch in November. A conference presentation can make appearances at several events over a year and a half. Training decks often sit untouched in a shared drive for years, only to be reopened for onboarding, with the original QR Code tagging along, regardless of whether the link behind it still works.
That reuse pattern is the entire reason method choice matters more than it looks like it should.
3 ways to create a QR Code for Google Slides
Three tools let you add a QR Code in Google Slides: Chrome’s built-in generator, a Google Workspace Marketplace add-on, or a dynamic QR Code generator like Uniqode. All three will give you a functional code, but the real difference lies in whether your QR Code remains useful when you reuse your slides.
Chrome’s generator and most Workspace add-ons create static code. These are quick, free, and set in stone the moment you make them. On the other hand, a dynamic QR Code generator lets you change where your code points even after you have shared your slides, though it does take a few extra minutes to set up. For a broader comparison across QR Code generators, not just for Slides, see how to select the best QR Code generator. For now, let’s break down exactly what each method offers you.
Method 1: Chrome's built-in QR Code generator
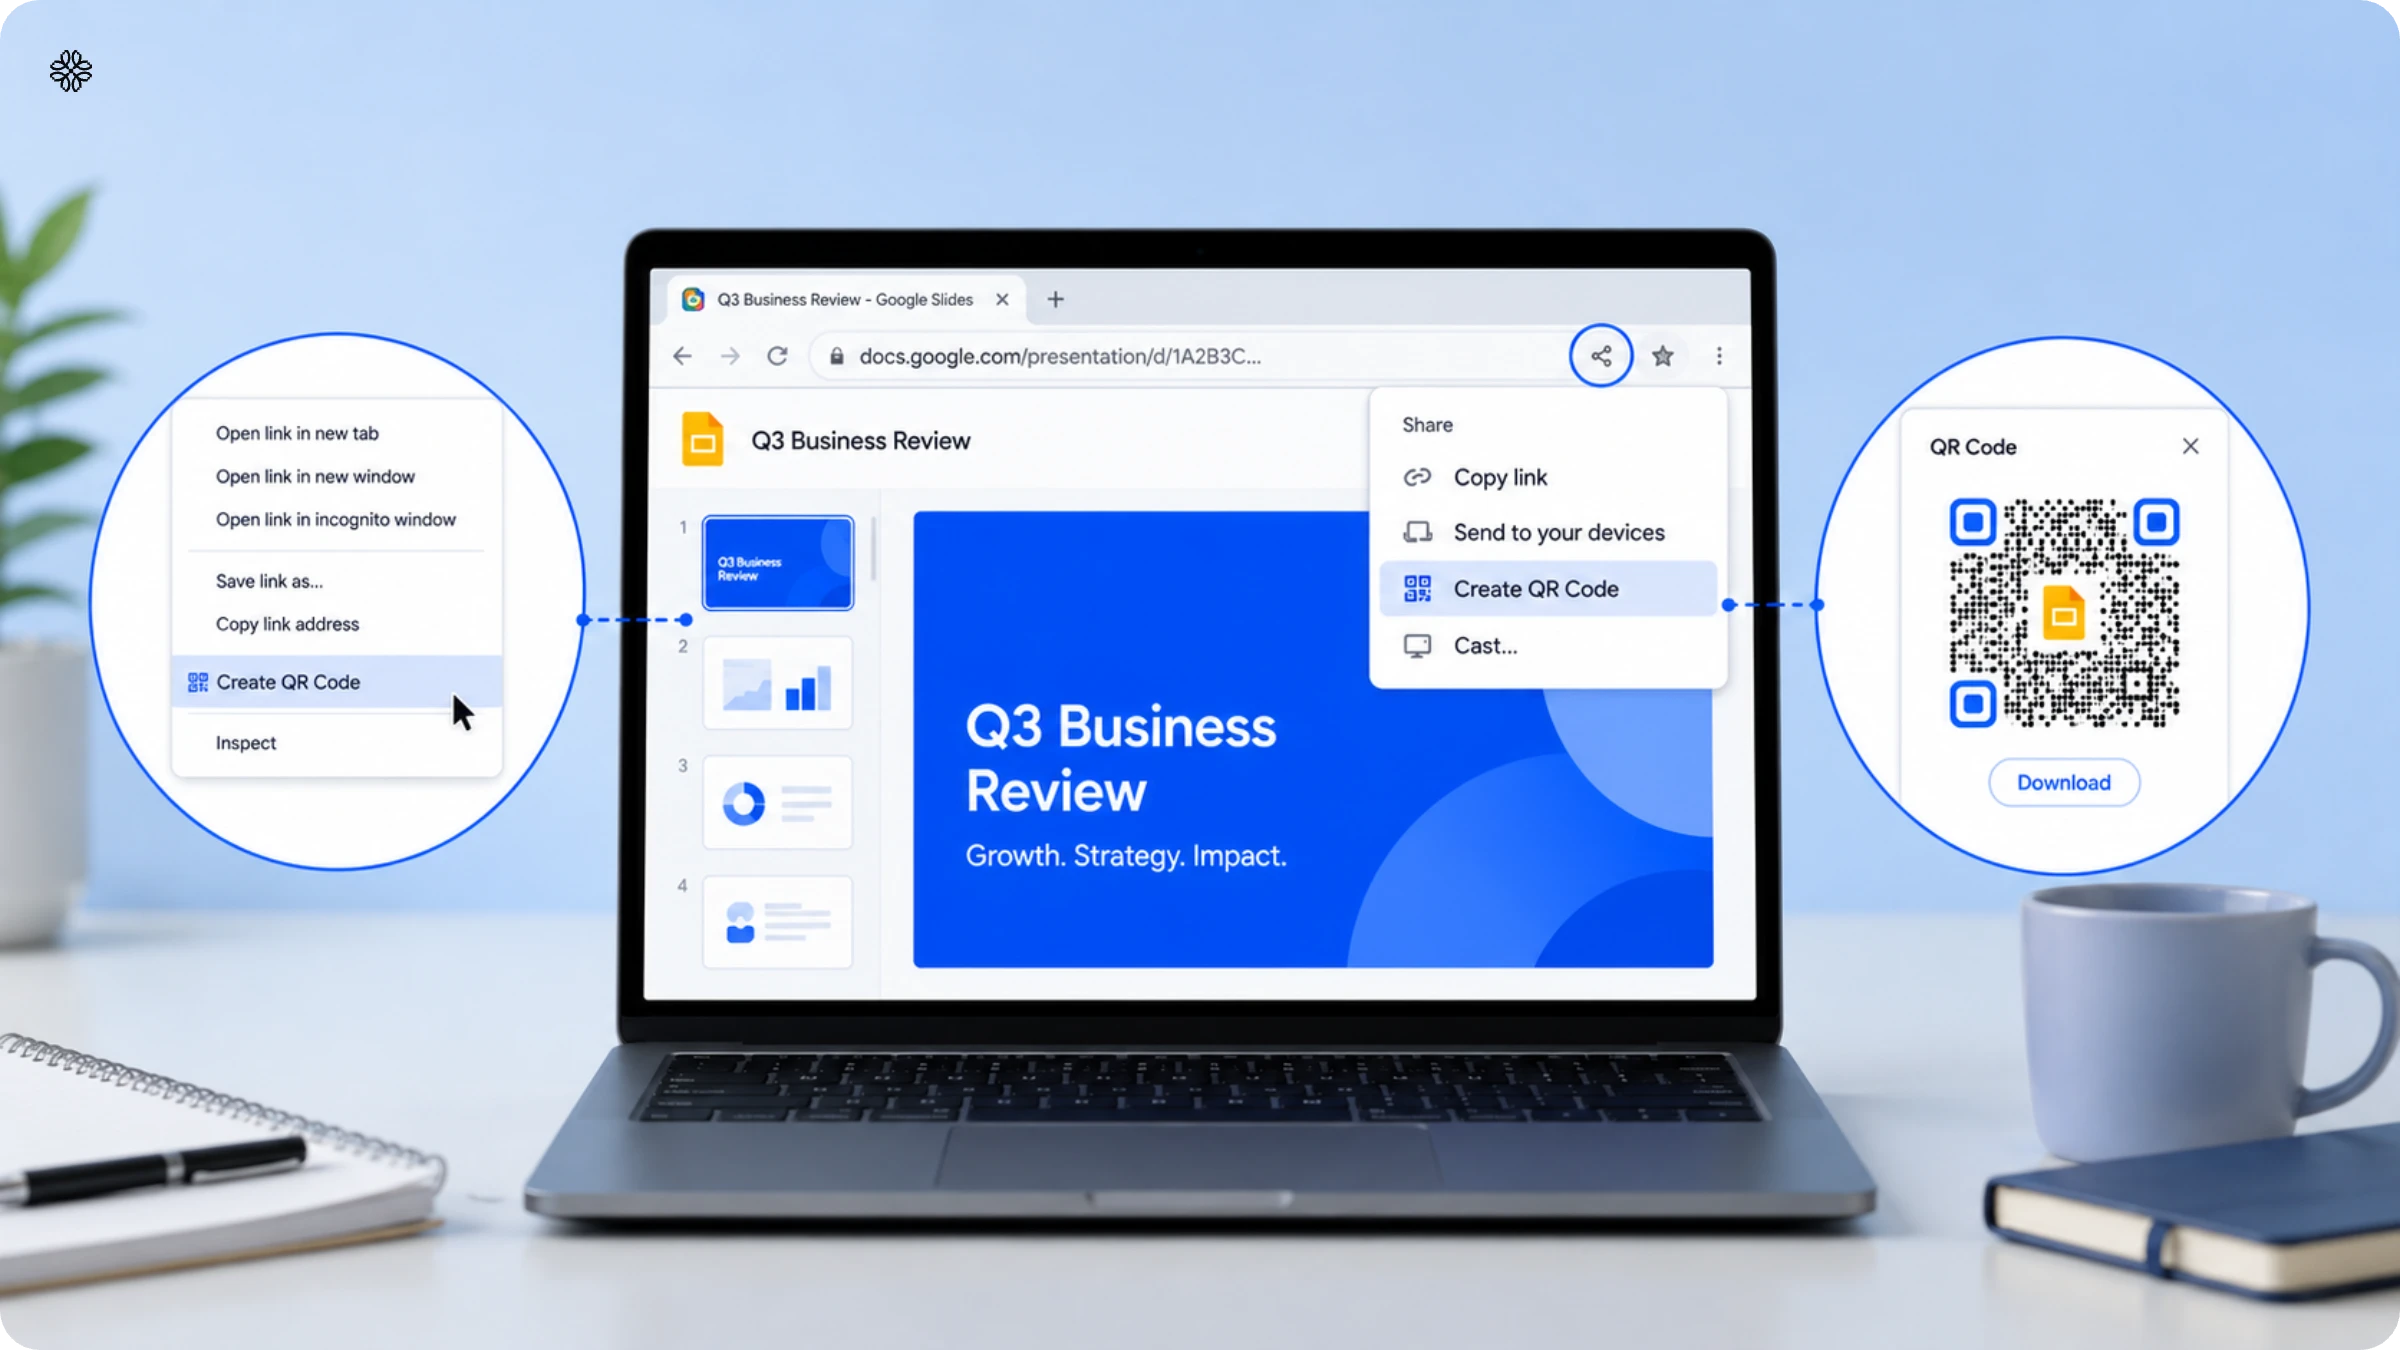
Chrome comes with its own QR Code generator, which is quick and effortless to use. Right-click on any link, even your Google Slides sharing link, and choose ‘Create QR Code.’ Instantly, Chrome does the rest. No need to sign up, install add-ons, or pay a fee. You can also find this feature in the address bar: just click the share icon and select the QR Code option to generate a QR Code for the page you are viewing.
Keep in mind, though, that the QR Code Chrome creates is static. This means it will always point to the exact URL you used when generating it. If you update your Google Slides sharing link later, the code will no longer work. There is nothing in the code to indicate that the destination has changed.
So, Chrome’s QR Code tool is perfect for those quick, one-off uses: an internal meeting, a classroom session, or any presentation where you are sure no one will need the link again for long.
Method 2: Google Workspace Marketplace add-ons
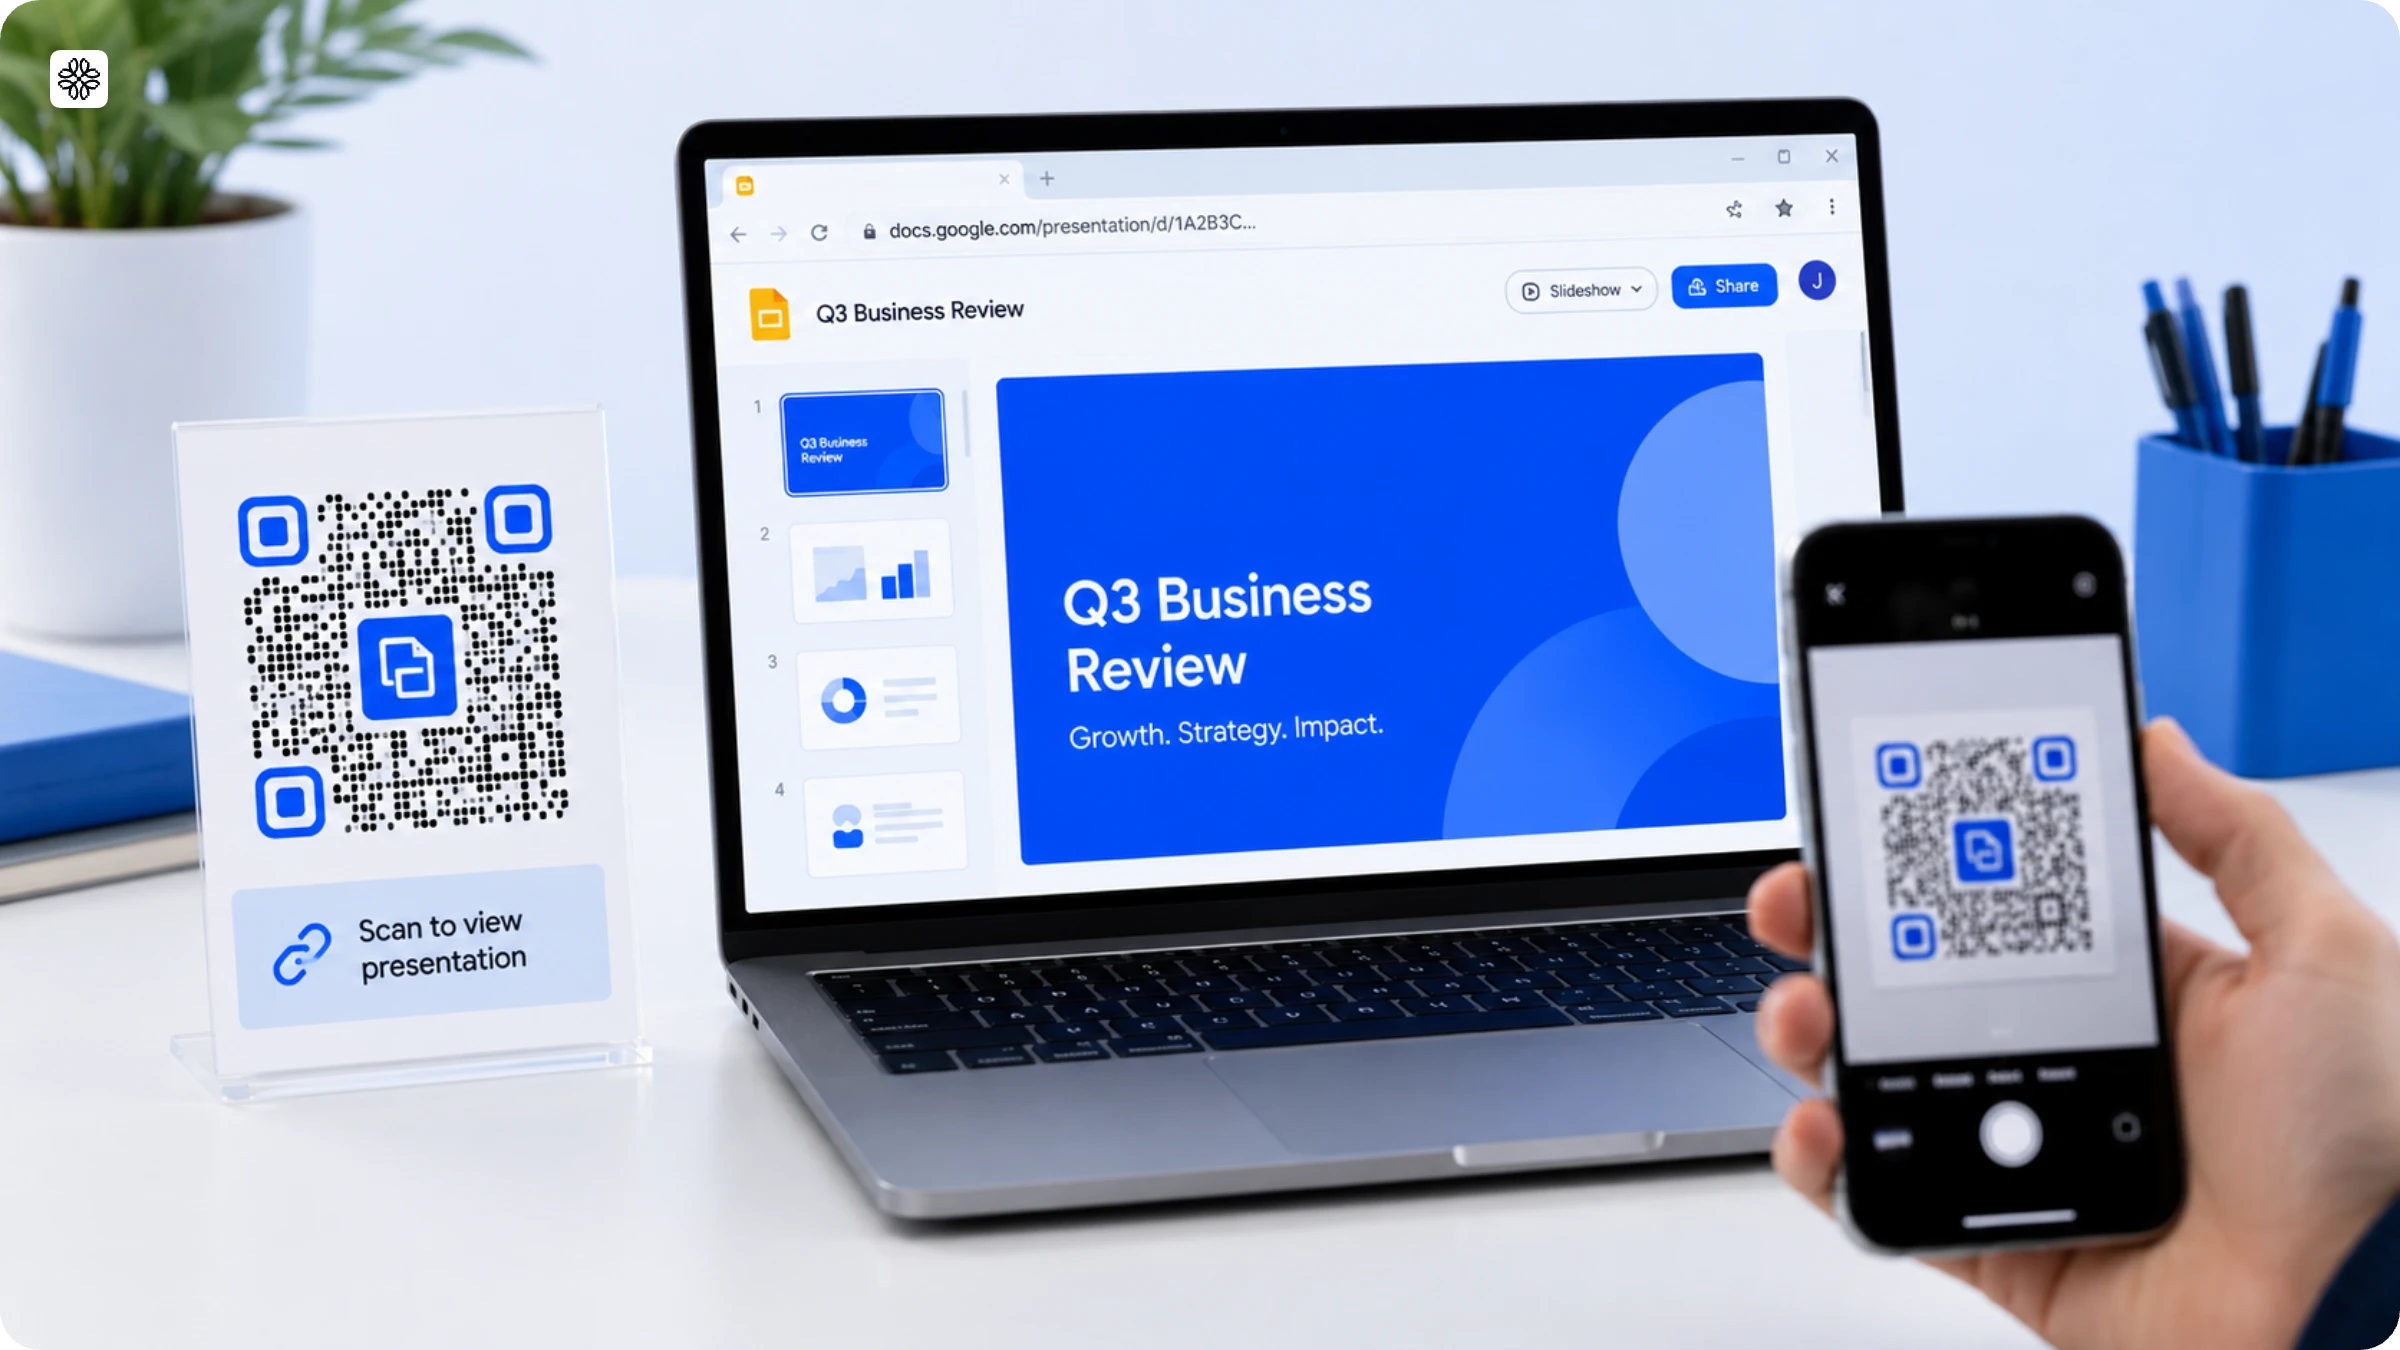
Google Workspace Marketplace add-ons generate a QR Code directly inside the Slides editor, without switching tabs to Chrome or a separate generator. Search for a QR Code add-on in the Marketplace, install it, and you will find a handy QR Code option waiting for you in the Slides Add-ons menu, ready to drop onto your current slide.
However, this convenience comes with a few trade-offs. First, every QR Code you generate through an add-on is static, just like the ones from Chrome’s generator. You will not find scan tracking here; you can see the code, but there is no way to know how many people scanned it, when, or from where. Export options are also limited; most add-ons offer just one image type, and you will not find a vector option if you need something print-ready.
For a quick QR Code insert within your Slides workflow, an add-on does the job well. The challenge appears when you need to reuse your deck. If the destination linked to your code changes or becomes outdated, you will have to regenerate the code and re-export the slide, much like the process with Chrome’s generator.
Method 3: Uniqode's dynamic QR Code generator
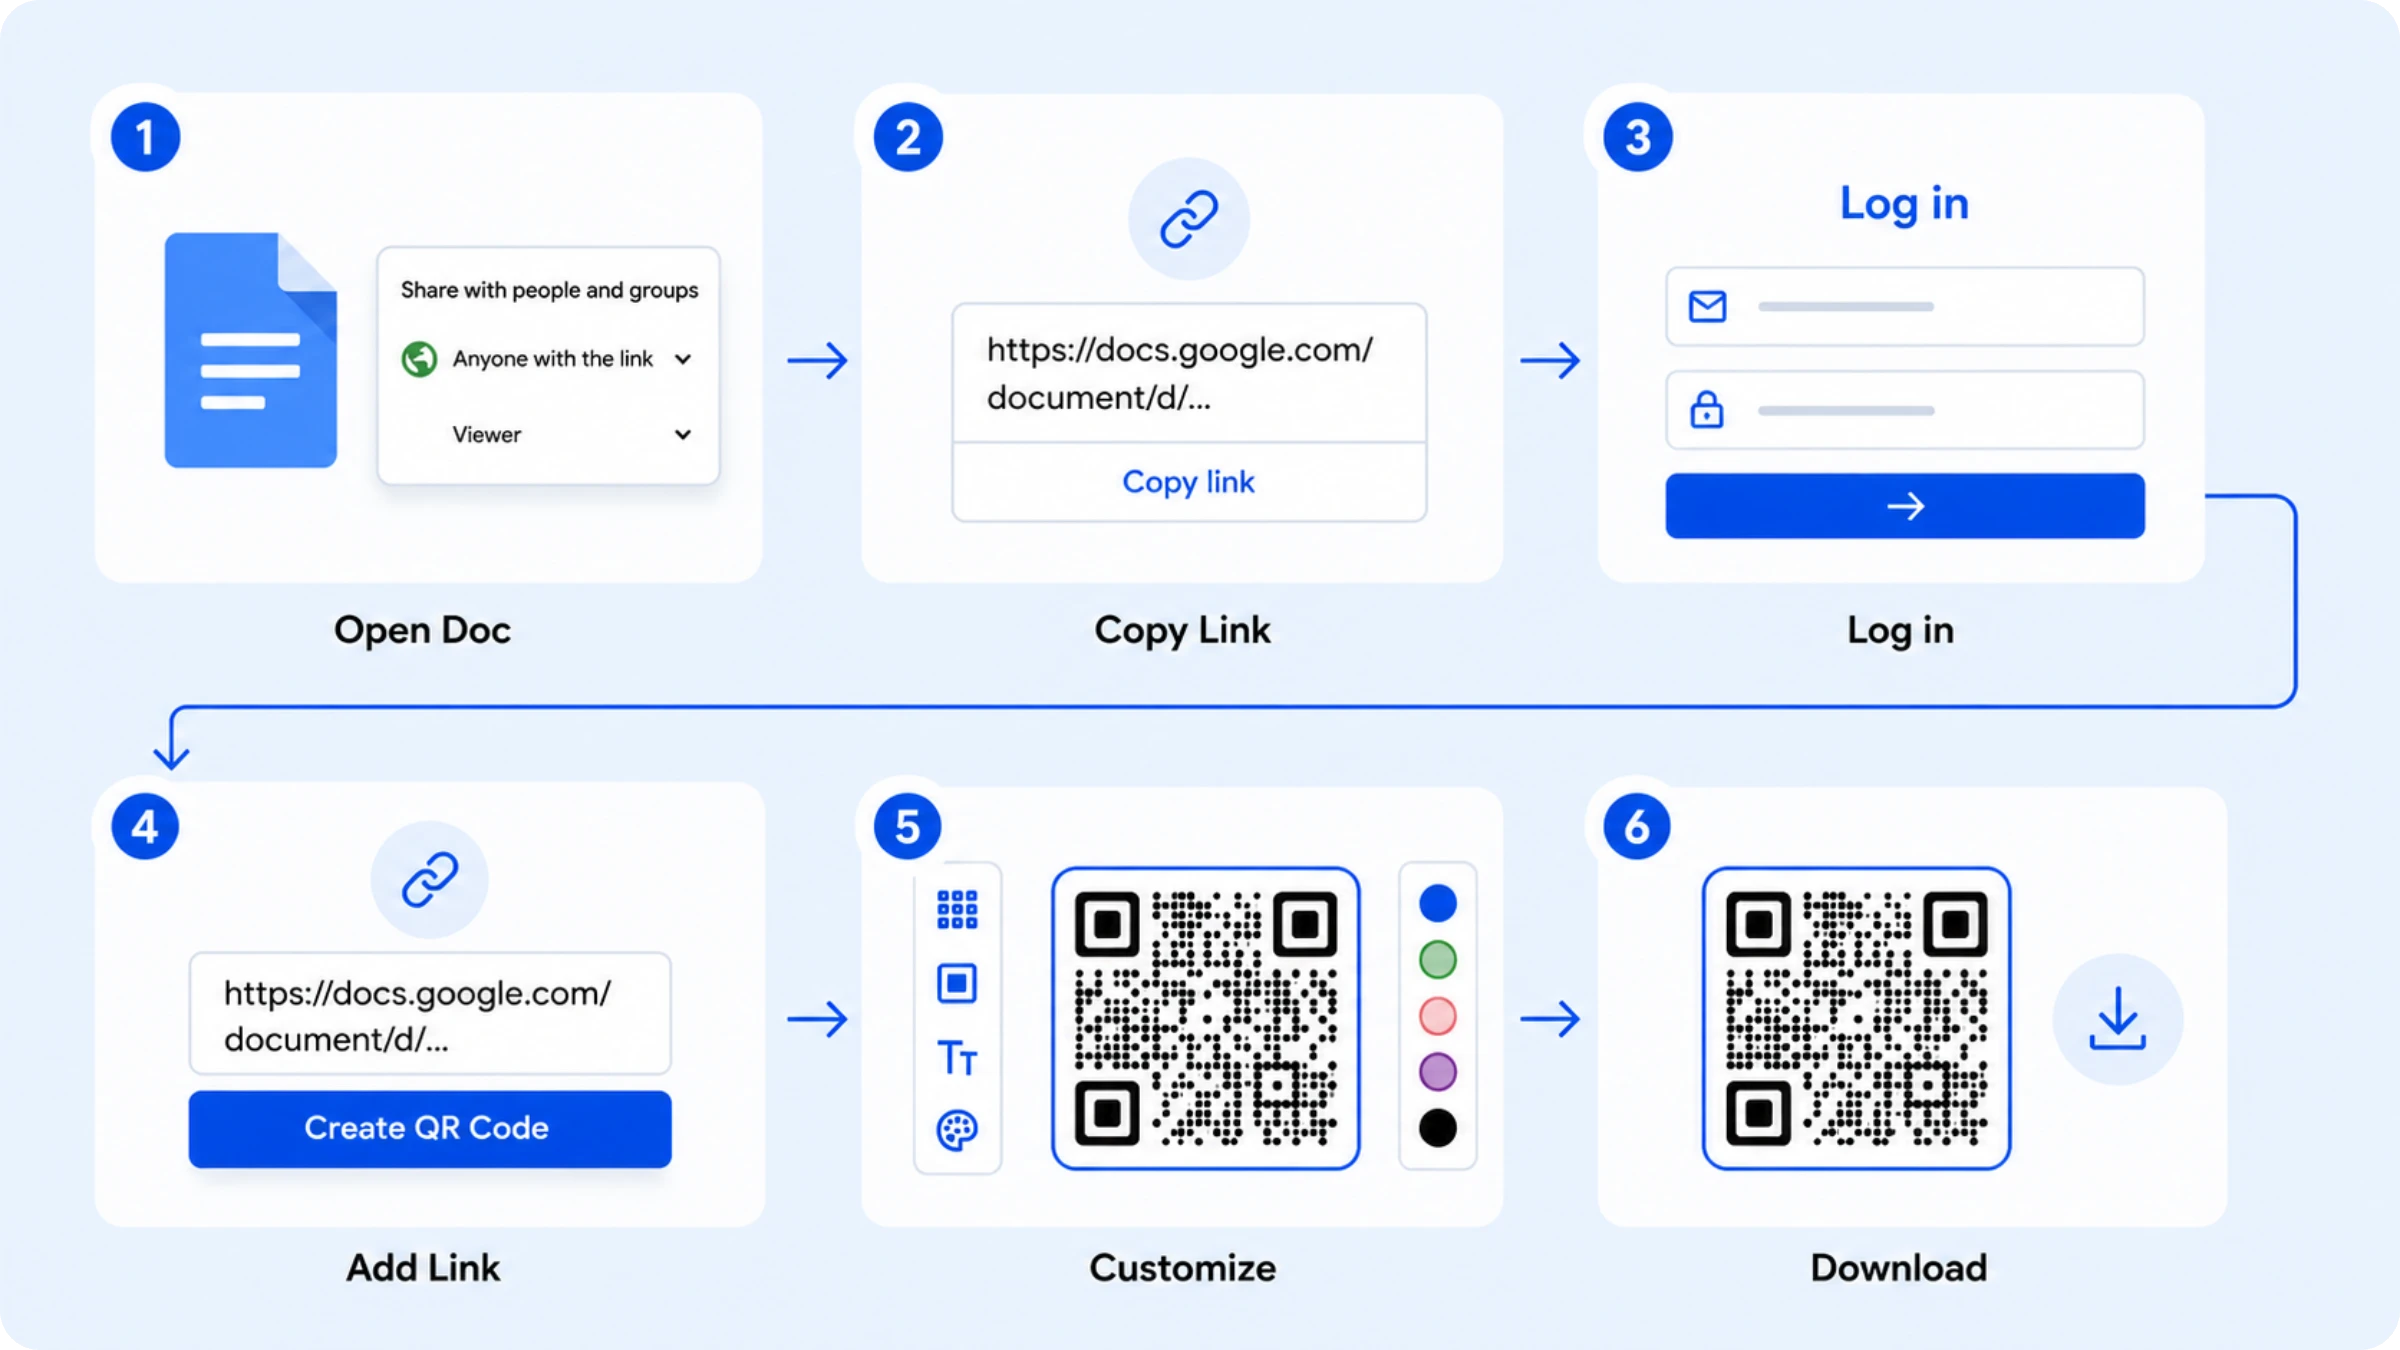
Here's how to create a QR Code for your Google Slides presentation on Uniqode, in five steps that take under two minutes end to end. Log in to your Uniqode dashboard, or create a free account if you're starting fresh.
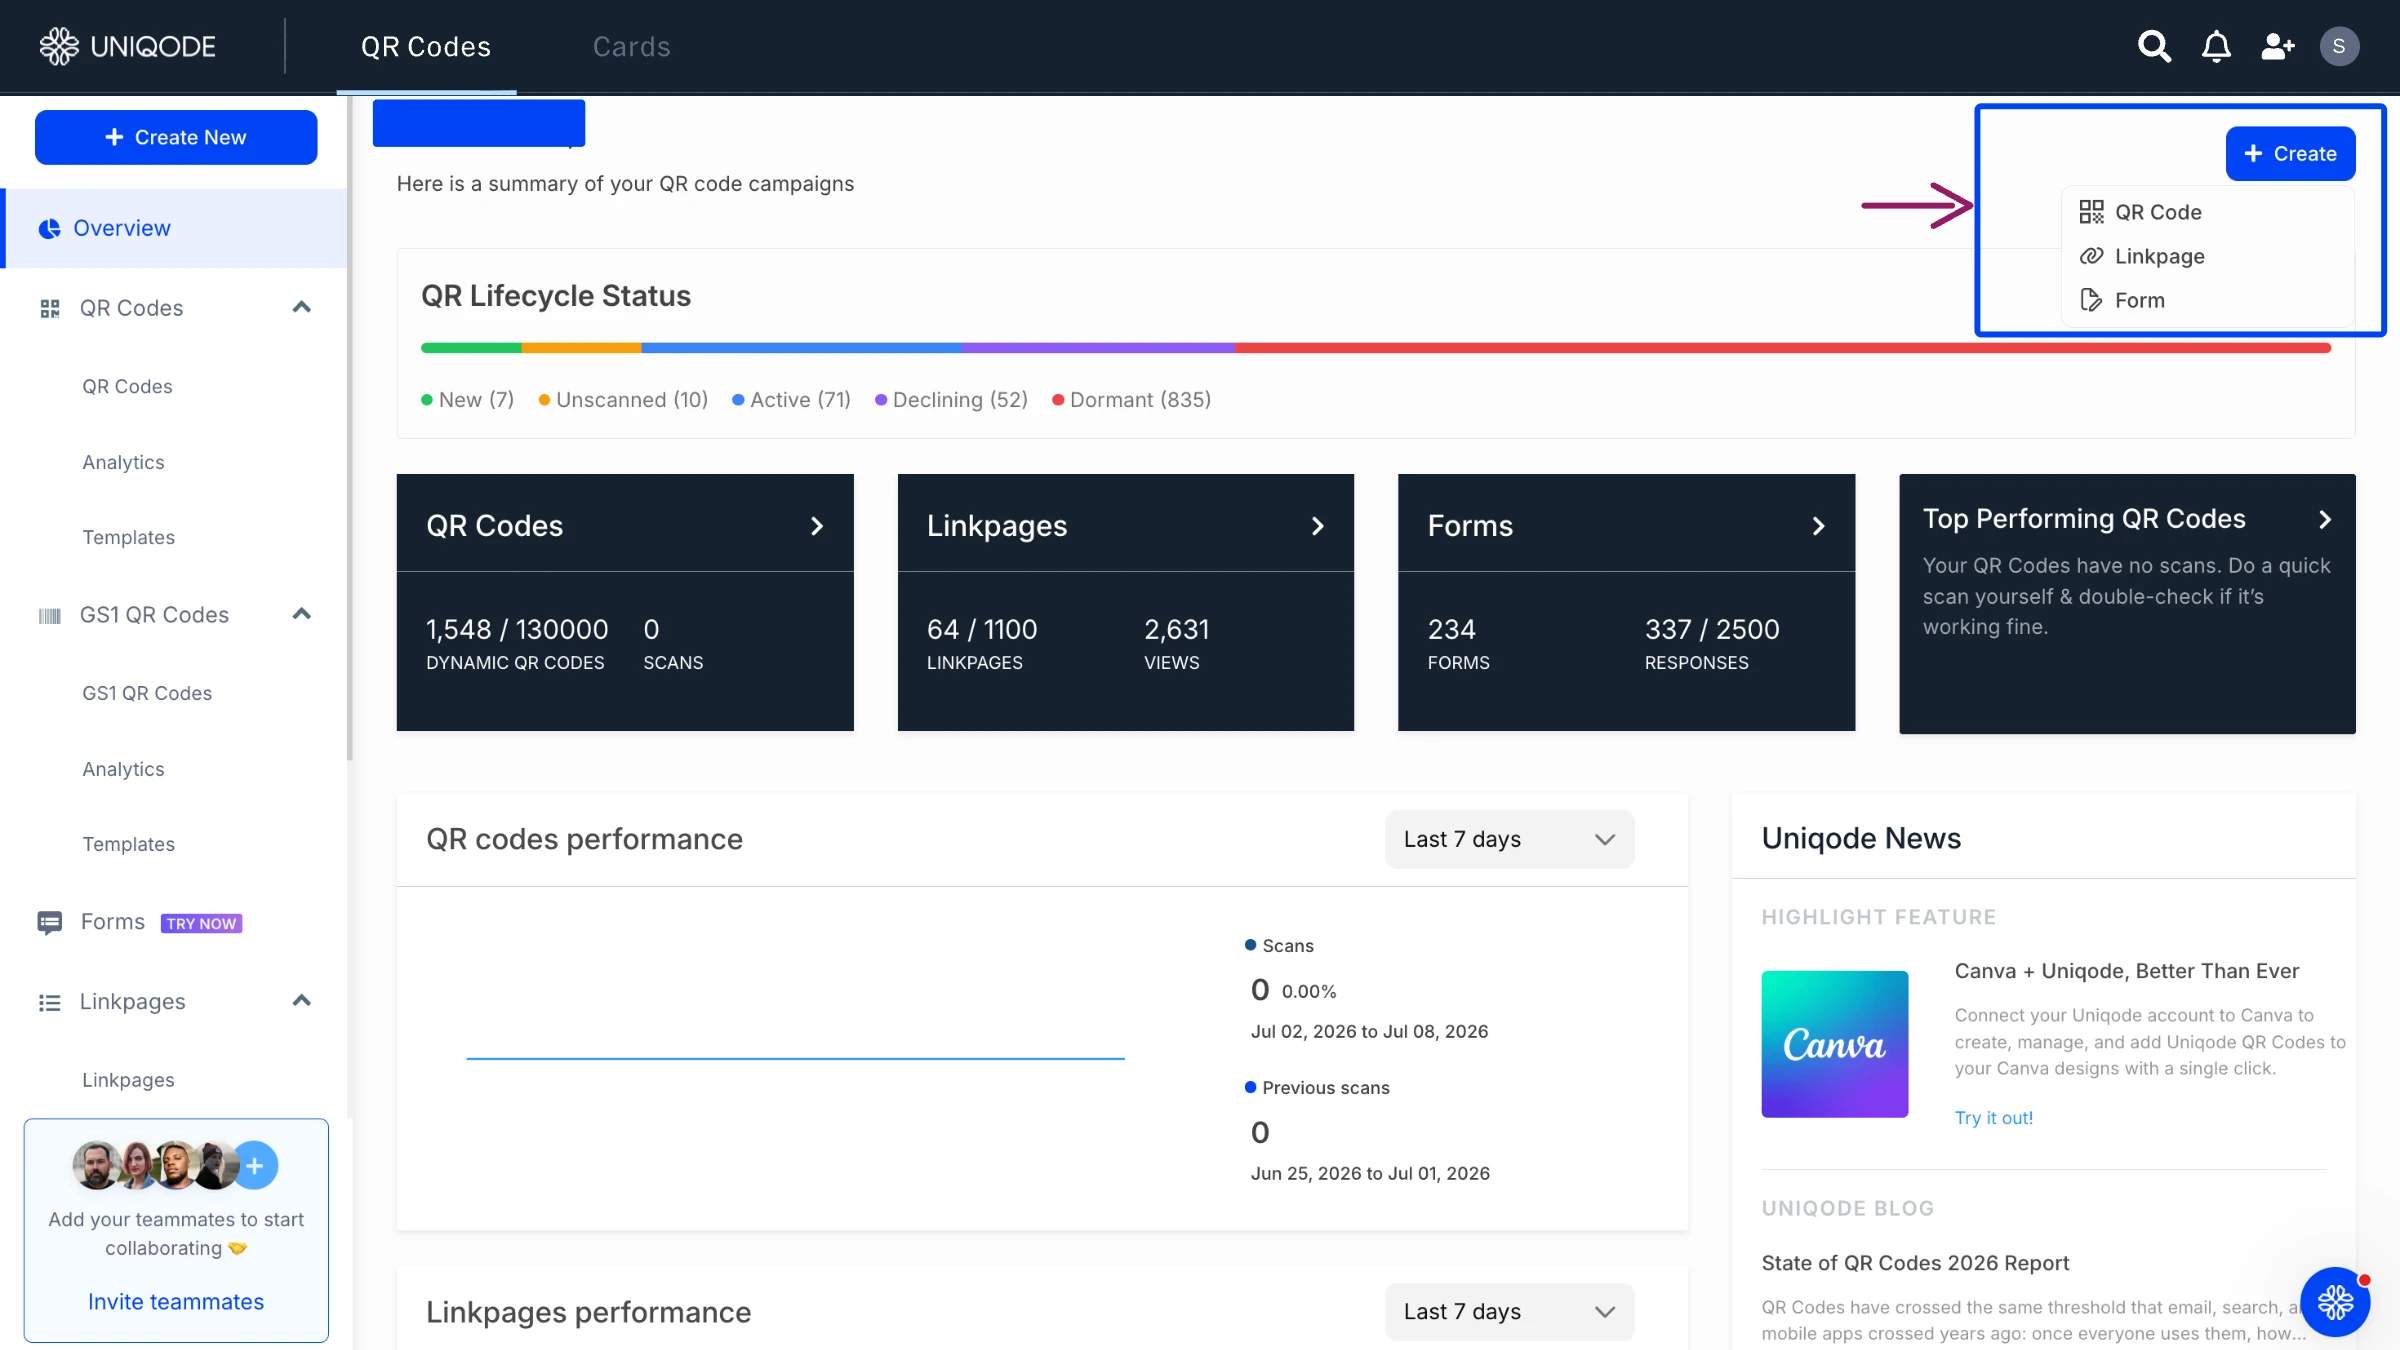
Step 1: Start a new QR Code. Click "+Create" in your dashboard and choose "QR Code" from the menu.
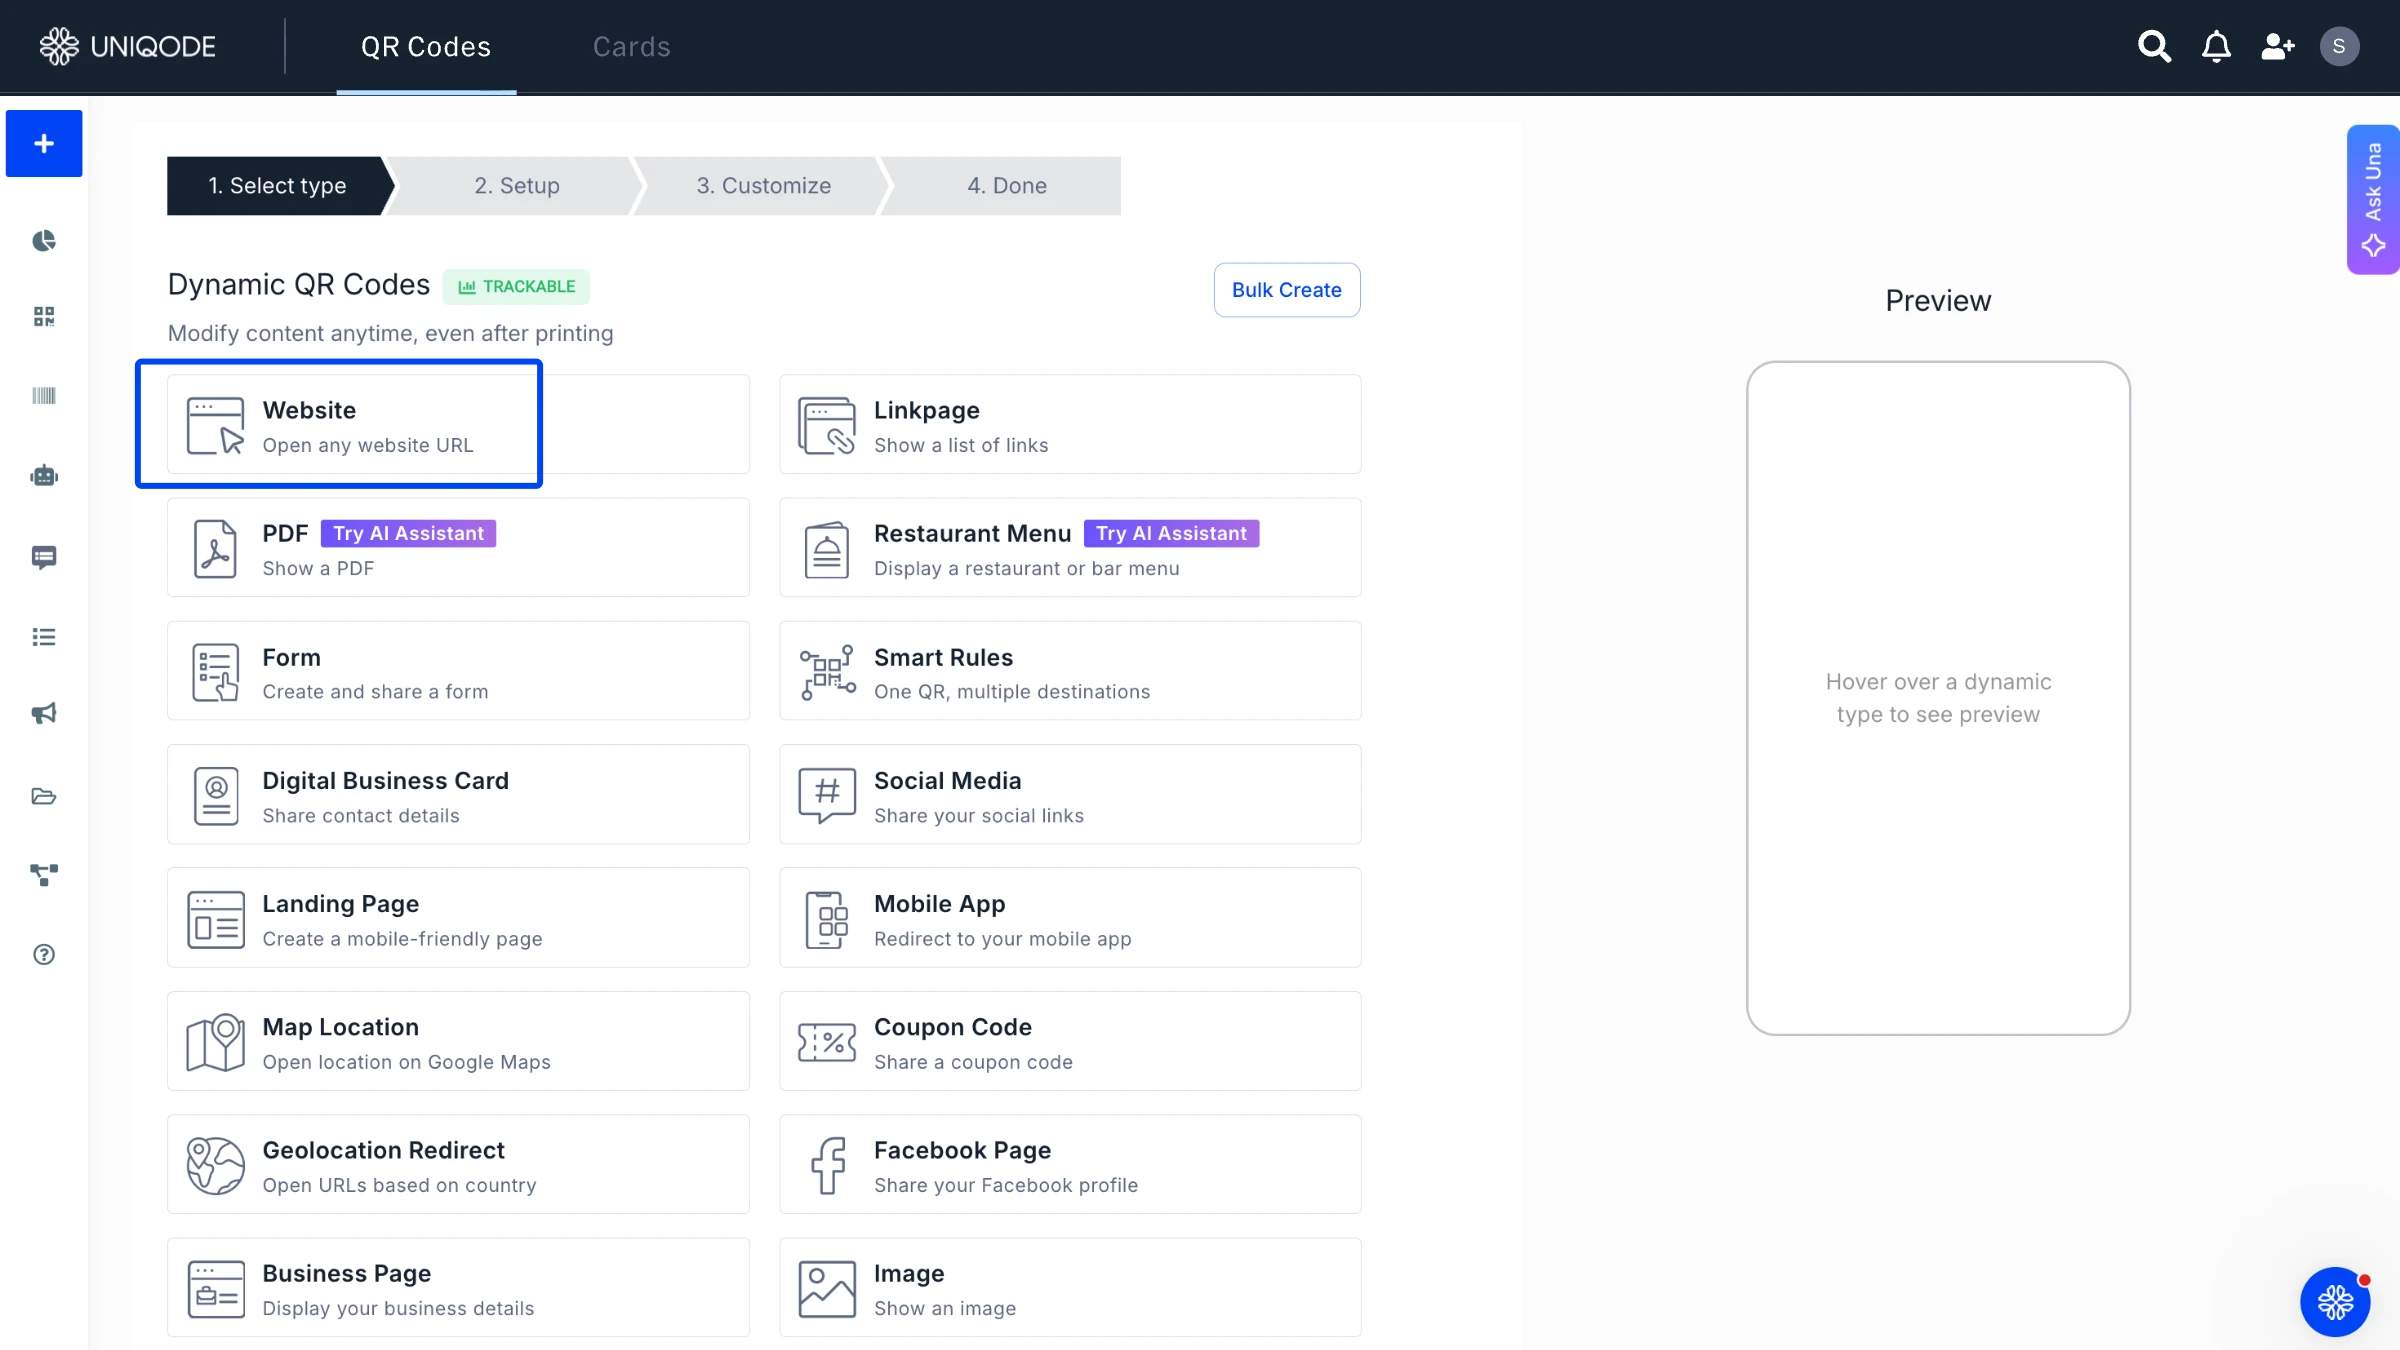
Step 2: Select the QR Code type. Choose "Website" from the list of QR Code types. A Google Slides link is a URL like any other, so Website is the type you want.
Step 3: Add your Slides link. Paste your Google Slides sharing link, grabbed via File, Share, Copy link, into the URL field, with sharing permissions set to "Anyone with the link."
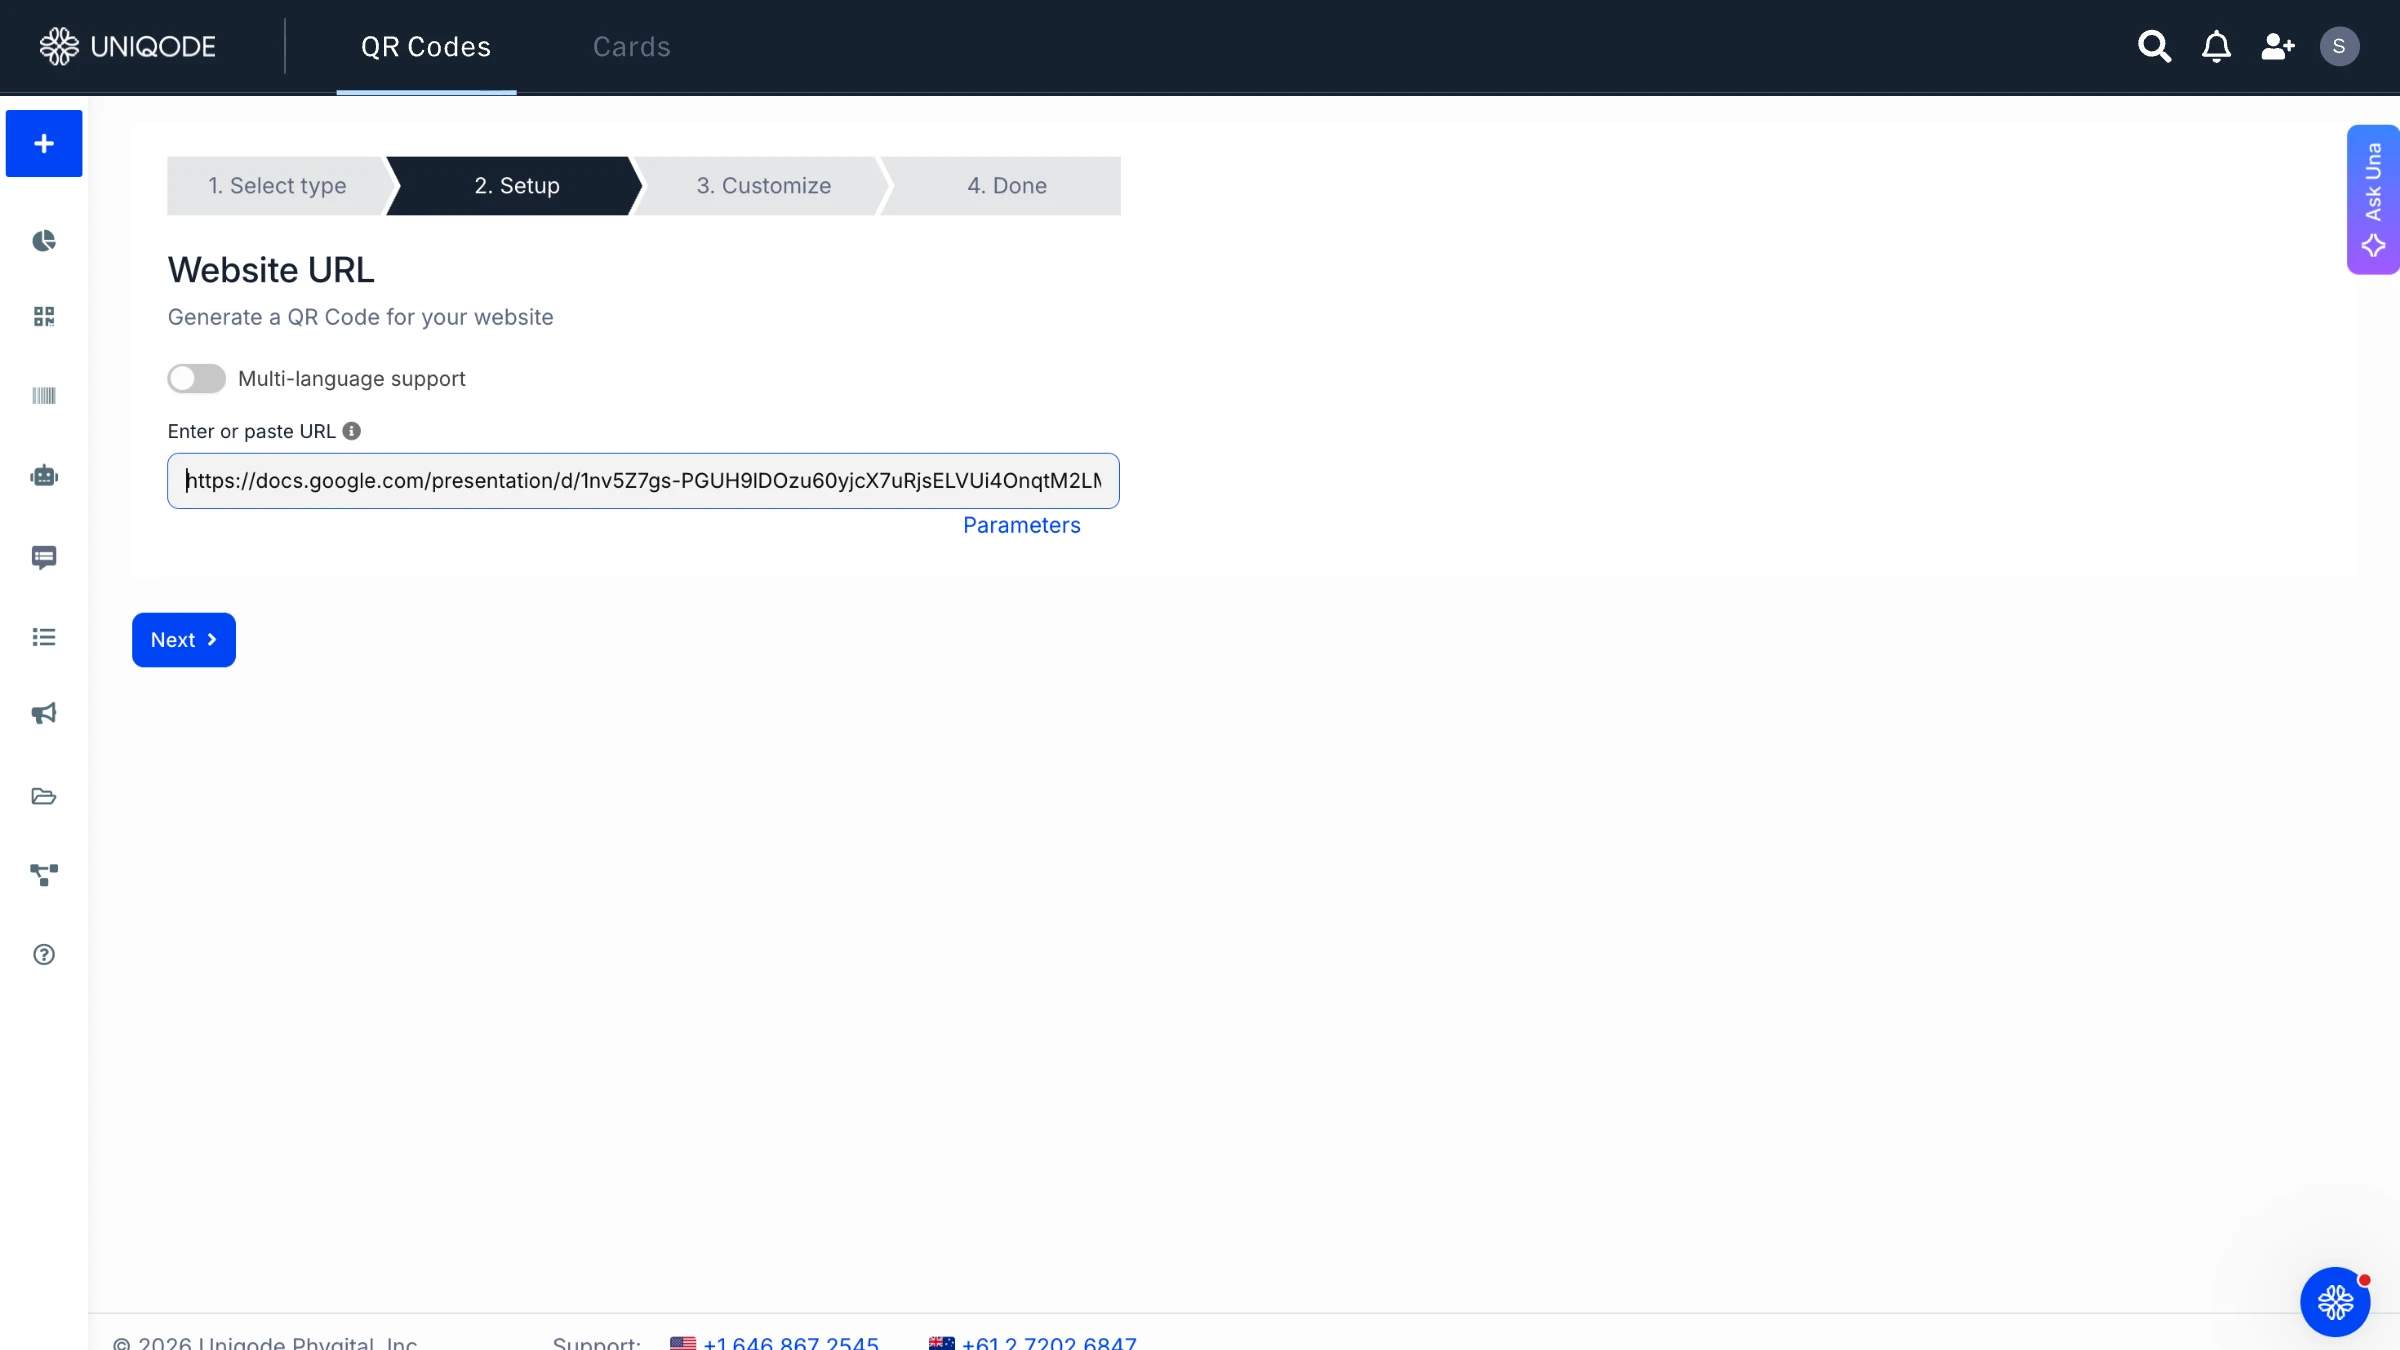
Step 4: Customize the design. Adjust colors, add a logo, and pick a frame so the code matches your deck's branding. This step is cosmetic, not functional. A plain black-and-white square scans exactly as reliably as a fully branded one.
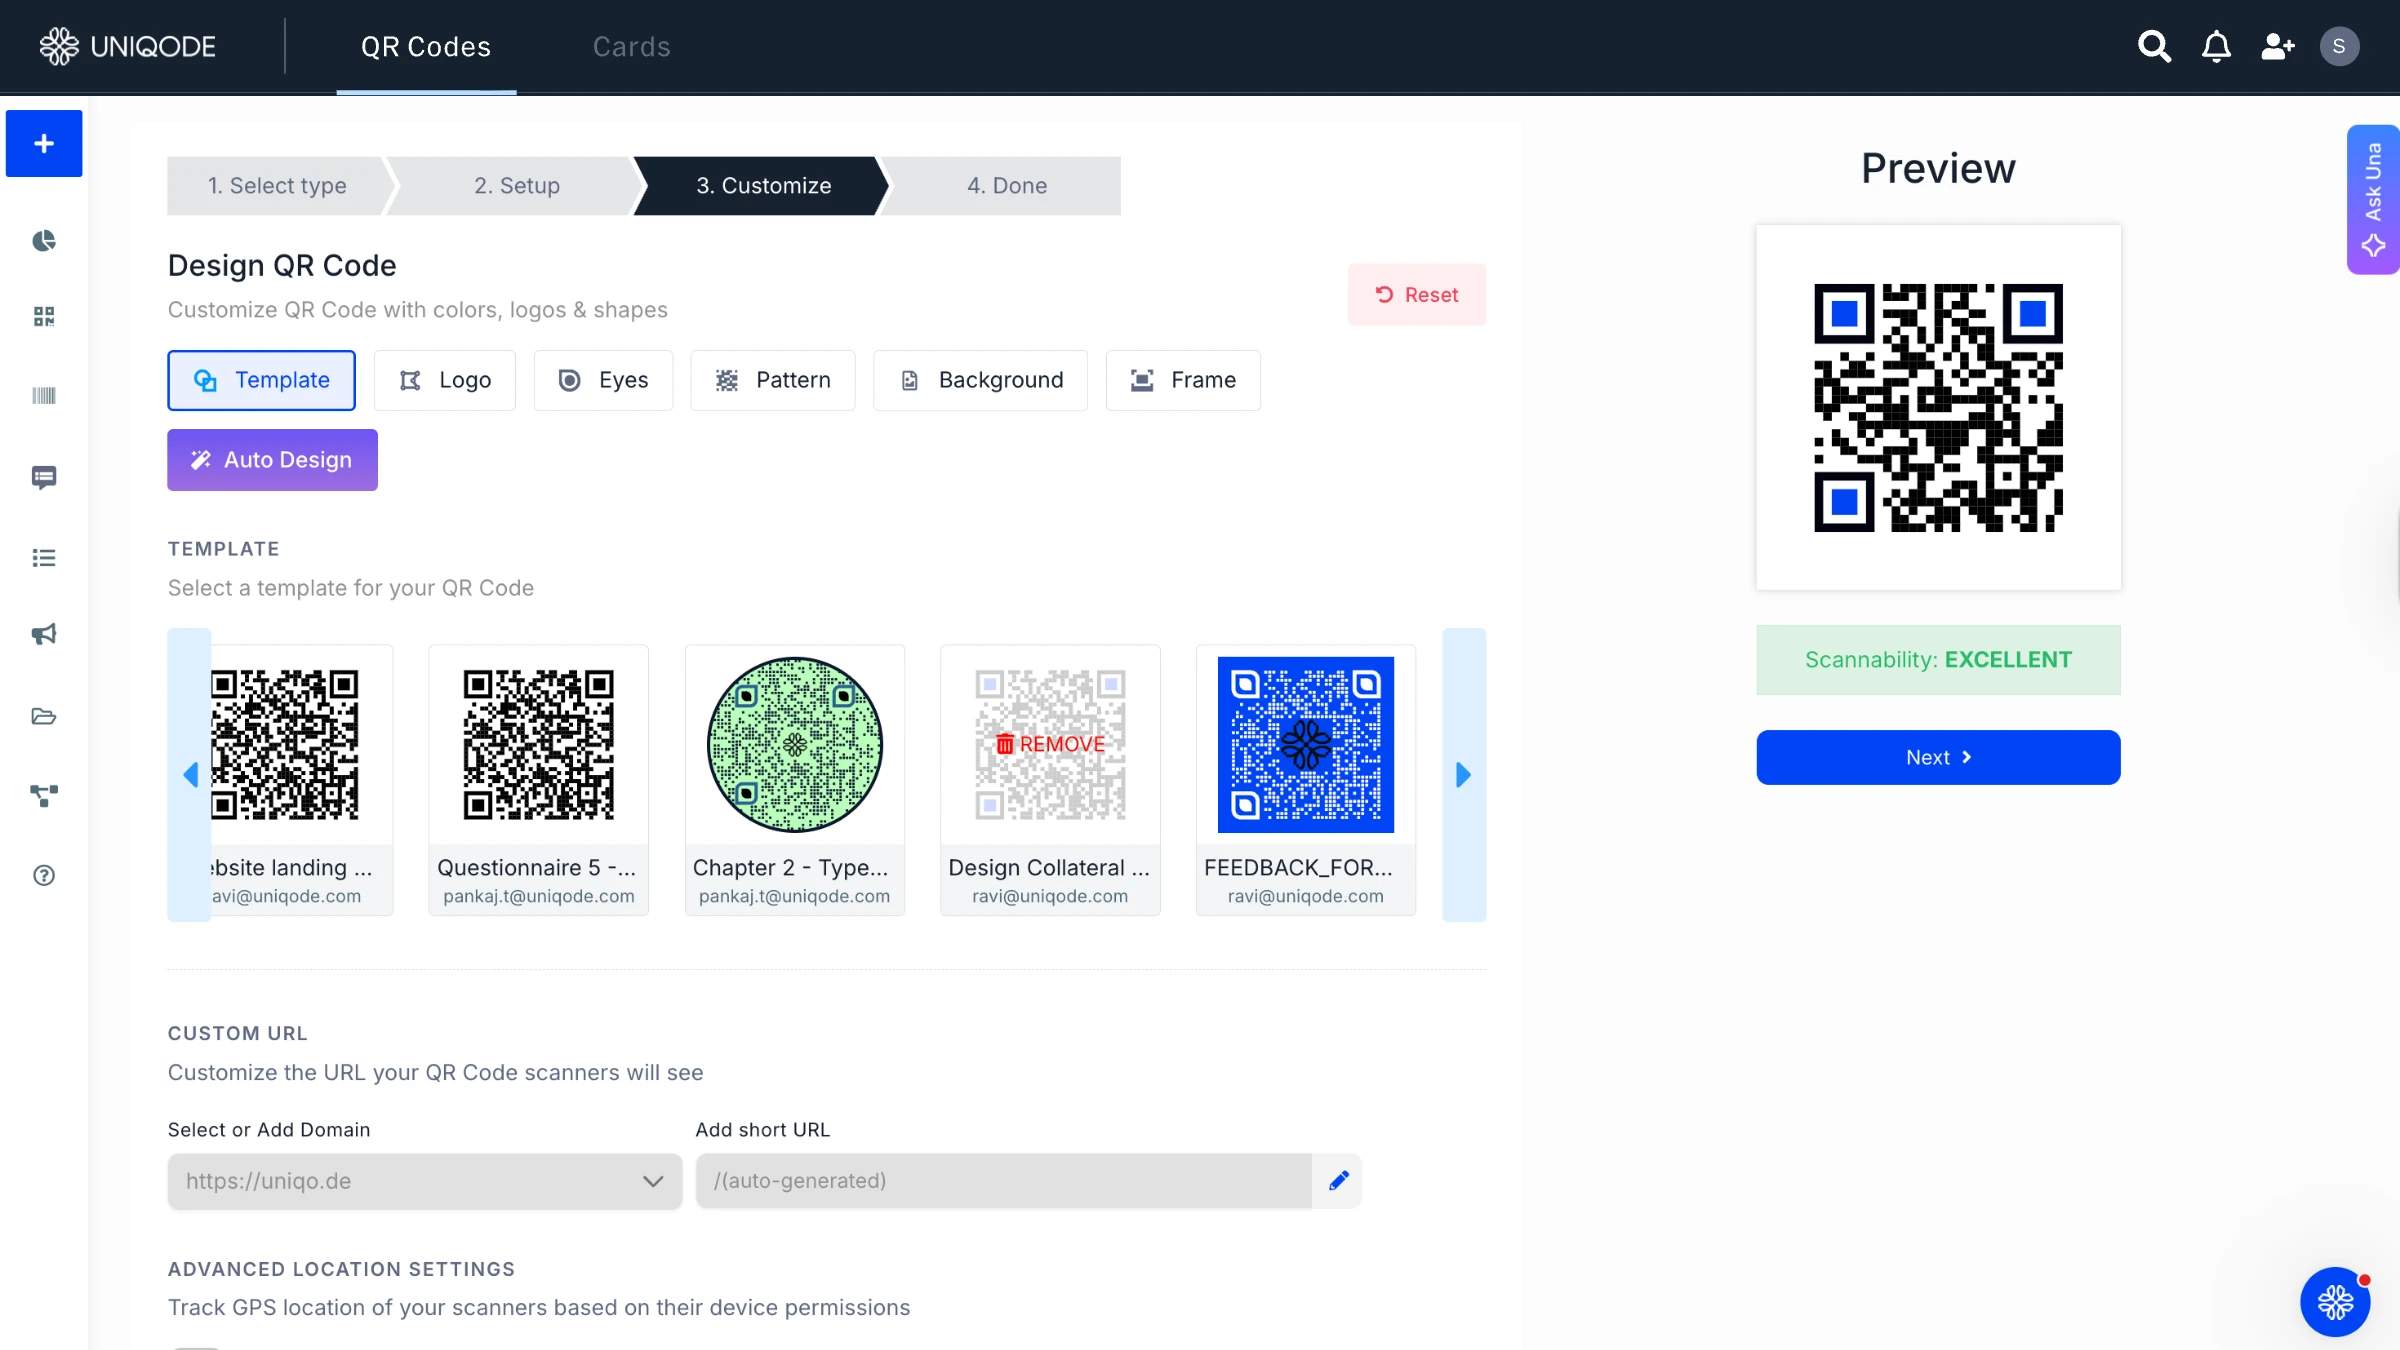
Step 5: Save and download. Name the code, save it, and download it as PNG, SVG, JPEG, PDF, or EPS depending on where it's headed next, on-screen or printed.
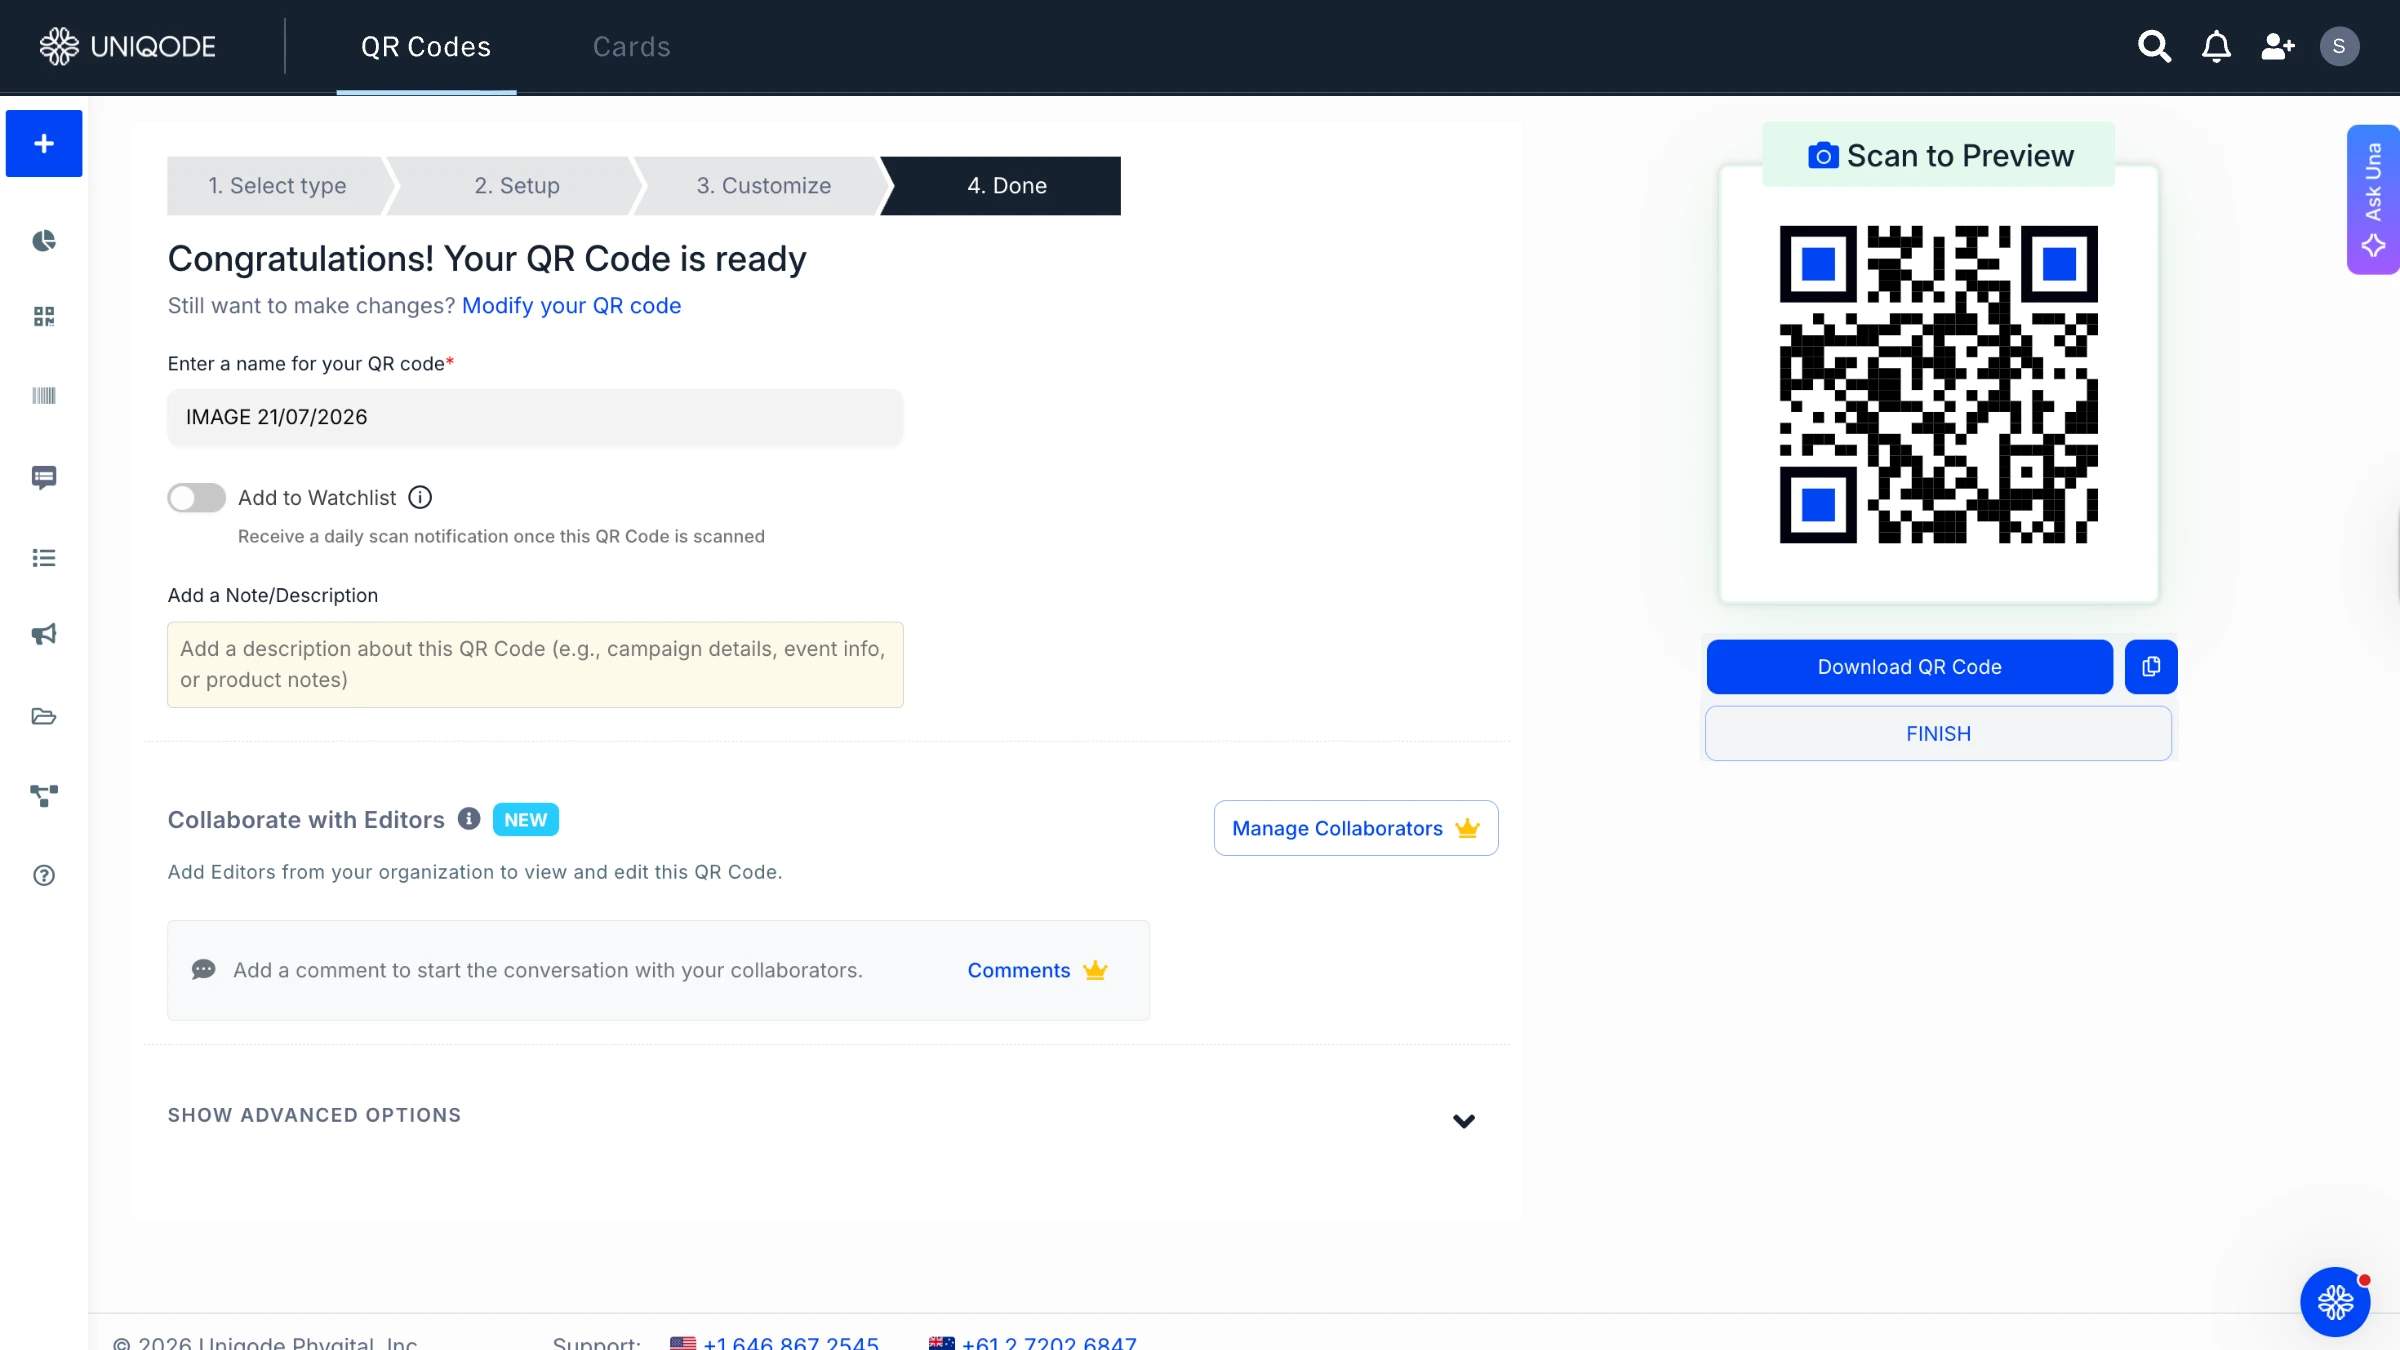
Add the image to your slide as you would with any other. Should the destination change in the future, you only need to update it once in the dashboard, and every instance will be corrected automatically; there is no need to re-export. However, before you place the image, keep in mind that its size and placement can affect whether it gets scanned successfully.
QR Code slide design tips
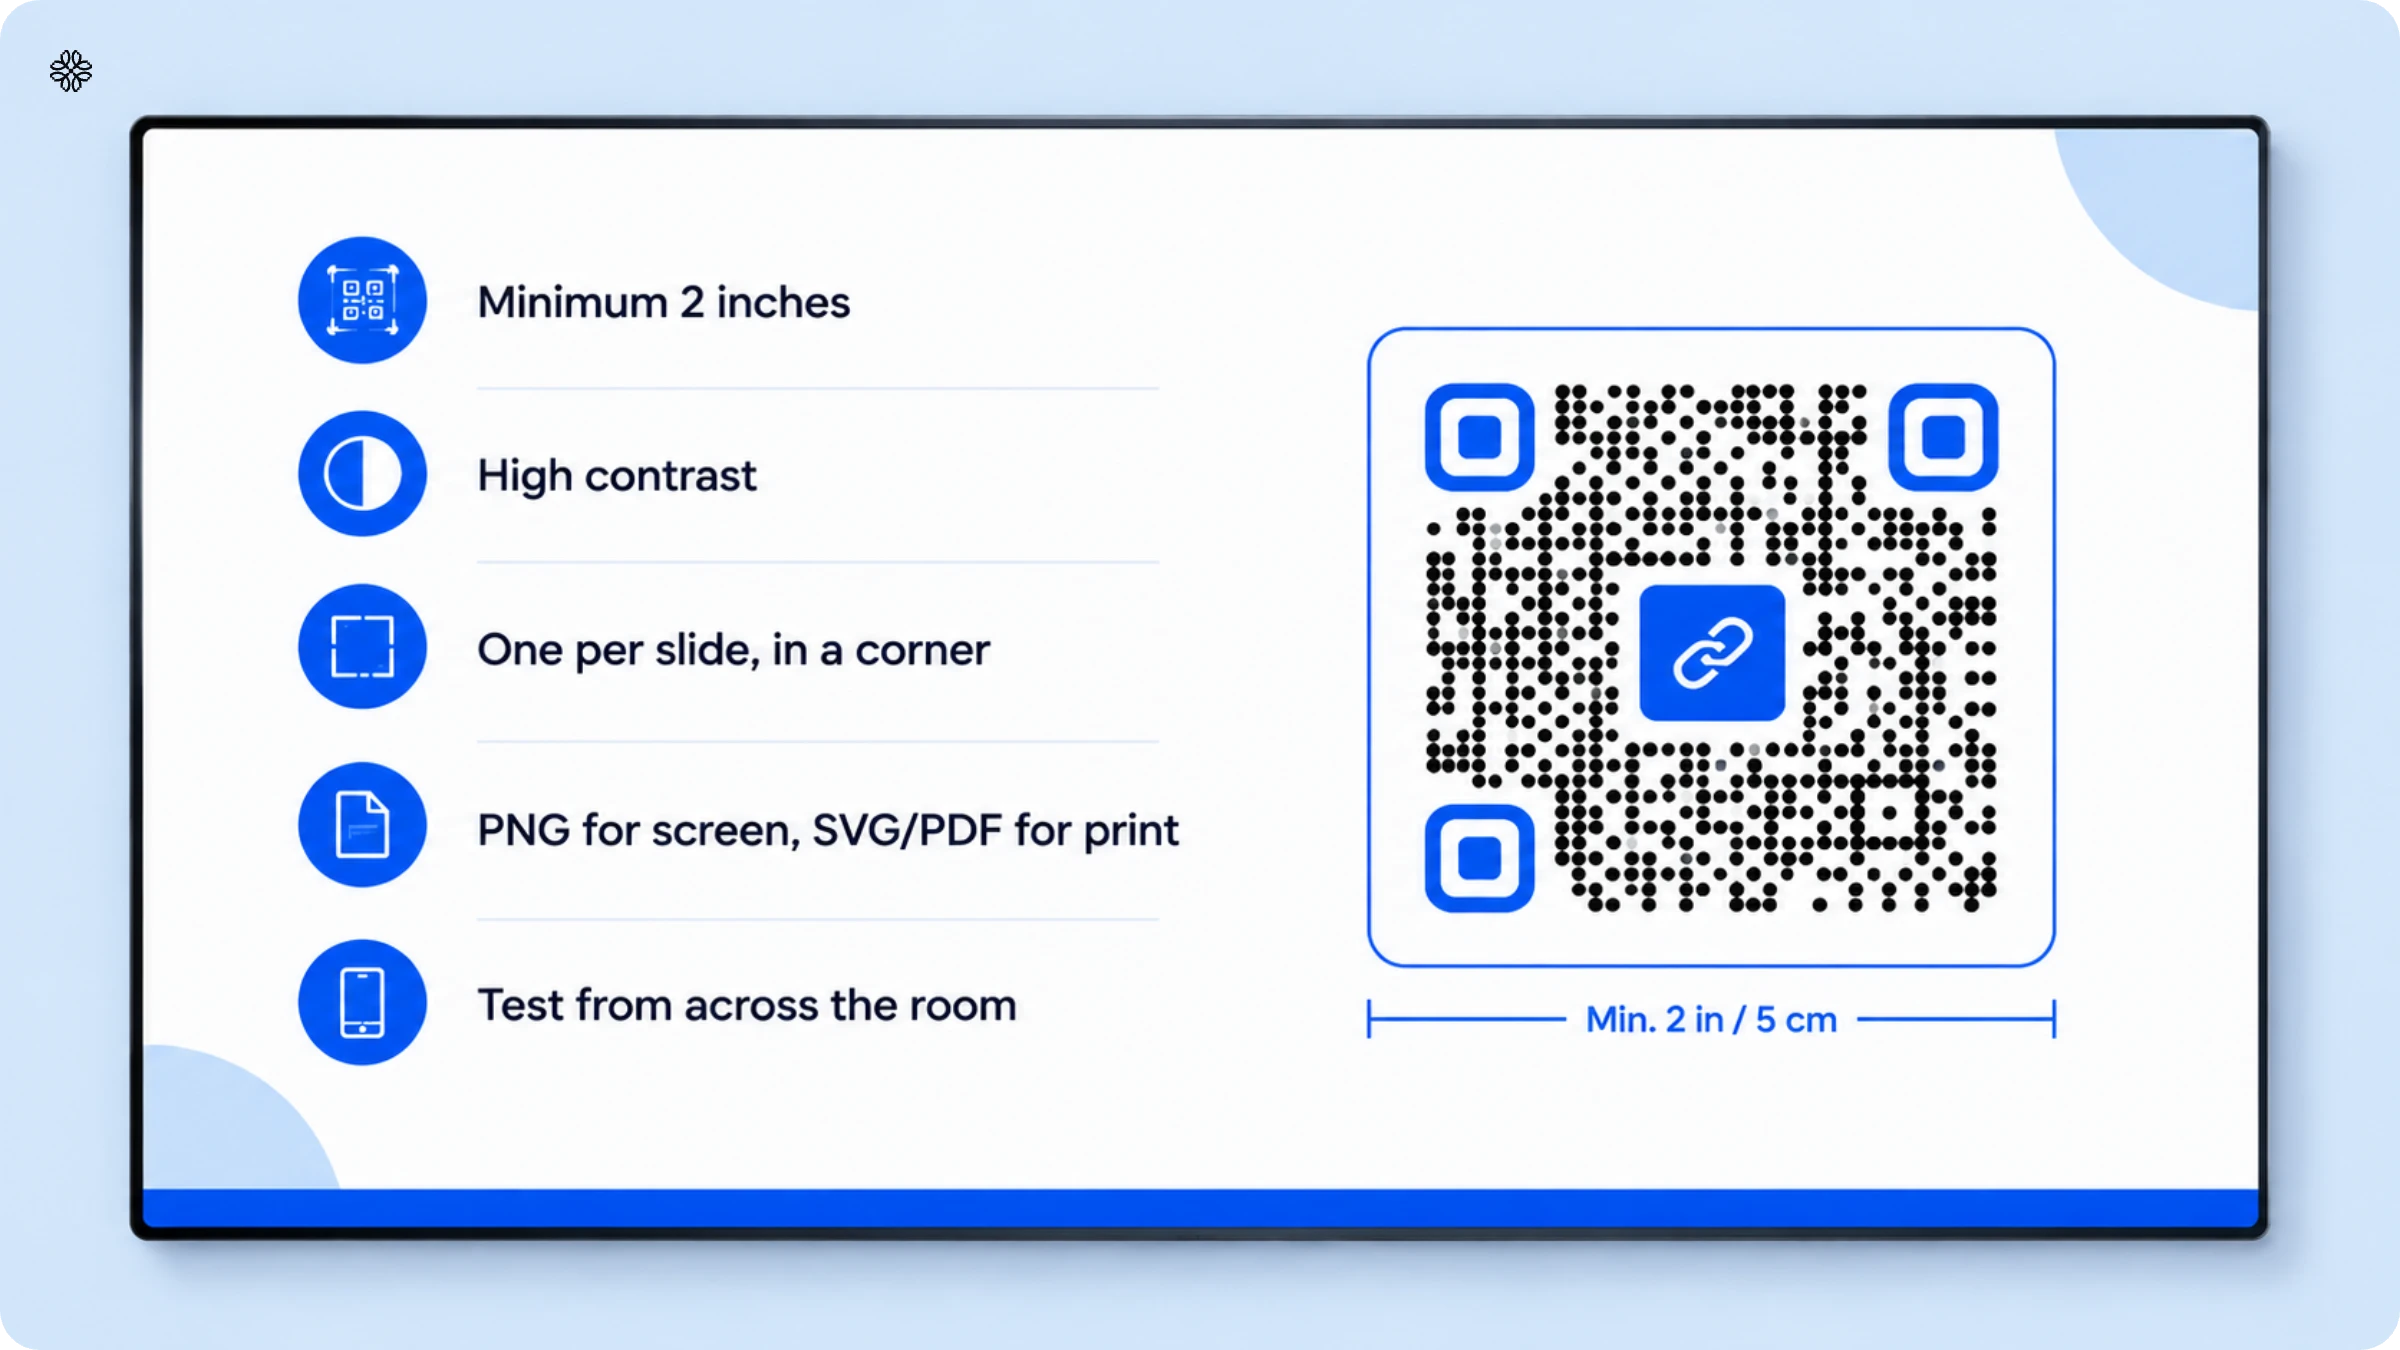
Size, contrast, and placement determine whether a technically correct QR Code is actually scanned. If your code is too tiny, blends into the background, or is squeezed in beside text, it will likely be ignored, no matter how flawless the link behind it is.
Aim for a QR Code that is at least 2 inches (about 5 centimeters) square on your slide. This size works well for most conference rooms. If you are presenting in a larger venue, remember to scale up; the further your audience sits from the screen, the bigger your code should be.
When it comes to QR Codes, contrast is king. Stick to black on white, or any truly high-contrast combination, for the most reliable scans. Light colors, gradients, or codes placed over busy images are best avoided. Remember, your phone camera is looking for clear patterns of light and dark, not your brand colors.
Placement is simple: use only one QR Code per slide, and tuck it neatly into a corner with plenty of white space around it. Avoid centering it over text or letting it touch the edge of your slide. Both can lead to cropping issues if the projector or screen size does not match the dimensions of your original file.
Choose your file format based on how you plan to use the QR Code. For slides and on-screen displays, export as PNG, as this format works smoothly across all versions of Slides. For large print handouts, go with SVG, PDF, or EPS, since these vector formats scale up without losing clarity. If your handout is a document, a PDF QR Code linking to a hosted file works just as well.
Test the slide on a second device before you trust any of it. Pull it up on a laptop or a second phone, project it if you can, and scan it from across the room, not from six inches away at your desk.
Fixing common QR Code problems in Google Slides
If you have ever struggled with a QR Code in your deck refusing to scan, you are not alone. The culprit is almost always one of four things: a dead link, low contrast, a code that is too small, or a code that nobody tested before the big moment.
A dead or broken destination link can sneak in when the Google Slides sharing link changes, the target page moves, or the linked file gets deleted. Make it a habit to check the destination every time you reuse a deck, not just when you first create the code.
Low-contrast scan failures usually come down to design choices: a light color pairing or a busy background behind the code. If your code scanned perfectly at your desk but refuses to cooperate on the projector, the contrast on the actual screen, not your laptop preview, is almost always to blame.
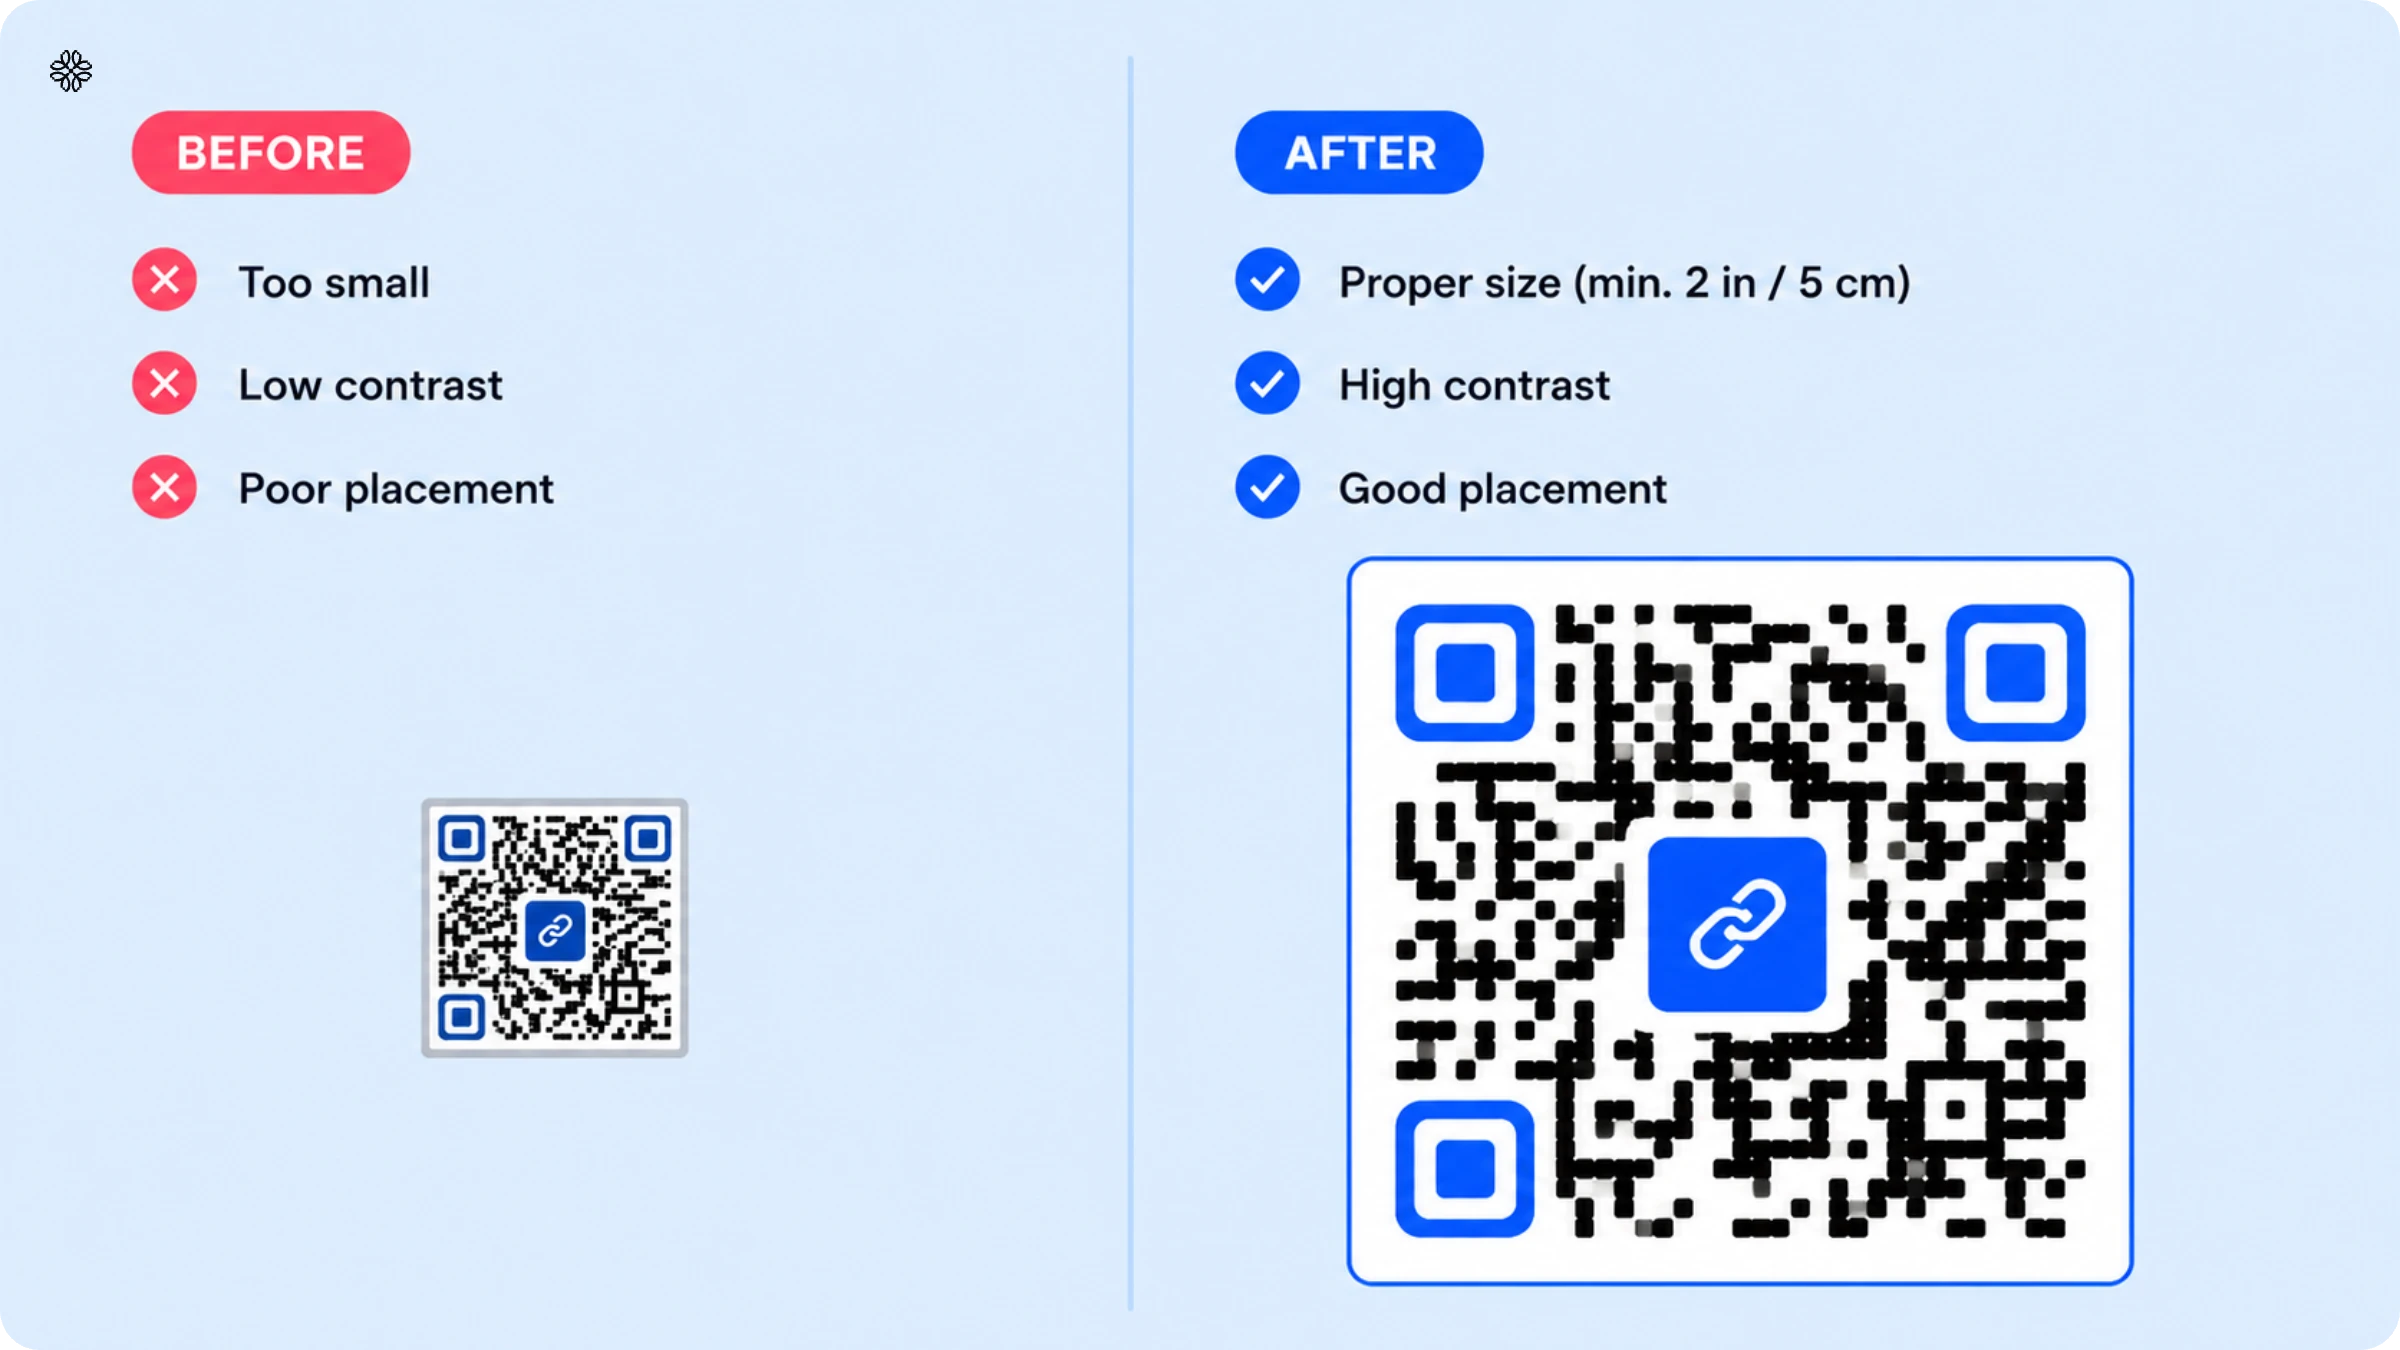
Pixelated or fuzzy codes are almost always the result of resizing an exported image after the fact, instead of generating it at the size you actually need. Export your file at the target display size from the beginning, and you will never have to worry about pixelation again.
Take a moment to stand at the back of the room, or wherever your farthest viewer might sit, and try scanning the code from there on the actual screen. A laptop preview six inches from your face will not tell you anything about what someone in row twenty will experience.
Benefits of using a dynamic QR Code for Google Slides
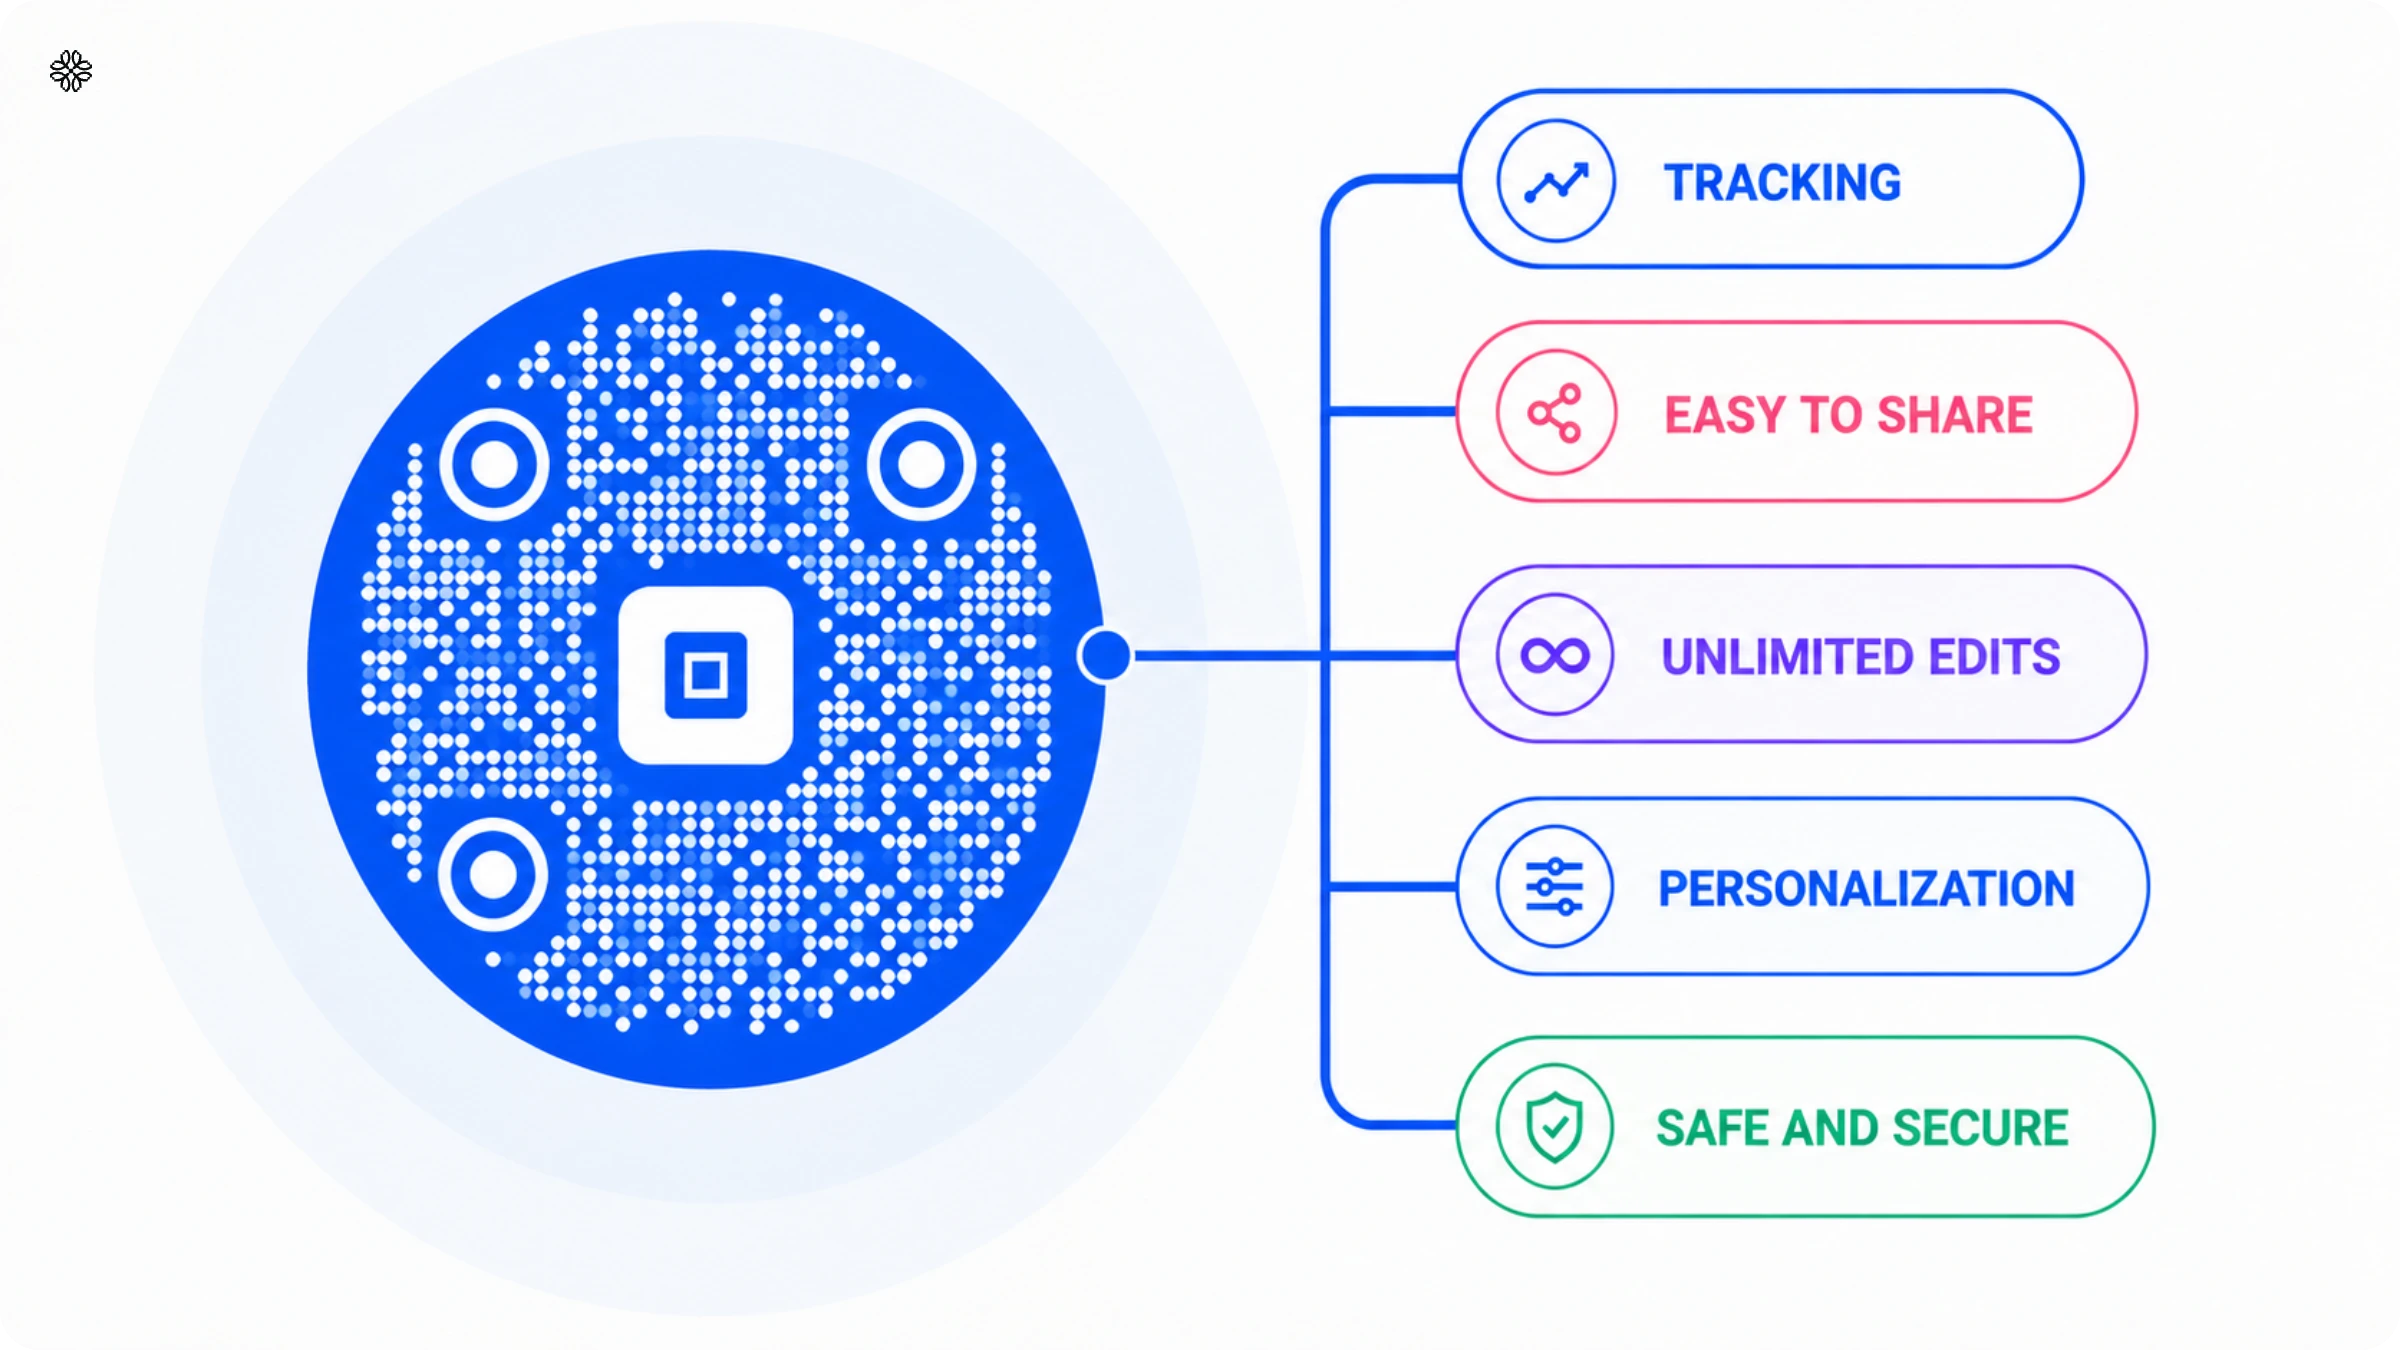
Setting up a dynamic QR Code for Google Slides may take a little extra time, but it pays off in four key ways. You get easier sharing, the flexibility to edit your destination, access to real engagement data, and the peace of mind that comes with built-in security.
#1 One scan replaces a file transfer
With a simple scan, your entire deck appears instantly on a viewer’s phone. There is no need to worry about email attachments failing due to size limits, or searching endlessly through shared drives for the correct folder. Attendees can access your slides before they even leave their seats, rather than reaching out days later for a working link. This convenience works both ways: place the code on a handout or badge, and anyone who scans it will always find the most up-to-date version of your deck, not an outdated file buried in their downloads.
#2 Edit the destination without reprinting
Redirect the code to a new URL any time after it’s already printed or embedded, without touching the image on the slide. If you’ve ever forked a deck for multiple client pitches over the course of a year, you know the hassle of keeping each version up to date. With this approach, every fork can always point to the latest content, no matter how many times you rename the target file, move it to a new folder, or swap out the linked landing page. The code on every existing slide remains functional, because it never changes; only the destination does. This is especially valuable for those decks that tend to be forgotten: think of a partner enablement deck tucked away in a shared drive, or a conference talk that resurfaces as a webinar months later.
#3 Tracking answers more than a scan count
With Uniqode, every scan tells a story. The platform captures not just the time and device used, but also the approximate location if GPS analytics are enabled. You can easily export these logs as CSV or PDF files for a closer look. After your presentation, take a moment to review the data and see when most scans happened. Was it right at the start, or did interest build as you went along? By comparing these trends across different sessions, you gain a deeper understanding of audience engagement, moving beyond simple scan counts. And if you connect these logs to Google Analytics, you unlock even more insights into what your visitors do after scanning.
#4 Security holds up under scrutiny
Uniqode is SOC 2 Type II certified, so a code handed out at a public conference or embedded in an external pitch deck isn't a security exception someone has to explain later. That certification means an independent auditor reviewed how Uniqode handles data over time, not just a one-time snapshot. For a sales team sending a deck to a prospect's IT department, or a conference organizer vetting every vendor tool on the agenda, that answer is already on file instead of something you have to track down under deadline.
More ways to use QR Codes in a Google Slides presentation
A QR Code for Google Slides earns its place well beyond a single link on a single slide. Four use cases appear consistently across the event, sales, and classroom decks.
Networking events and scannable slides are a perfect match. Add a Digital Business Card QR Code to your closing slide at a conference, and watch as attendees save your contact details directly to their phones, no more misplaced business cards or forgotten connections.
When it comes to product promotion, nothing beats a direct route to your landing page. Place a QR Code on your product slide during a pitch, and your audience lands precisely where you want them.
In the classroom, QR Codes make sharing resources effortless. Whether it’s a quiz, a reading, or a helpful link, students can access materials instantly, no need to repeat a long URL. For teachers building recurring lesson decks, this approach is a real time-saver.
Collecting feedback after an event or pitch is essential, but it often falls flat. By adding a form QR Code to your final slide, you transform the usual "any questions?" into real, trackable survey responses.
Frequently Asked Questions
- How do I create a QR Code for a presentation?
You can create a QR Code for a presentation in 5 easy steps:
- Sign up for the Uniqode QR Code generator free trial.
- Go to your dashboard and click on ‘+Create QR Code.’
- Choose ‘Website’ from the list of campaign types and paste your Google Slides URL.
- Customize your QR Code per your brand’s design aesthetics.
- Test and download the QR Code.
- Can I track who scans my Google Slides QR code?
Yes, but only with dynamic QR codes—static QR codes from Google add-ons provide zero tracking capabilities. Dynamic QR codes from platforms like Uniqode provide comprehensive analytics including total scan count, geographic location data of scanners, device types (iOS vs Android), and time-stamped scan activity, allowing presenters to measure audience engagement across webinars, workshops, and conferences.
- Do people need a Google account to access Google Slides through a QR code?
When you share Google Slides via QR code with public viewing permissions enabled, viewers can scan, access, download, and share the presentation without requiring a Google account, sign-up, or login. This eliminates the logistical challenge of adding hundreds of people individually through the 'add people and groups' option, making it ideal for large-scale events like webinars and workshops where audience size exceeds 100+ participants.
- Does the QR Code expire?
Static codes never expire on their own, but they break the moment the destination they point to moves or gets deleted. Dynamic codes stay live as long as the generating account and plan stay active, and the code image itself carries no built-in expiration date either way. A dynamic QR Code adds one advantage here: if the destination does need to change, you fix it from the dashboard instead of discovering a dead code mid-presentation.
- What is the optimal size for a QR Code in a presentation?
At least 2 inches, about 5 centimeters, square on the rendered slide for a typical conference-room screen, sized up further for larger venues. The farther the back row sits from the screen, the bigger the code needs to be. Test the actual size from the actual viewing distance before you trust it on presentation day.