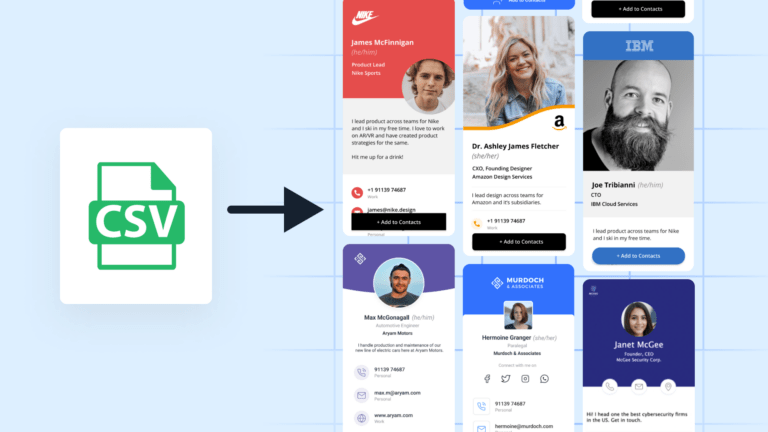
Your team is growing—congratulations 🎊
But with new team members joining comes the need for new business cards. While preparing a spreadsheet with rows of contact details, reality sets in. Transferring all the data and printing paper business cards is a headache!
Is there a simple way to create business cards for a large team? Can you manage dozens of contacts from a centralized dashboard?
Yes. vCards are a more straightforward way to counter the clunkiness of CSV. You can quickly convert CSV files to VCF format and streamline your latest recruits’ onboarding process.
vCards offer superior security and functionality compared to CSV files. They support encryption, password protection, and multi-factor authentication. vCards also streamline contact management, and integration with CRMs.
And if you pick the right platform, you can do way more than just whip up basic e-contact cards.
We’ll show you how to easily convert CSV files to vCards, manage contacts, and a whole lot more with Uniqode (a robust platform that also acts as a VCF converter) in this article.
- Difference CSV and vCard
- How to convert CSV to vCard
- Alternate ways to convert CSV to vCard
- Frequently asked questions
Difference between CSV and vCard
A CSV (comma-separated values) is a spreadsheet, with each line representing a record (e.g., a contact), and commas separate the values within that record (e.g., name, email, phone number).
A vCard (virtual contact card) is a digital business card that holds information in a structured and easily shareable way. It stores more than contact information (photos, websites, social media profiles, etc.) than CSV.
Here’s how CSV and vCards (VCF files) are distinguishable:
| Property | CSV | vCard |
| Data capacity | Limited (basic text fields) | Rich (website, social media, photos, etc) |
| Stores multiple contacts | ✅ | ✅ |
| Two-way contact sharing | ❌ | ✅ |
| Error-prone during transfer | High (data loss or typos) | Low (pre-formatted structure minimizes errors) |
| Platform compatibility | Limited (may require import tools) | Universal (compatible with mobile devices, Zoom backgrounds, CRMs) |
| Sharing | Requires manual attachment | Easy sharing via QR Code, Apple Wallet, Google Wallets, etc |
| Storage efficiency | Less efficient (stores data in plain text) | More efficient (compact data structure) |
| Customization | Limited | Highly customizable (design, branding, CTA) |
How to convert CSV to vCard
To show you how to convert CSV files into vCards, we’ll be using the Uniqode dashboard, which makes the process quick and secure (along with a host of other benefits):
Step 1: Create a Uniqode account and log-in
Before you create a vCard, create a Uniqode account. After logging in, go to the “Cards” section. On the left sidebar, click “Organization Cards.”

Step 2: Click “Bulk Create”
You will be taken to the next step in the dashboard. Click “Bulk Create” here to create multiple cards in VCF format.

Step 3: Decide the look and feel of your vCards
After you click “Bulk Create,” you can choose a template for your vCard file. This is how all your contacts will look after bulk creation.
You can pick templates that resonate the most with your brand or customize your template.

Step 4: Enter the vCard data
The dashboard will now ask you to upload your employees’ details on a CSV file. Have your CSV file ready, or download the template provided by Uniqode and fill in your employees’ data.

Step 5: Have all necessary details in place
Ensure that your CSV file has the required fields filled. Some necessary fields are prefixes, first names, last names, suffixes, job titles, phone numbers, email IDs, links to social media, and more.
Once it is ready, import your CSV file to the dashboard. You can drag and drop it from your desktop or laptop or upload it.

Step 6: Add a personalized touch to your vCard
Once you upload your CSV file, the dashboard will unfurl downwards, allowing you to customize your VCF file more.
The first option is to pick the primary for your vCard. You can also customize the color of your contact button to match your brand. Further, you can change your icon color to add a personal touch.
📝Note: The options to customize button and icon colors and to change your vCard’s background are only available on our Business plan and above.
Finally, you can also change the background colors of your vCard file. Choose from various colors or upload your image to the background.

In the following sections, you can choose a font for the vCard and select each section’s font size and more. You can also choose a font for the content using the contact button.

Step 7: Set your VCF file up with ease
After customizing your vCard file, click “Next” in the top right corner. The dashboard will take you to the “SET-UP” page. Here, you can use the advanced settings to toggle on or off crucial features such as auto-downloading your vCard and two-way contact sharing.

⚡Pro tip: Do more with your vCards: Manage contacts, target prospects, and measure campaigns on Uniqode

- Manage dozens of contacts with our centralized digital address book for smoother follow-ups with prospects
- Track the GPS and IP location from where a VCF file was scanned to target prospects better
On this page, you can also send the vCards directly to your employees’ respective email IDs. You can also choose the QR design for your card.

Step 8: Finish creating your vCards
Set up these options. Click “Finish” in the top right corner. A pop-up stating that the system will alert you once your vCards are ready.

Alternatively, you will receive an email with your registered email ID notifying you about the cards.

You have successfully converted all the CSV information into vCard in one go!
Now that you have finished the most crucial part, you can customize the VSF further with the company logo and display picture.
Fine-tune your vCard into feature-rich digital business cards
On Uniqode, you can further fine-tune your vCards into feature-rich business cards. Here is how you can make further changes:
Step 1: Get a comprehensive view of your vCards
Click “View Cards” in the email you received from Uniqode. You will be redirected to your Uniqode account, where you will find the cards you created with a default profile picture. Click the card you wish to customize.

📝Note: You can allow roles to your employees, such as Admin, Editor, and Viewer, to control the level of access they have to the Uniqode dashboard. Admins and Editors can make changes to all cards as and when they need to.
Step 2: Customize your vCard
Build your card and customize it as you see fit. Cross-check the dashboard for inaccuracies and correct them.
You can upload your picture, the company’s logo, and more. As you enter all the contact details, you can also see a preview of the card on the right side of the dashboard.

Step 3: Finish setting up your card and share it with prospects
Once you’re done, click ”Finish” in the top right corner. A side panel will appear on the right, helping you preview your card. It also has options for sharing the card through an Apple Wallet, Google Wallet pass, or QR Code, catering to both Mac and Android device users.
Alternate ways to convert CSV to vCard
If you want to convert CSV to vCards using other methods, you can do so via Windows Contacts and Google Contacts:
Converting CSV to vCard with Windows Contacts
Converting a CSV to a VCF file is straightforward with Windows Contacts. Open “Windows Contacts” and navigate to “Import” then “CSV (Comma-Separated Values).”
Select your file and map the data points (name, email, etc.) to the corresponding fields on the vCard file.
Potential challenges while using Windows Contacts
- Windows Contacts might not recognize all the data fields in your CSV file, which can lead to information loss during the conversion.
- Converting a large CSV file with hundreds of contacts can be time-consuming and tedious.
- Windows Contacts does not offer convenient sharing options for your newly created vCards.
Converting CSV to vCard file with Google Contacts
You can convert CSV to VCF format with Google Contacts as well. You will need to head to https://contacts.google.com/ and click the Settings gear icon.
Click on the “Import” button, then “CSV file,” and select your file. Google will map the data for you automatically.
Review, tweak if needed, and hit the “Import” button to convert your contacts.
Potential challenges while using Google Contacts
- With Google Contacts, customization options for vCard creation are limited. You might not be able to control the exact layout or formatting of your vCards.
- Uploading a large CSV file containing sensitive contact information to Google Contacts might raise security concerns for some users.
⚡Pro tip: Generate vCards in bulk and streamline your process with Uniqode. It’s a simple, quick, and secure solution for mid-to-large-sized businesses.

- Convert all your data into individual VCF files in a few seconds.
- Share your e-business cards via Apple Wallet or Google Wallet.
- Upload offers highly customizable templates to personalize your vCards per your brand guidelines.
- Transfer leads to your existing CRM and nurture them further.
- Ensure compliance with GDPR, HIPAA, and SOC® 2 Type 1 and Type 2 standards, conduct regular security penetration testing, detect phishing URLs, and safeguard against data interference.
Embrace vCards with Uniqode and go beyond CSV files
Several free online tools can convert CSV to vCards, but they lack the robust features of a comprehensive solution.
Uniqode provides a secure platform that goes beyond simple CSV conversion. You can:
- Customize vCards tailored to your specific needs.
- Easily generate a batch of personalized vCards in one go with bulk creation.
- White label your dashboard and align it with your brand identity.
In contrast, other tools, such as FileConverts and vCardWizard, only offer basic conversion functionalities. They lack the extensive customization options and easy sharing features that Uniqode provides. Additionally, they are not as efficient in handling bulk VCF file creation.
Ready to ditch CSV files and go digital? Create a free digital business card on Uniqode today and see how VCF files can transform your contact management!

Frequently asked questions
1. What is the best way to convert CSV to vCard?
There are several ways to convert CSV files to vCard, but the “best” method depends on your needs. Here’s a breakdown:
- Free online tools: Several free online tools can handle basic conversions. However, they may have limitations like file size restrictions and lack of customization options.
- Windows Contacts and Google Contacts: Both offer built-in import/export features. They’re convenient for small conversions but lack bulk processing capabilities.
- Dedicated conversion software: Software, such as Uniqode, offers advanced features such as bulk conversion, data mapping customization, and error handling. This is ideal for large datasets or complex data structures.
Alternatively, you can give Uniqode a go. Login to your Uniqode account, navigate to “Bulk Create” and add your CSV file to the dashboard. Choose a template and the dashboard will automatically create multiple vCards in one go.
2. Can I convert a CSV file to vCard for free?
Yes, there are free online tools that can convert CSV to vCard. However, be aware of potential limitations like:
- File size restrictions: Free tools might limit the size of the CSV file you can convert.
- Limited features: Free tools may not offer advanced features such as bulk conversion or data mapping customization.
- Security concerns: When using free online tools, be cautious about uploading sensitive data such as contact information.
3. How do I map the data points in my CSV file to the vCard fields?
Data mapping refers to matching the information in your CSV file (e.g., “name” column) to the corresponding vCard fields (e.g., “FN” field for full name). Most conversion methods offer a data mapping step where you can manually assign each data point to the correct vCard field.
4. Is it safe to convert a CSV file containing contact information?
Yes, converting a CSV file containing contact information can be safe, but only if you choose a secure platform. Here’s what to look for in a secure platform:
- Encryption: Look for platforms that encrypt your data in transit (during upload and download) and at rest (when stored on their servers).
- User authentication: Two-factor authentication adds an extra layer of security to ensure that only authorized users can access your data.
- Privacy policy: Review the platform’s privacy policy to understand their data handling practices and ensure they align with your expectations.
Sukanya is a Content Marketer at Uniqode and a former journalist who fuses newsroom curiosity with SEO-savvy storytelling to help brands grow online. She’s on a mission to demystify digital business cards, digging deep into data, trends, and user behavior to spotlight how they transform how we network and generate leads. Her content doesn’t just inform—it equips. Outside the digital realm, she’s either rescuing animals, getting lost in a plot twist, whipping up kitchen experiments, or chasing stories worth telling.


