How To Integrate Uniqode with Microsoft Entra ID (Azure Active Directory)

Automatically create digital business cards for every new hire with a Uniqode-Microsoft Entra ID (Azure Active Directory) integration. Learn how to set up this connection to simplify your onboarding process.
Manually creating e-business cards, complete with details and customizations, for each hire can be time-consuming.
But picture this: For every new member you onboard, your digital business card solution automatically creates a detailed card for them. And all you need to make this happen is to integrate your e-business card solution with Microsoft Entra ID (formerly Azure Active Directory).
Entra ID is a favorite access management tool among companies with a sizeable workforce and an annual revenue of $10-50 million. If you employ this platform to enroll new hires into your digital ecosystem, why not use it to help automate digital business card (e-business card) creation?
Integrating Entra ID with your digital business card solution can help eliminate manual, recurring tasks and ensure your team members are networking-ready as soon as they join.
So, how do you efficiently execute this integration? Keep reading to find out.
6 Ways an Entra ID (Azure AD) integration can benefit your business card workflows
1. Automatically create digital business cards for new team members
Adding a new user account to Microsoft Entra ID triggers Uniqode to create a new digital business card for that user.
Uniqode uses the Entra ID data to instantly craft an e-business card with the new member’s professional and contact details.
🎬 Here’s how it works: Emily is set to join your sales team as its newest member. When HR adds Emily to Entra ID, Uniqode will create a polished digital business card. This card showcases Emily’s role, contact details, and relevant multimedia elements such as URLs and social handles.
2. Maintain data accuracy when a team member leaves your company
When you deactivate a user account on Entra ID, Uniqode automatically archives that user’s digital business card.
The user will no longer be able to use their company-issued card for future professional interactions. This procedure aligns with many companies’ security protocols for ensuring an organized record.
🎬 Here’s how it works: Michael, one of your real estate agents, has notified you about their resignation. You begin the offboarding process by deactivating Michael’s account on Entra ID. The instant this deactivation occurs, Uniqode automatically archives Michael’s digital business card, making it unusable.
Good to know: Auto-deactivation capability also prevents unauthorized card use. For instance, you can stop dishonest ex-team members from exploiting their previous company cards to conduct fraudulent activities.
3. Tailor your digital business card’s design according to each team’s preferences
You can create pre-customized cards based on unique team preferences with a Uniqode-Entra ID integration. A set of e-business cards for one team can feature distinct colors and a different layout.
🎬 Here’s how it works: As a customer-facing department, your sales team’s e-business cards must reflect your company’s visual identity. But since marketing is not always on the front lines with customers, they can have creative freedom over their card’s design. Regardless of preferences, each team can preset their card’s visual customizations.
4. Stay on top of data security and compliance
To ensure sensitive team member information remains secure and compliant with organizational policies, only designated administrators can initiate the Entra ID-Uniqode integration.
🎬 Here’s how it works: You assigned Tom as the admin for your legal firm’s corporate law division. Now, it will be up to Tom to initiate an Entra ID-Uniqode integration for this department. A single individual conducts every activity involved in the integration—from initiating the API to configuring card settings.
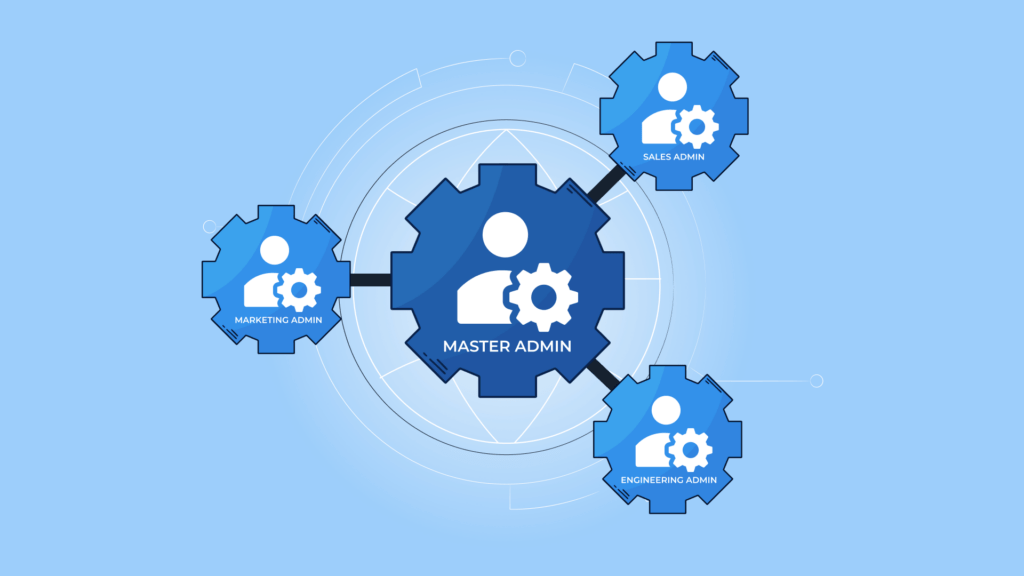
Good to know: Having admin privileges to a team in your company’s Uniqode account puts you in charge of conducting an Entra ID integration only for that team. You cannot oversee integrations for other teams unless you hold master admin status. A master admin can initiate all team integrations.
5. Automate card creation based on specific domains in Entra ID
You can smoothen the onboarding process by automatically creating e-business cards for employees belonging to a specific domain in Entra ID. This ensures a standardized card representation for all members within that domain.
🎬 Here’s how it works: As standard practice, each department in your company uses a unique Entra ID domain. Marketing has @marketing.yourcompany.com, and sales has @sales.yourcompany.com. Upon integration, each new hire in these departments instantly gets an e-business card reflecting the details specific to their assigned domain.
6. Automate card creation based on specific Entra ID “groups”
A “group” in Entra ID is a collection of user accounts organized by specific criteria. These criteria can be department affiliation, device usage, and project roles. You can automate digital business card creation based on your company’s Entra ID groups.
🎬 Here’s how it works: Three project teams work within your IT department. After a successful Entra ID integration, Uniqode will identify and onboard new members from these three project teams. It automatically creates a digital business card for each member based on their group (project team) details on Entra ID.
How to integrate your digital business card solution to Microsoft Entra ID (Azure Active Directory)
Note: We will use Uniqode’s digital business card solution for this demonstration. You can access this capability by opting for a BUSINESS+ plan.
The integration process has five legs:
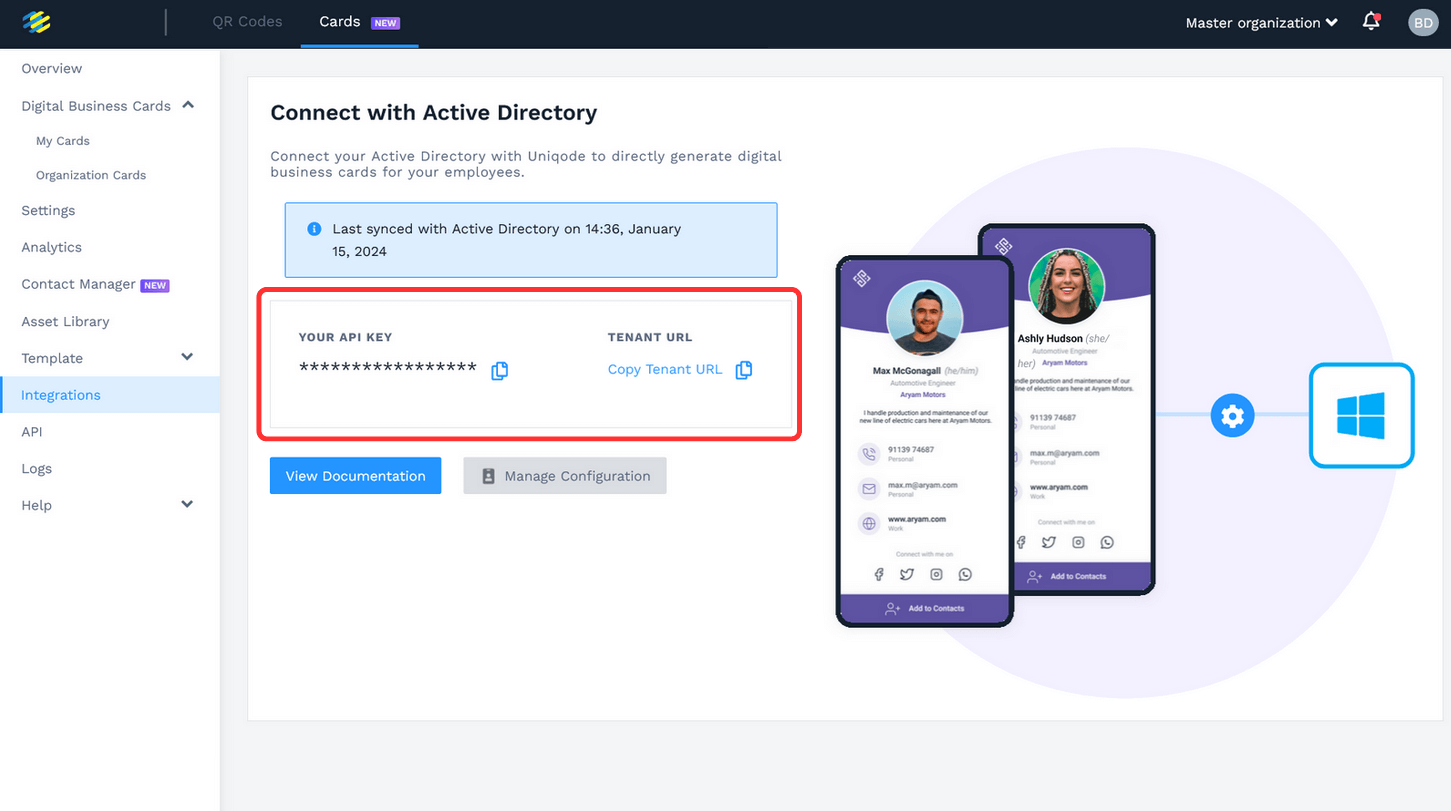
Step 1: Get your Uniqode account’s API Key and SCIM URL
These details are required to establish the connection between Uniqode and Entra ID.
Log in to your Uniqode account.
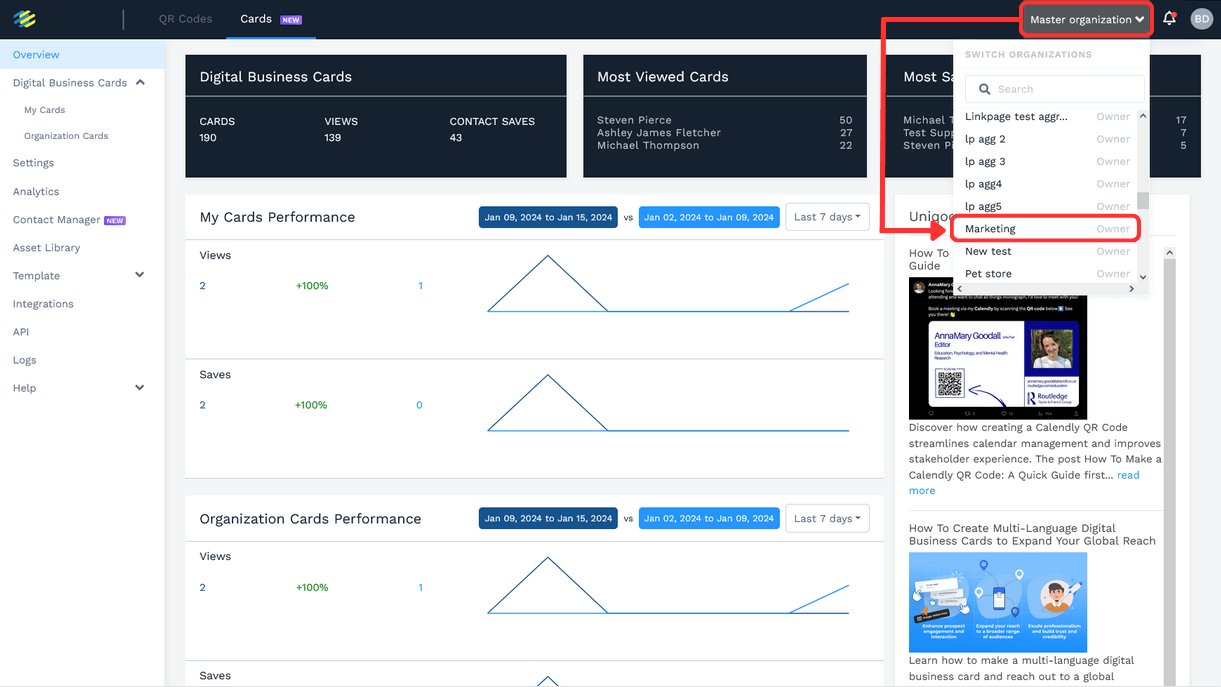
Note: If you’re the account owner or super admin with multiple organizations, select the correct organization from the top-right menu (near the bell icon). If you’re an admin of another organization, you can only integrate Entra ID with that specific organization.
Go to Integrations → Microsoft Entra ID.
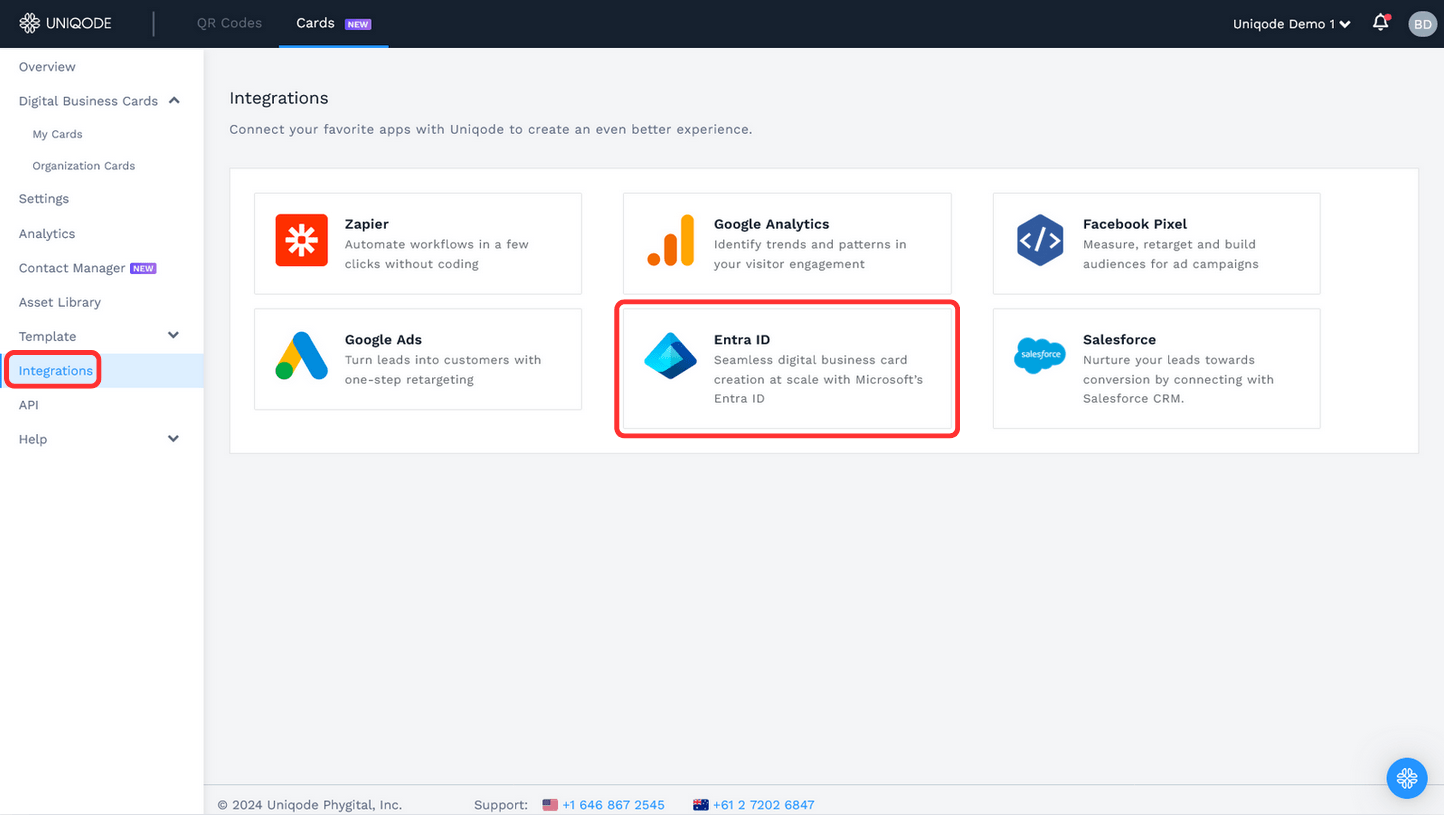
Copy your API Key and SCIM URL (also referred to as Tenant URL).
Step 2: Create a Uniqode application in Microsoft Entra ID
Now, create a custom app in Entra ID for the integration:
- Sign in to your Microsoft Entra ID account.
- Navigate to Enterprise applications.
- Click + New application under the “All applications” tab.
- Select + Create your own application.
- Enter the app name.
- Select Integrate any other application you don’t find in the gallery (Non-gallery).
- Click Create.
Note: You can only create one enterprise application for each organization in your Uniqode account. If your account has multiple organizations, simply replicate the above process for each one.
Step 3: Configure Entra ID to integrate with Uniqode
Once the app is created, configure it with your Uniqode details:
- In your Entra ID app, go to Provisioning under the Manage section.
- Click Get started.
- Under Provisioning Mode, select Automatic.
- Paste the SCIM URL in the Tenant URL field.
- Paste your API Key in the Secret Token field.
- Click Test Connection and wait for a success message.
- Once verified, click Save (top-left corner).
See it in action HERE.
You’re done with the primary integration process. The next stages involve configuring additional settings on Uniqode’s dashboard and performing a final test to ensure the integration’s success.
Step 4: Create and configure your card template in Uniqode
Now set up how your employees’ cards should look and behave:
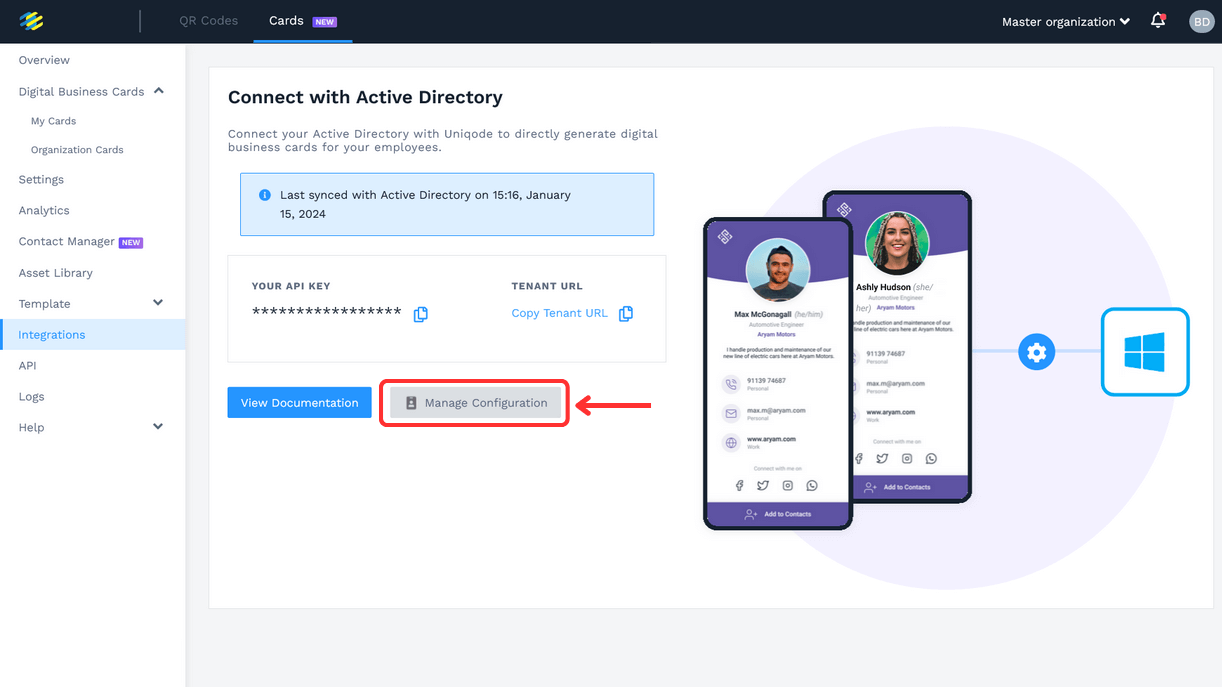
1. Go back to Uniqode’s dashboard
2. Navigate to Integrations → Microsoft Entra ID → Manage Configuration.
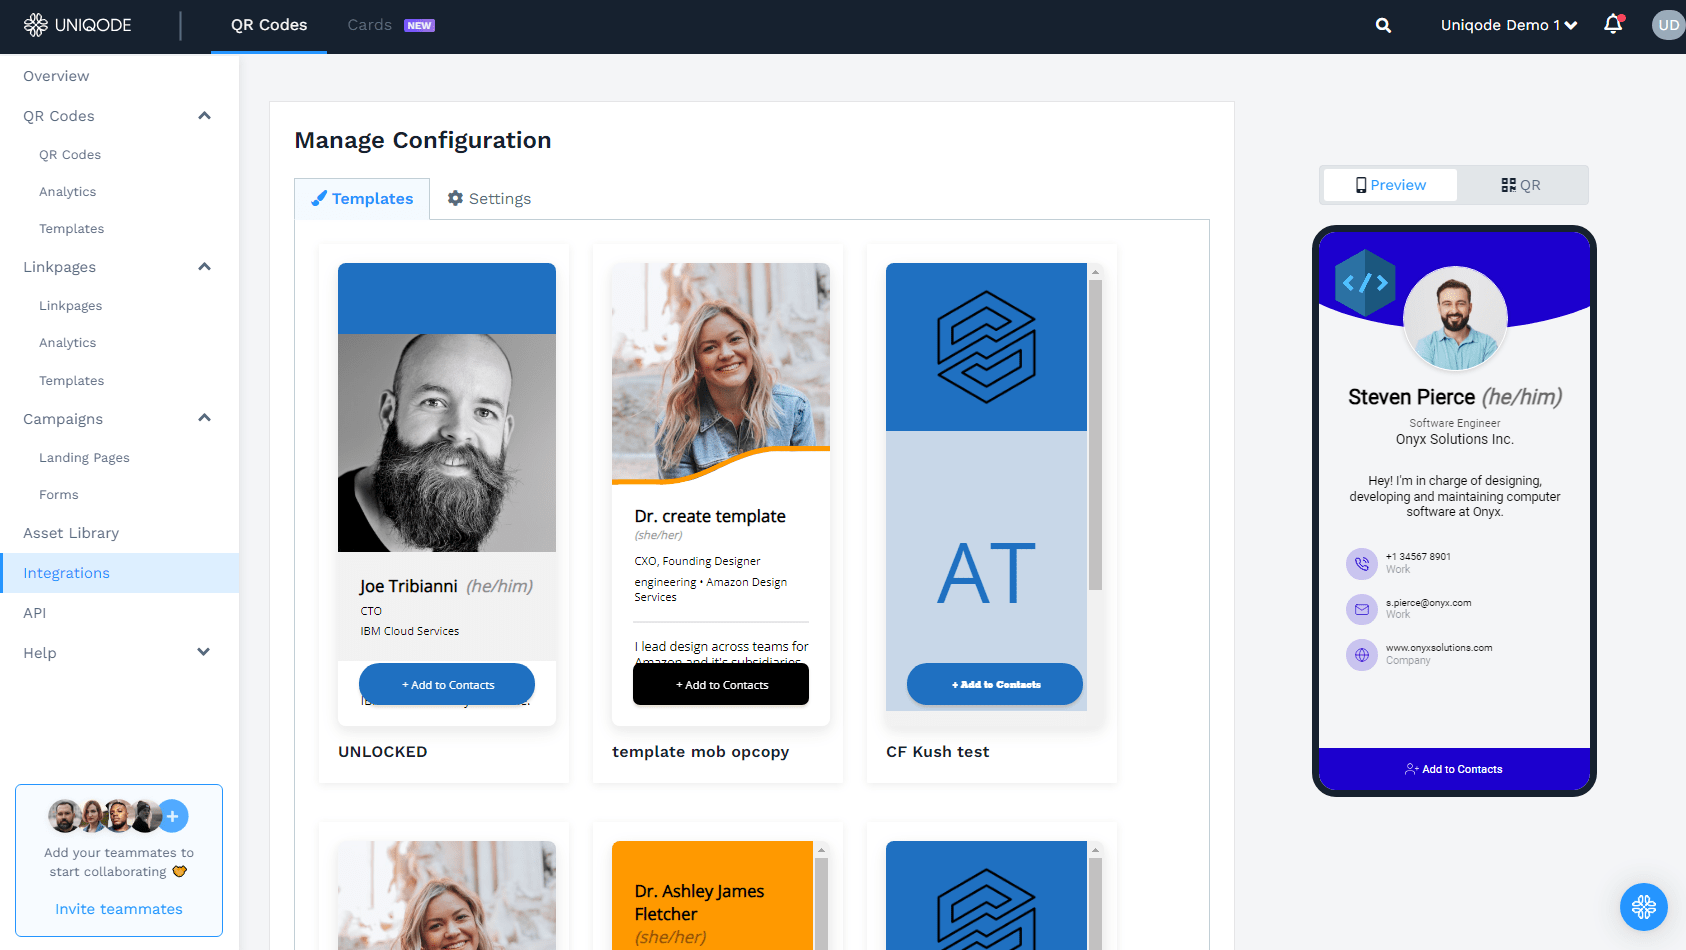
3. Under the Templates tab, select the template you want to assign for employee cards.
4. Switch to the Settings tab and configure multiple features
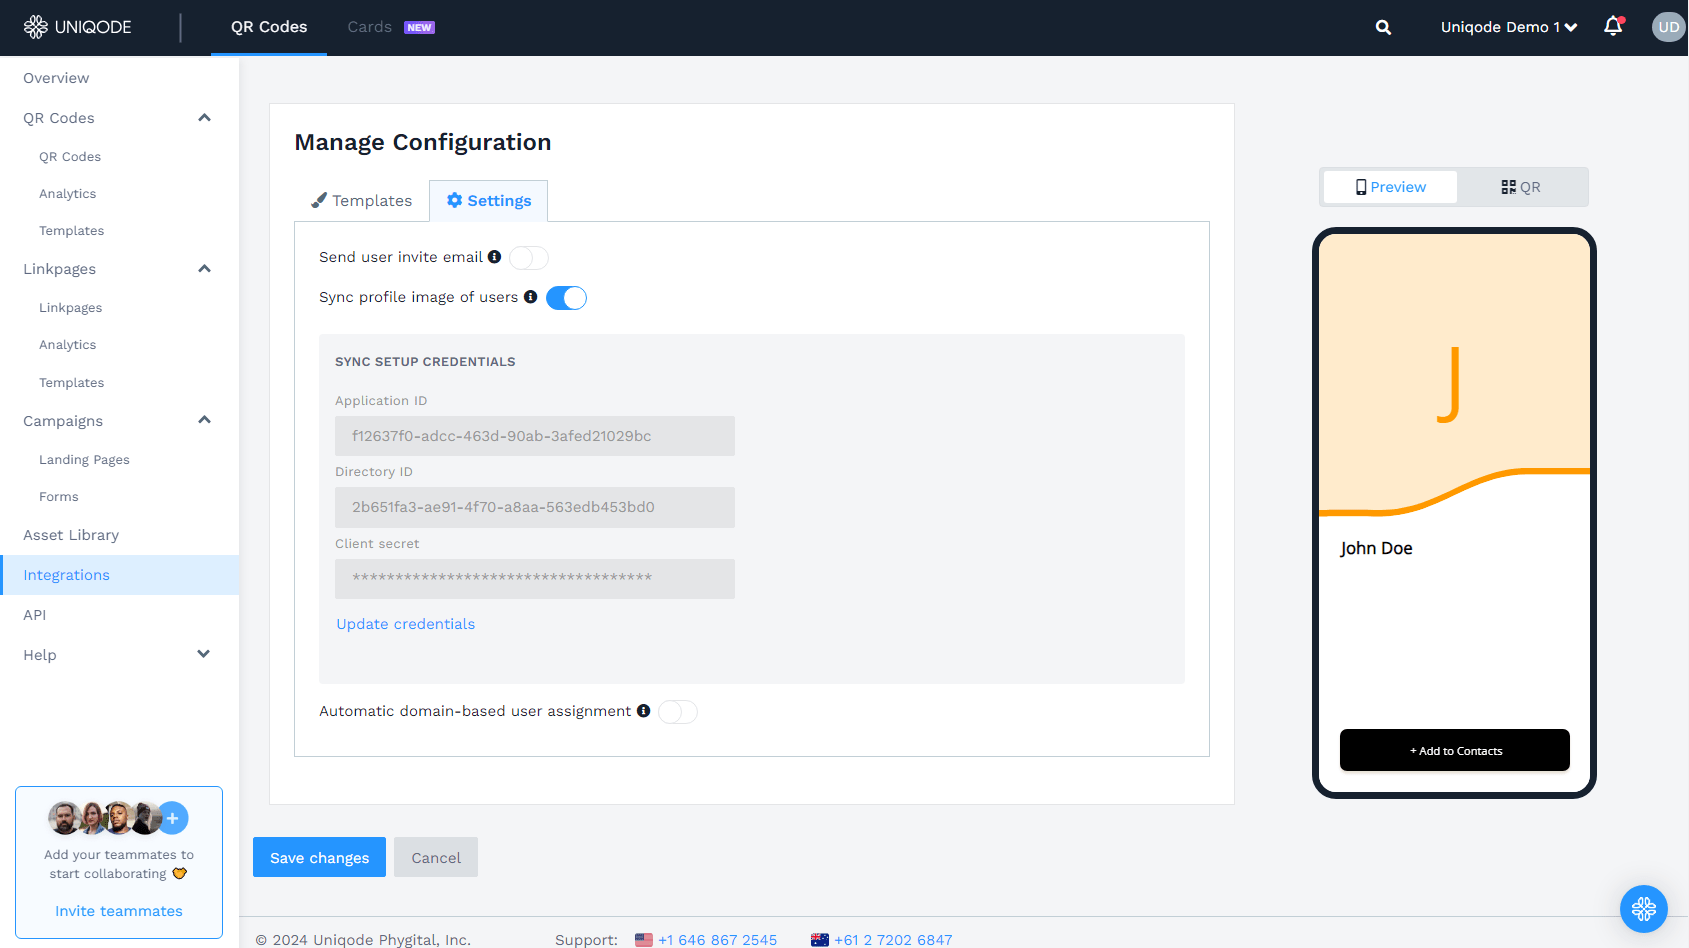
These settings include:
#1 Send user invite email: Enable this option to automatically send an invitation and password reset link to new users via email. This simplifies onboarding by allowing them to join your organization and set their Uniqode password conveniently.
#2 Automatic domain-based user assignment: Enable to automatically assign users to their respective organization based on their domain. This feature can be enabled/disabled only by the organization’s owner or the admin of the master organization (super admin).
#3 Sync profile image of users: Enable to automatically import the newly onboarded users’ profile picture from Azure Active Directory to their cards. To obtain the credentials:
- Sign in to your Azure Active Directory account. Then go to Microsoft Entra ID → App registrations → Uniqode.
- Copy the Application (client) ID and Directory (tenant) ID.
- Go to API permissions → + Add a permission → Microsoft Graph → Application permissions → User.Read.All → Add permissions.
- Go to Certificates & secrets → + New client secret. Enter a description (e.g., Uniqode profile picture), set expiry, and click Add.
- Copy the secret Value.
- Return to Uniqode and paste the Application ID, Directory ID, and Client secret into the respective fields.
Note: A few advanced settings such as “Auto-Save Business Cards“, “GPS Location“, and “Two-Way Contact Sharing” are now managed under “Organization Settings.” Enabling/disabling these settings affects all your newly-created cards.
See it in action HERE.
Step 5: Test your Entra ID integration
Before rolling this out to all employees, test the integration with a small group:
- Go to your Entra ID app → Provisioning → Edit provisioning.
- Expand Mappings, then disable Provision Azure Active Directory Groups. Click Save.
- Go back to Provisioning → Settings, and set the Scope:
For testing, select Sync-only assigned users and groups. - To test with one user:
- Go to Users and groups → Add user/group → Select a user → Assign.
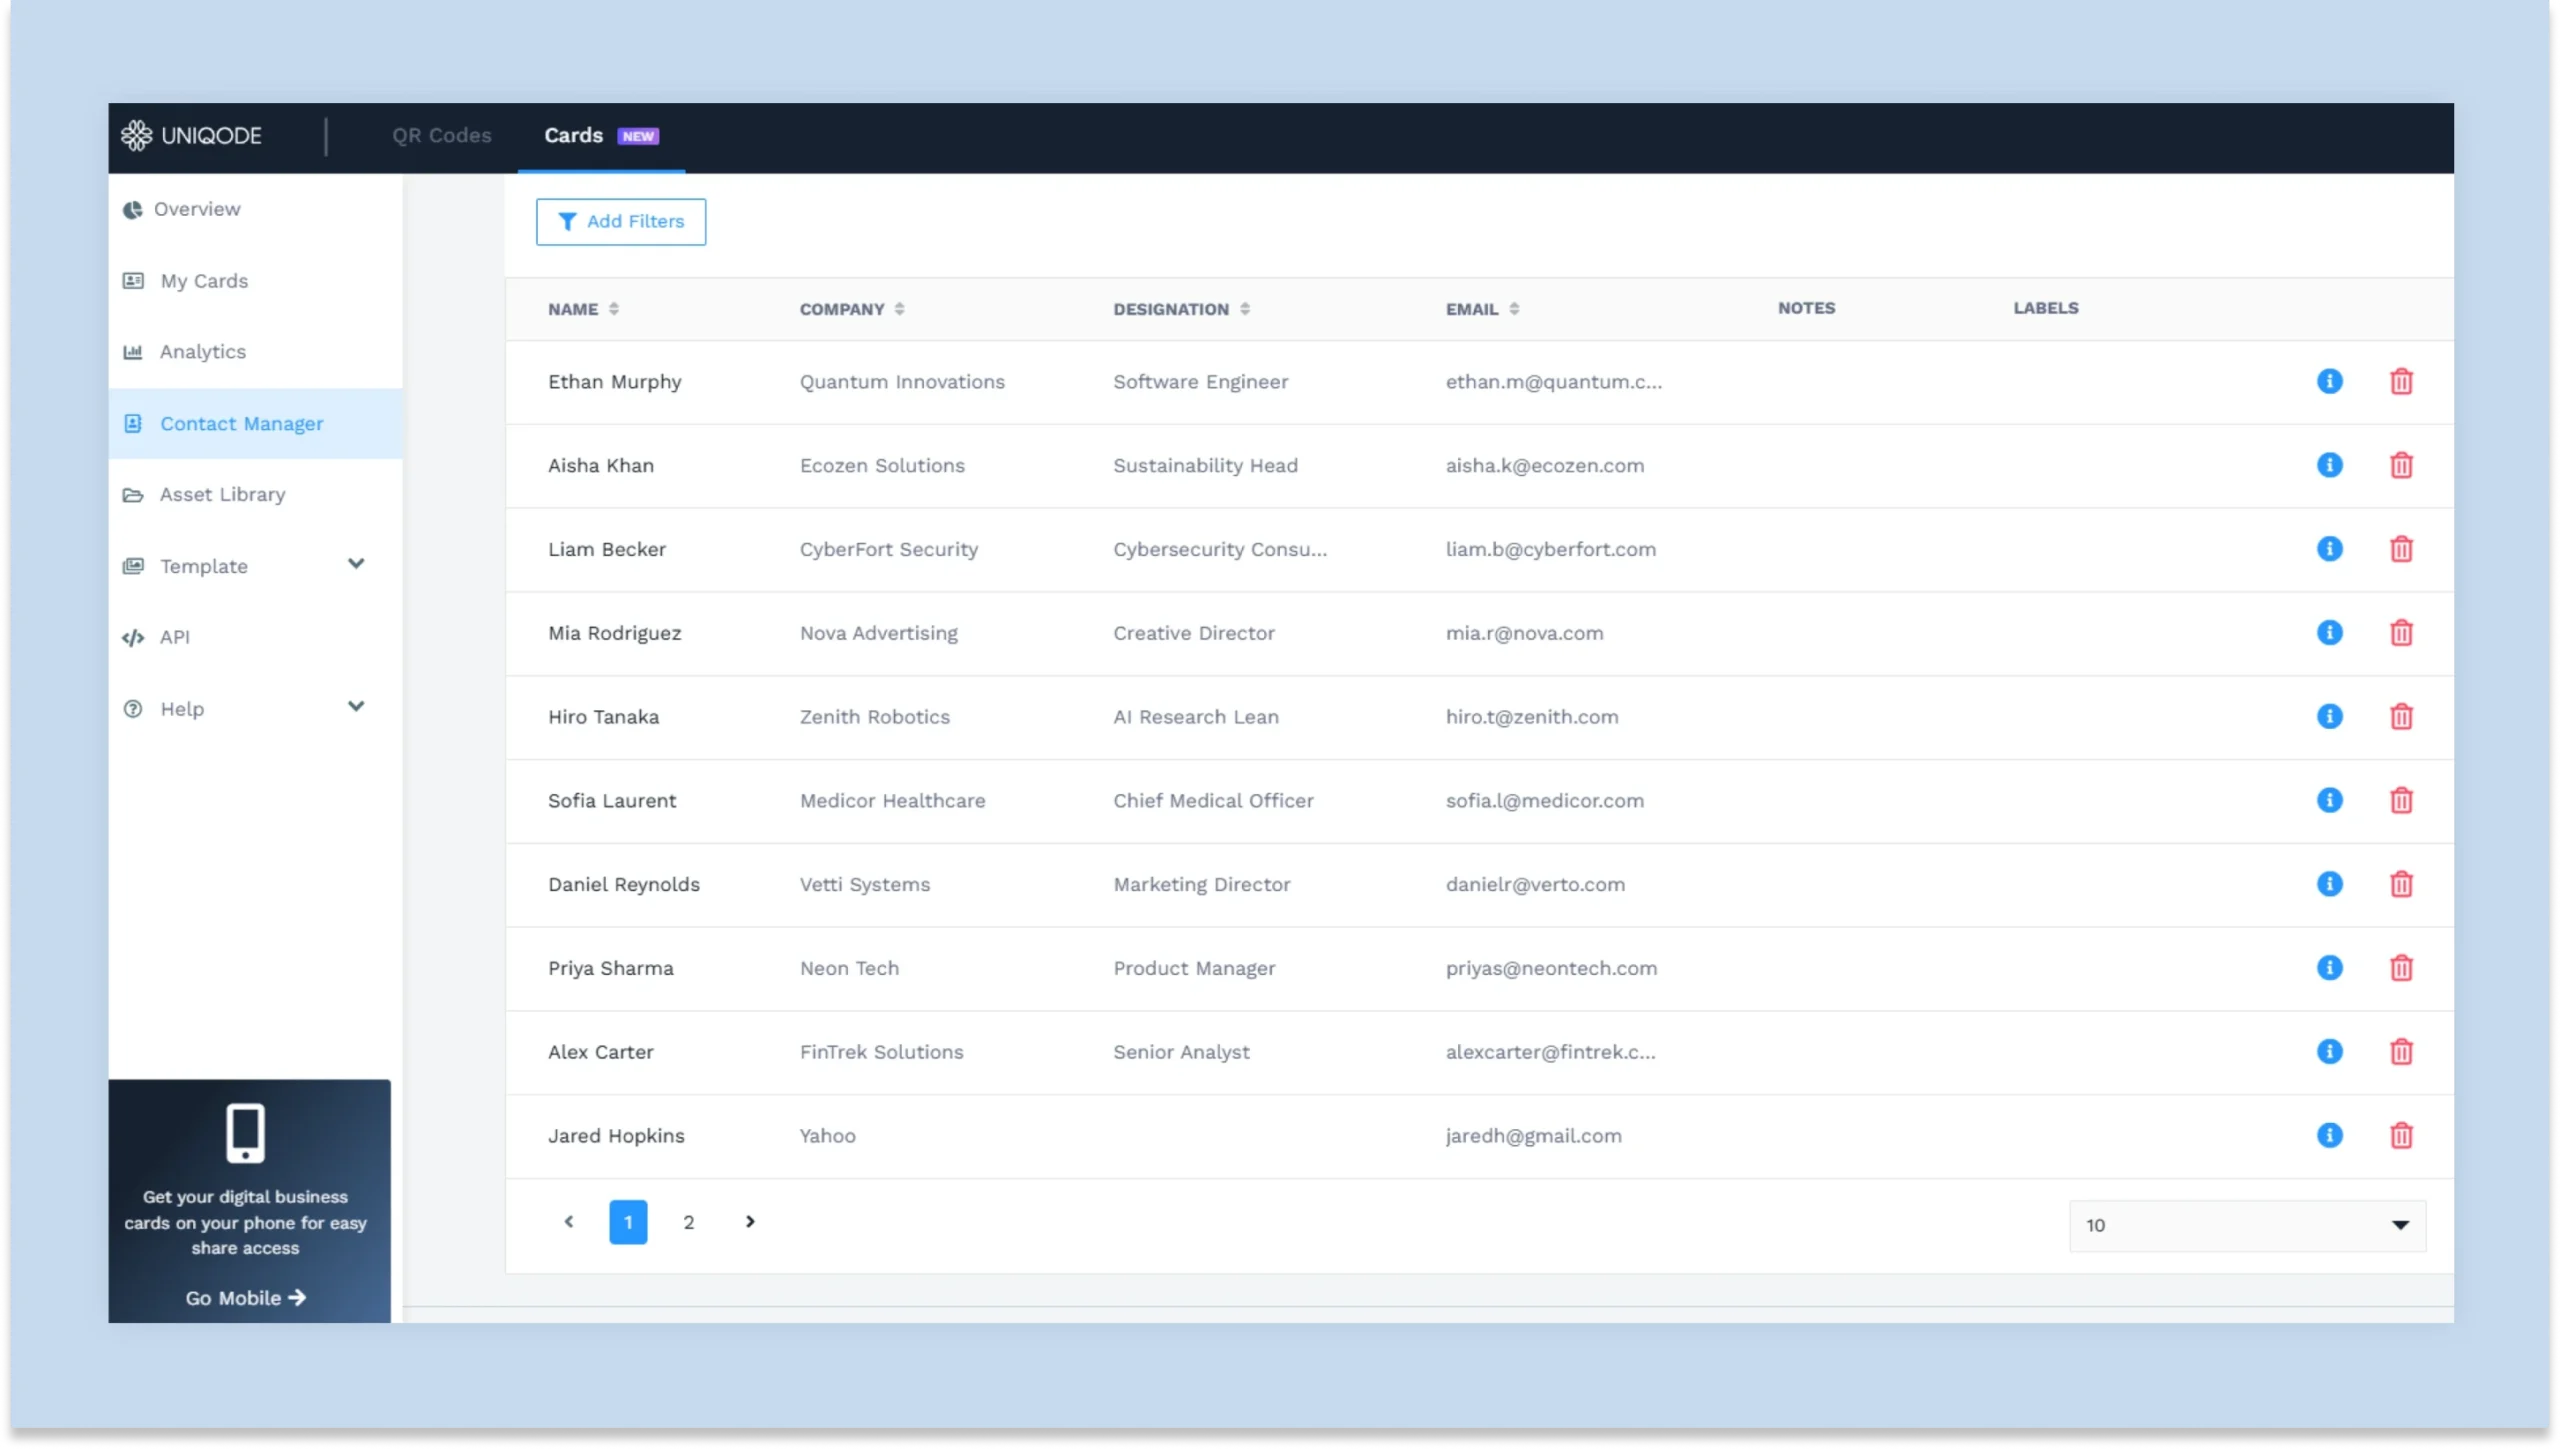
- A card should appear for them in Uniqode’s dashboard under Organization Cards.
- You can also test immediately with Provision on-demand for a specific user/group.
- Finally, toggle Provisioning Status → On, then click Save.
Note: It may take up to 40 minutes for cards to be generated for newly added employees. You can view the last sync status in Uniqode → Integrations → Microsoft Entra ID.
Pro tip: You can assign the provisioning to a single user for a more precise testing approach. This allows you to verify (via Uniqode dashboard’s QR Codes view) whether the integration has created a card for that user.
To assign the app to a specific user:
1. Click “Save” in the top-left corner to save the settings you have done so far.
2. Go back to the app’s page by clicking “Uniqode | Provisioning,” then click “Users and groups” under the “Manage” section in the left menu.
3. Click “Add user/group,” then click “User.” Select a user for whom you want to test the card creation.
4. Click “Select,” then click “Assign.”
See it in action HERE.
Step 6: Configure the Address field
If you want employees’ addresses to appear on their digital business cards, you’ll need to configure this separately:
- In Entra ID, go to your Uniqode provisioning app → Provisioning → Mappings → Provision Azure Active Directory Users.
- Under Attribute Mapping, remove unnecessary sub-attributes:
addresses.formattedaddresses.localityaddresses.regionaddresses.postalCodeaddresses.country - Locate the Street Address mapping (
addresses[type eq "work"].streetAddress) and click it. - In Edit Attribute:
Change Mapping type → Expression.
Enter this expression:
Join(“, “, [streetAddress], [city], [state], [postalCode], [country]) - Save your changes.
This ensures that the full address syncs as one clean field on Uniqode digital business cards.
Step 7: Review supported attributes
Uniqode supports syncing the following attributes from Microsoft Entra ID:
- Basic details:
–userPrincipalName
–givenName
–surname
–displayName
–jobTitle - Contact info:
–emails[type eq "work"].value
–phoneNumbers[type eq "work"].value
–mobile
–faxNumber - Organization info:
–department
–companyName - Address (after configuration in Step 6):
–streetAddress,city,state,postalCode,country
Instantly create e-business cards for new hires with an MS Entra ID-Uniqode integration
Integrating Microsoft Entra ID with Uniqode’s digital business card solution smoothens your organization’s card onboarding process.
You create digital business cards for every new hire as soon as you enroll them in Entra ID. No manual processes. No time-consuming card deployment.
In addition to this integration capability, Uniqode gives you all the features to create, manage, and share e-business cards at scale:
- Share your digital business cards via Apple Wallet (or Google Wallet)
- Enable Two-Way Contact Sharing to capture warm leads using your card
- Track and analyze your digital business card’s engagement metrics
- Centrally manage all e-business cards created within your company
You can access these functionalities (and more) without downloading an additional app. Enterprise-grade security measures also safeguard your networking activities.
Frequently Asked Questions
- How does Microsoft Entra ID integration automate digital business card creation?
Microsoft Entra ID (formerly Azure Active Directory) integration automatically triggers digital business card creation whenever a new user account is added to the system. The integration pulls professional data directly from Entra ID to populate the card with contact details, role information, and multimedia elements like URLs and social handles, eliminating manual data entry for each new hire.
- What happens to digital business cards when an employee leaves the company?
When a user account is deactivated in Microsoft Entra ID, the integrated digital business card system automatically archives that user's card, making it immediately unusable. This auto-deactivation capability prevents unauthorized card use and potential fraud by ex-employees who might otherwise exploit their company cards for dishonest activities.
- What is the best digital business card solution for Microsoft Entra ID integration?
Uniqode offers a comprehensive digital business card solution that integrates seamlessly with Microsoft Entra ID, particularly beneficial for companies with sizeable workforces and annual revenues of $10-50 million. The platform automates card creation, supports team-specific design customization, and automatically archives cards when employees are deactivated in Entra ID.
- Can you customize digital business card designs for different teams with Entra ID integration?
Yes, Entra ID integration allows you to create pre-customized digital business cards based on unique team preferences, with each team having distinct colors, layouts, and visual elements. Sales teams can maintain strict brand identity alignment while marketing teams can exercise creative freedom, all within the same automated system.
- How does Entra ID integration ensure digital business card data security?
Microsoft Entra ID's robust security features extend to integrated digital business card solutions, ensuring sensitive employee information remains secure and compliant with data protection standards. The integration maintains centralized access management and automatically enforces security protocols like immediate card deactivation during offboarding.
About the Author
Sukanya is a content marketer who previously worked as a journalist. She has been passionate about writing from a young age and now helps businesses boost engagement through content. Currently, she is exploring innovative tools, such as digital business cards, and their transformative impact on various aspects of business.